Simple Christmas Wreath Cake

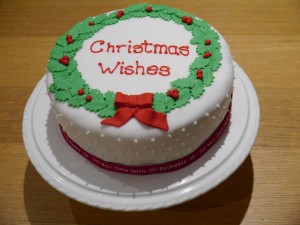
Wreath cake 5Here is a simple and effective design for a Christmas cake, whether for a traditional fruit cake or, as in this case, a rich chocolate cake. The design is a holly wreath with hand rolled berries, a hand made red fondant bow and water icing dots around the edge in a diamond / diagonal pattern. The lettering in the middle is red water icing done with a writing nozzle. The only cutter I needed for this was a holly leaf (actually it was a cluster of holly leaves and I separated the leaves with a small knife. The chocolate cake is crumb coated and filled with vanilla frosting then covered in ready to roll white fondant.

For the chocolate cake

400g Plain flour
250g Golden castor sugar
100g Light muscavado sugar
50g Cocoa powder
2 tsp baking powder
1tsp bicarbonate of soda
half tsp salt
3 eggs (beaten)
150ml tub of sour cream
3 tsp vanilla extract
175g unsalted butter (melted)
125ml corn oil
300ml cold water

  • Preheat the oven to 180c.
  • Butter two 8in cake tins and line them with greaseproof paper (this is my least favourite part of baking but so worth it).
  • Place all the dry ingredients in the mixing bowl of a stand mixer (sugars, flour, baking powder, bicarb, cocoa, salt) and mix (by hand) until they are well combined.
  • Melt the butter in a microwave in 10 second bursts and stir to melt completely, avoid overheating it.
  • In a large jug whisk the melted butter with the oil and then add the cold water, continue to whisk, then add to the dry ingredients in the free-standing mixer while mixing at a slow speed.
  • Leave to mix until smooth and in a separate jug or bowl mix the beaten eggs, vanilla extract and sour cream.
  • Add the cream mixture to the mixing bowl and continue to mix slowly until smooth.
  • Split the mixture between the two tins and bake for about 55 minutes or until a cake tester comes out clean.
  • Cool the cakes on wire racks before icing.

For the Vanilla frosting

160g unsalted butter
500g icing sugar
50ml whole milk
3 tsp vanilla essence

  • Cream the butter and icing sugar in a free-standing mixer on a low speed it will look powdery first before becoming a smooth mixture.
  • Mix the vanilla essence with the milk in a separate glass or jug (I use a re-purposed Tommy Tippee cup as it has handy volumes on the side).
  • With the mixer on a low speed slowly add the vanilla milk.
  • Beat the mixture on a high speed for at least 5 minutes

For the decoration

1 box of ready to roll white fondant icing (enough to cover an 8 inch cake plus extra to colour for the leaves and ribbon).

Non stick mat or greaseproof paper

Green and red food colouring paste

6 inch circle (a tin lid / cutter, loose cake tin base) to mark the top of the cake as a guide for the wreath.

Edible glue (or water)

White water icing thick enough to pipe

Red water icing thick enough to pipe (mde by adding red colouring paste to the wite water icing).

2 x Piping bags- or one and wash it in between the red and white icing.

2x writing nozzles – or one and wash it in between the red and white icing.

Ribbon for the bottom of the cake.
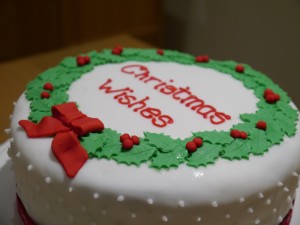
  • Wreath cake 4Fill the cake with the vanilla buttercream then crumb coat the top and sides.
  • Roll out the fondant on a non stick mat (or grease proof paper) until it is large enough to cover an 8 inch cake including the sides.
  • Roll the mat or paper up with the fondant on and flip upside down and unroll onto the cake before carefully peeling off the non stick mat.
  • Gently smooth the fondant around the top and sides and cut off the excess from the bottom with a pizza wheel or sharp knife. Discard any fondant that has cake crumbs on but keep the remainder to make the decorations.
  • Colour some of the remaining fondant green by kneading through the gel colour then roll out the fondant and cut out holly leaves.
  • Use the 6 inch circle (I use the top of my piping nozzle tin) to lightly mark a circle on top of the cake then attach the holly leaves around this circle using either edible glue or water. Be careful if using water as using too much can make the top of the cake sticky and too wet.
  • To make the wreath pattern I made a v shape with two leaves on either side of the marked line all the way around the circle, then added extra leaves at points that the whit icing showed through.
  • Colour the remaining fondant red by kneading through the gel colour then roll out the fondant and using a straight edge cut a long strip to make the ribbon.
    • Cut your long strip of red fondant into 4 equal pieces.
    • Take piece one, fold both ends into the middle to make the loops of the bow and use a spoon handle or similar to separate the top of the loops from the bottom a little to make the loops more bow-like.
    • Take pieces two and three and cut off one end of each at an angle like the end of a ribbon – attach the other ends to the bottom of piece one to make the tails of the bow. Bend the tails slightly to give movement. Use edible glue or water to join the pieces together.
    • Cut a small strip from piece four and use this to make the centre of the bow using edible glue or water to attach it.
    • Place the bow on the wreath. This is now the bottom of the wreath.
    • Use the remainder of piece four and any other left over red fondant to make holly berries. Attach them around the wreath in groups of 1, 2 or 3.
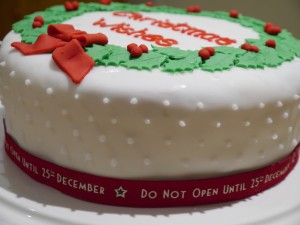
  • Wreath cake 3Mix white water icing adding a teaspoon of water at a time until the icing will hold it’s shape when piped with a writing nozzle.
    • Leaving space for your ribbon at the bottom pipe 4 rows of dots around the side of the cake.
    • Pipe the top two rows together in a zig zag pattern.
    • Pipe the third row between the dots of the second row and below the dots from the 1st row so that a diamond pattern begins to appear.
    • Pipe the fourth row between the dots of the third row and below the dots of the second row to complete the diamond pattern.
  • Either mix up a batch or red water icing that will hold it’s shape when piped with a writing nozzle or colour any remaining white water icing red and replace in a clean piping bag.
    • use a straight edge to very faintly mark two lines for the letters to follow above the bow.
    • Pipe Christmas Wishes in the middle of the cake
  • Attach the ribbon around the bottom of the cake – if you use ins be sure to remove them before serving.


Share Button

Christmas Cranberry Wreath Bread with Baked Camembert and Cranberry Sauce

wreath bread 2I love making festive food and this is an idea I came up with based on a starter we used to have in our favorite restaurant before they changed the menu. The cranberry studded loaf has a jeweled look that’s perfect for a Christmas table and the hot cheese and warm bread are a perfect combination for cold winter nights. This is great as a starter for a dinner party, a casual supper or  buffet table. We chose to eat the bread while it was still warm but there’s no reason you couldn’t make it ahead of time. The cranberry sauce is also made in advance – in fact the sauce we had last night was from a freshly opened jar that I bottled last Christmas. I always make too much sauce for Christmas dinner so by bottling in sterile jars straight out of the dishwasher I get gorgeous cranberry sauce that keeps really well.

The plaiting in the bread was inspired by my attempt yesterday to do a fishtail braid in my daughter’s hair. I’d never done one before and had to watch a YouTube tutorial to see how it was done but it looked pretty simple so I thought it would look nice in the wreath bread I’d been planning. If you don’t have time simply twist the loaf to make a spiral and form into a circle but otherwise have a go – as long as you keep the strands separate from each  other it’s pretty straight forward.

To make the cranberry sauce:

You will need some (3 / 4) empty jam jars to pot the sauce in. They need to be completely sterile when the sauce is put in and them sealed immediately. The easiest way to sterilise the jam jars and lids is to wash them in the dishwasher. The heat from drying them in the dishwasher will also sterilise them. Simply time your sauce to be ready as your dishwasher finishes so that they are hot and sterile – be careful taking the jars out as they will be hot. (You can also sterilise in an oven if you don’t have a dishwasher).

wreath bread 3300g Fresh Cranberries

200g Castor Sugar

45ml Cointreau

50ml Orange juice

25ml water

  • Place all the ingredients in a small pan and stir until the sugar has dissolved into the liquid.
  • Cook on a medium heat until the cranberries are bursting and the sauce is a beautiful red colour.
  • While the sauce is still hot remove your sterilised jam jars and lids from the dishwasher and immediately spoon the sauce into the jars and tighten the lids.
  • Leave the jars to one side to cool then store in a cool dry place or in a fridge if you prefer – wait for the jars to be completely cool if placing in a fridge as the sudden temperature change could otherwise crack the glass.


To make the cranberry wreath bread:

500g strong white bread flour

1 sachet fast action dried yeast

10g salt

2 table spoons castor sugar

175ml whole milk

175ml water

100g chopped dried cranberries

1 beaten egg to glaze

  • Add the flour, yeast, sugar and salt to a large bowl and mix together  – place the salt on the opposite side from the yeast or the salt may denature the yeast.
  • Mix the milk and water together and heat for approx 30 seconds in a microwave until slightly warm. This will kick start the yeast respiration and allow the dough to prove slightly quicker.
  • Gradually stir the wet ingredients into the bowl of dry ingredients until combined then turn out onto a floured surface and knead. (This can also be done with a dough hook in a free standing mixer.)
  • Continue to knead until the dough is smooth and elastic – about 10 minutes, then form into a ball and place in an oiled bowl covered with clingfilm.
  • Leave to prove for at least an hour until doubled in size.
  • Turn out the dough onto a lightly floured surface and knock it back to remove the excess air.
  • Knead the chopped cranberries into the dough so that they are evenly distributed.
    To plait the loaf:
    wreath bread plait collage
  • Roll out the dough into a rectangle about 25cm wide and as long as you can make it.
  • Starting about 2 cm below the top of the rectangle use a pizza wheel or knife to cut the rectangle in half lengthways (it should stay joined together at the top.
  • Cut each half in half again lengthways again starting about 2cm below the top. – you should now have 4 strips of dough.
  • Cut each of the 4 strips into 3 giving you 12 strips in total.
  • Divide the 12 strips of dough into two groups of 6.
  • Bring the outside strip from the left hand group across the left hand group and place it on the inside of the right hand group.
  • Bring the outside strip from the right hand group across the right hand group and place it on the inside of the left hand group.
  • Repeat these steps all the way down the plait – you will need to move the strips apart a few times to keep the groups clear and stop strips from sticking together.
  • Once the plait is complete press the ends together neatly.
  • The top of the plait has a section of dough which is not braided, roll this as flat as you can then bring the bottom of the plait round on top of this section to form a circle.
  • Place on a buttered and floured tray to prove for an hour – place something oven proof and circular that is the same size as your Camembert in the middle of the ring so that as it rises you keep a hole large enough for the cheese.
  • Turn on the oven to preheat to 190c
  • After the bread has finished it’s second prove use a pastry brush to glaze the top with the beaten egg and place in the preheated oven for 20 minutes until the top is golden brown and the base sounds hollow when tapped.
  • Place on a wire rack to cool.

To bake the Camembert:

  • Preheat the oven to 200c – ideally take the bread out when baked and turn the oven up.
  • Open the box and remove all other packaging from the cheese then place it back in the box leaving the lid off.
  • Drizzle the top with olive oil.
  • Place on tray and bake for 10 minutes or until the middle of the cheese is molten.
  • Remove from the oven and place in the middle of the warm bread on a bread board or serving plate.

Enjoy!


Yellow Days
Casa Costello


Share Button

White chocolate orange cake with dark chocolate topping

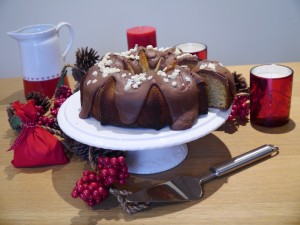
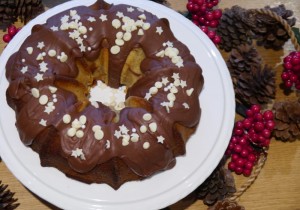
festive cake mainIt’s beginning to look a lot like Christmas so here’s a festive cake for anyone like me who isn’t a huge fan of the traditional Christmas cake. A light bundt cake with chocolate and orange flavours. Last year I made a Chocolate orange drizzle cake as a variation of the more common lemon drizzle cake and it was delicious so this year I thought I’d dry something along the same lines with a twist. This cake uses white chocolate in the cake itself and is topped with dark chocolate icing. It’s a simple cake with easy decoration but would look stunning a a centre-piece on any Christmas table.

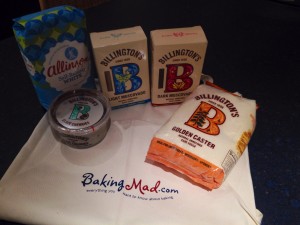
The lovely people from Bakingmad.com sent me some goodies last week including the delicious Billington’s unrefined brown sugars and allinson fine flour. I used these along with Neilson-Massey Orange essence to make this festive altenative. If you’d prefer to have a go at a traditional chistmas cake Eric Lanlard’s recipe is great and can be found on their website here

I cooked my cake in a bundt cake mould – cooking times may vary in other tins.

Ingredients:IMG_6721.JPG

For the cake:

125g Castor sugar

125g Billington’s light muscavado sugar

250g Unsalted butter (softened)

4 large eggs (beaten)

250g Allinson’s self raising flour

3tsp Neilson-massey Orange essence

150g White chocolate (melted)

75ml Whole milk


For the icing:

200g Icing sugar

50ml Water

100g Dark Chocolate (melted)

White chocolate stars / white chocolate chips to decorate

White sugar pearls (optional)


Method:

For the cake:

  • Preheat your oven to 170c
  • Cream the softened butter and sugars in a free standing mixer.
  • Add the half the beaten eggs and a few spoonfuls of flour and continue to mix.
  • Add the remainder of the beaten egg and a few more spoonfuls of flour to stabilise the mixture.
  • Once the mixture is smooth reduce the mixer speed and add the remainder or the flour.
  • Add the orange essence and mix thoroughly.
  • Melt the white chocolate in a microwave or in a bowl over a pan or hot water. If using a microwave use 10 second bursts and stir the chocolate between each burst. Once most of the chocolate has melted remove the bowl from the microwave / heat and stir continuously until all the chocolate has melted.
  • Use a spatula or spoon to fold the melted white chocolate into the cake mix.
  • Stir in the milk until the batter is smooth.
  • Grease the bundt tin with butter making sure to cover the entire inside including any details.
  • Place a few spoonfuls of flour in the tin and tilt to cover the buttered surfaces with flour. This will stop the cake sticking in the tin.
  • Pour the cake batter into the bundt tin and bake at 170c for approx 35 minutes until a cake tester comes out clean – check several points around the cake to ensure it is cooked through.
  • Once cooked turn out the cake onto a wire rack to cool

For the topping:

  • Blend the icing sugar and water together
  • Melt the dark chocolate in a microwave or in a bowl over a pan or hot water. If using a microwave use 10 second bursts and stir the chocolate between each burst. Once most of the chocolate has melted remove the bowl from the microwave / heat and stir continuously until all the dark chocolate has melted.
  • Stir the melted chocolate into the icing and pour over the cake
  • Sprinkle white chocolate stars and white chocolate chips as decoration – you can also use white sugar pearls.

Festive cake top view
Link up your recipe of the weekCasa Costello


Share Button

November’s Celebration Cakes and Bakes with October’s Round up

cake1Halloween and Bonfire night are over – I hope everyone had fun trick or treating and watching firework displays. There were some fab spooky cakes submitted to last month’s Celebration Cakes and Bakes as well as some other special birthday cakes. As always thanks to everyone who joined in – I hope you have some special bakes to add again this month.

The first entry last month was a fabulous Rocky Horror cake that I came across on twitter one night – the  lettering is perfect and the theme instantly recognizable to anyone who’s seen the film or show. The cake was made by Michelle from the Purple Pumpkin Blog for an 18th birthday party.

Next came my own Room on the Broom Autumn cake – I have to say I was very proud of this cake – it used lots of different techniques from tempered chocolate to cinder toffee and has won me not one but two prizes! The first was a bottle of wine from the school fete and the second was some Viners bakeware thanks to the great blogger’s bake off final run by Jenny from Mummy Mishaps.

room on the broom chocolate cake details

The third entry was from Carole at Carole finds her wings and was an inventive Chocolate and blackberry cheesecake swirl. I love the mould she used (I acutally have the same one myself) and always like seeing how bundt cakes turn out.

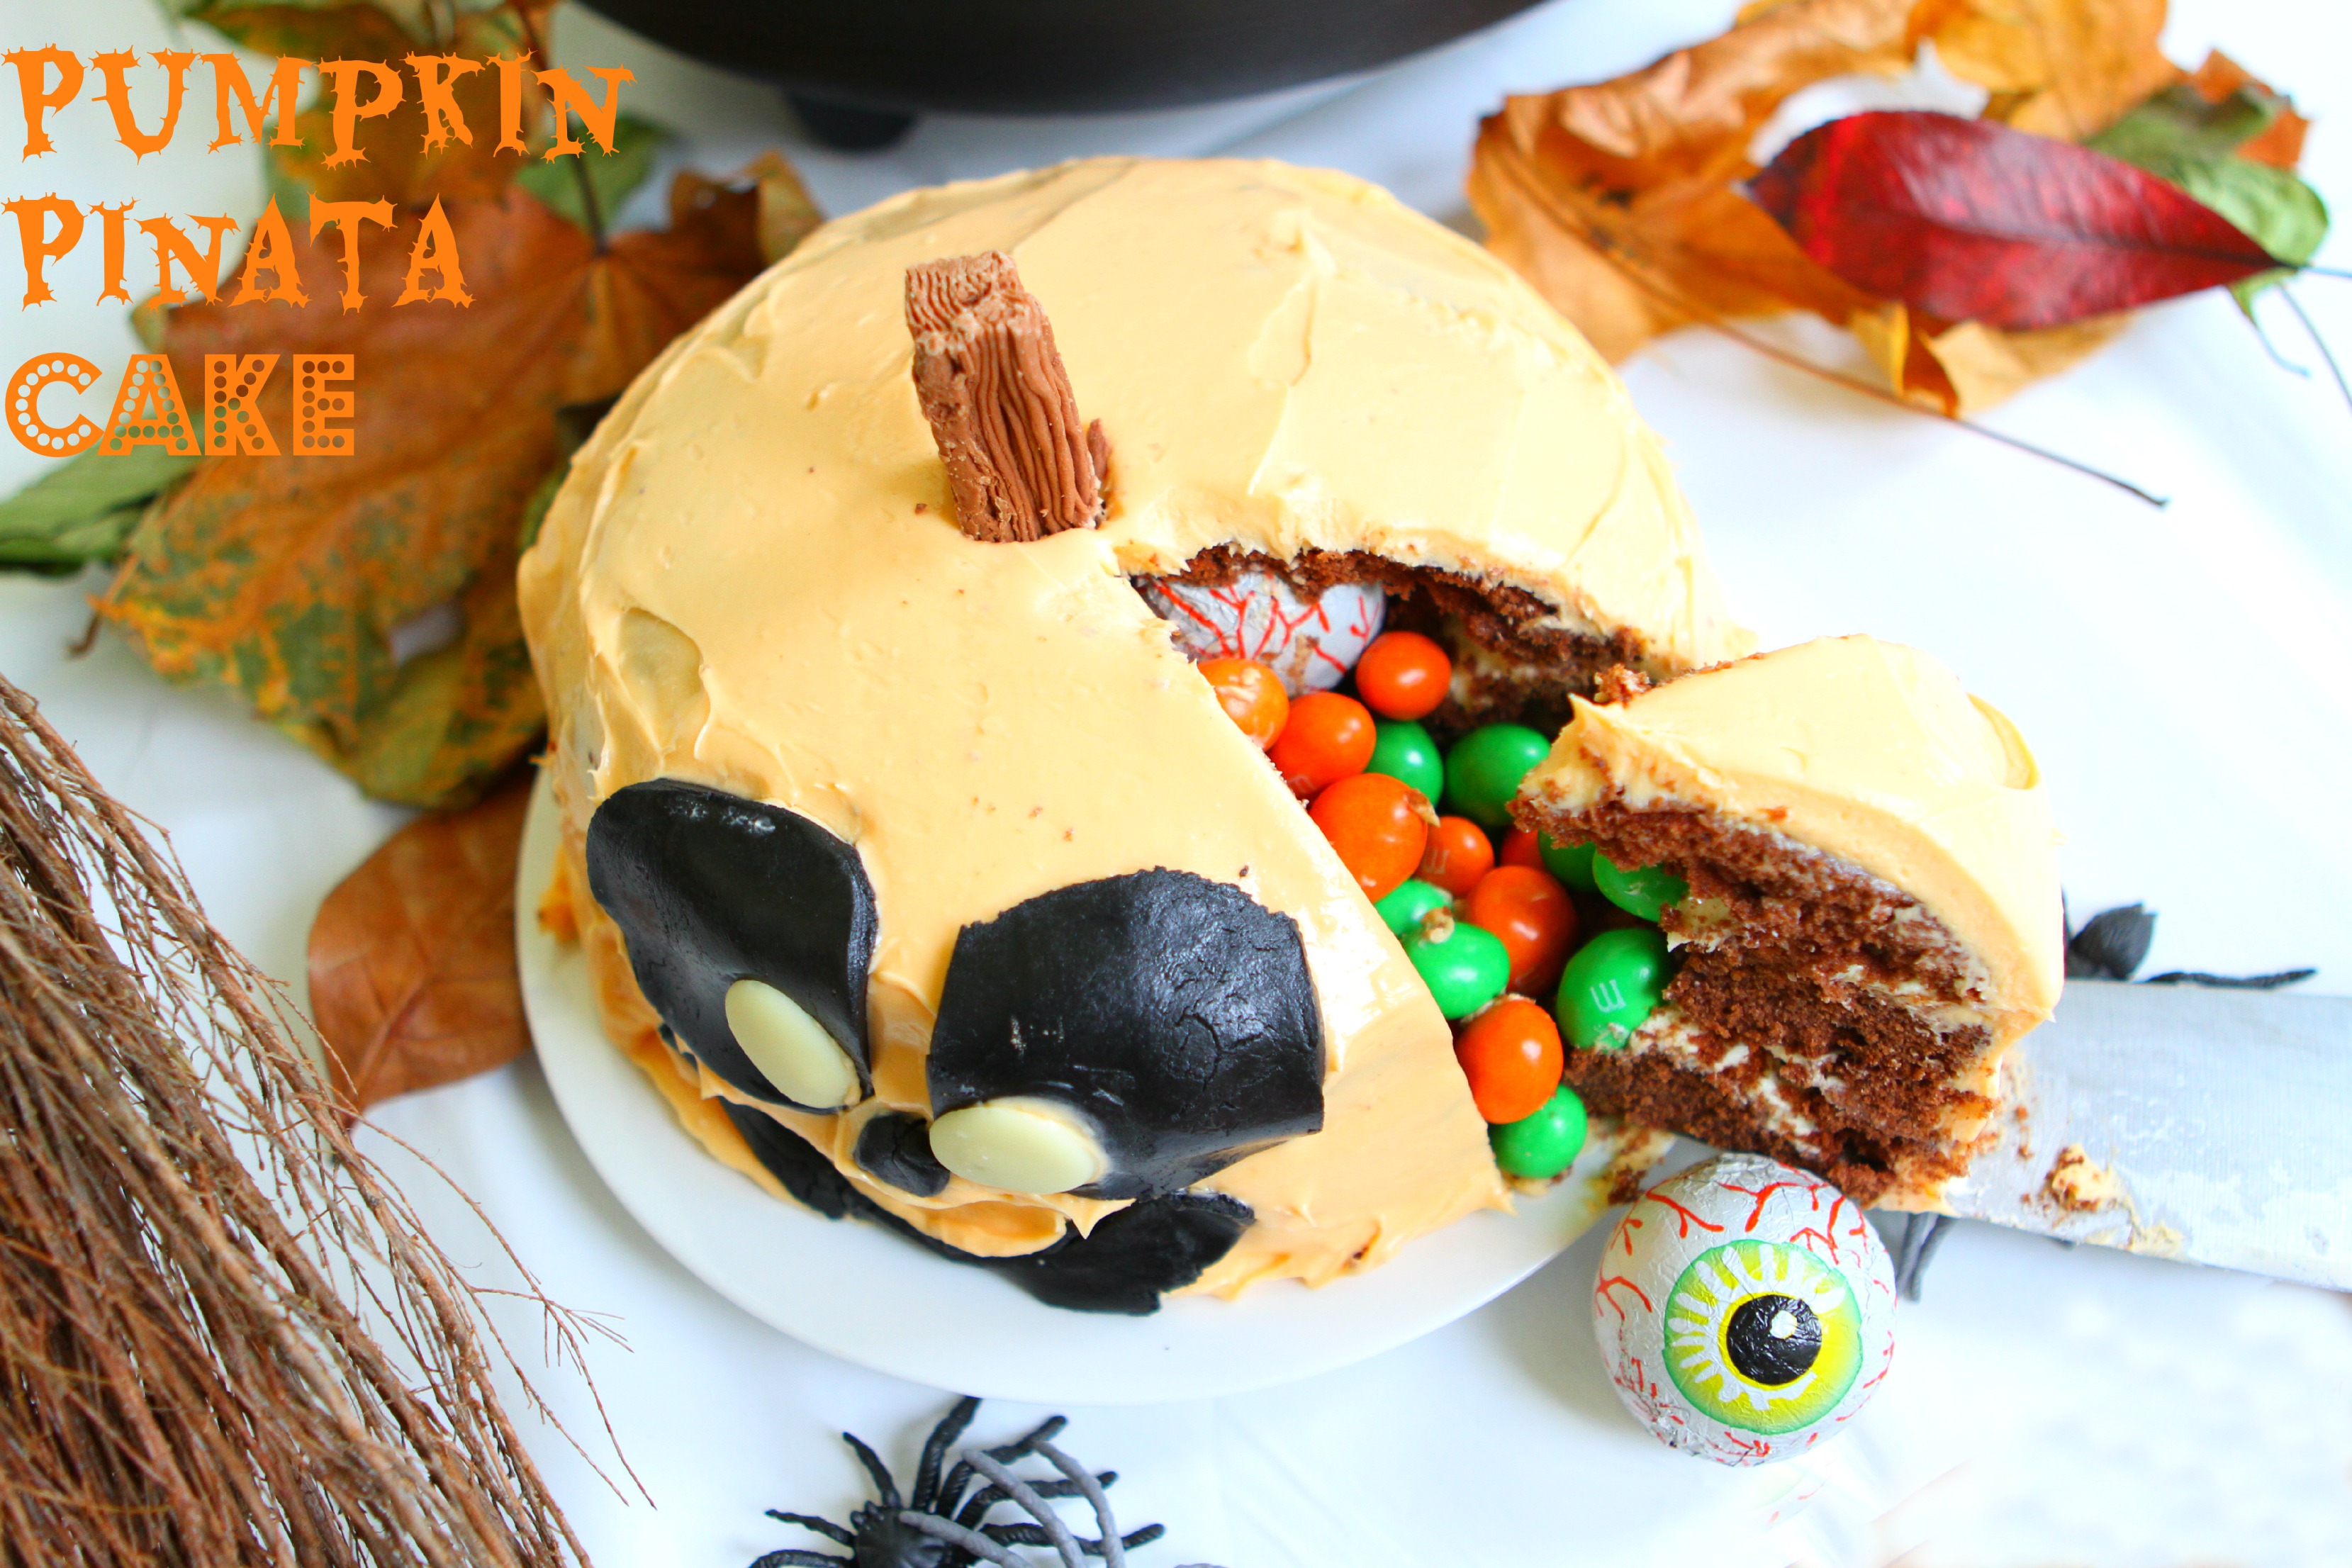
Jenny from Mummy Mishaps linked up two lovely cakes this month, first a spooky Pumpkin Pinata Cake  filled with Halloween candy. Everything a little ghost or ghoul could desire!


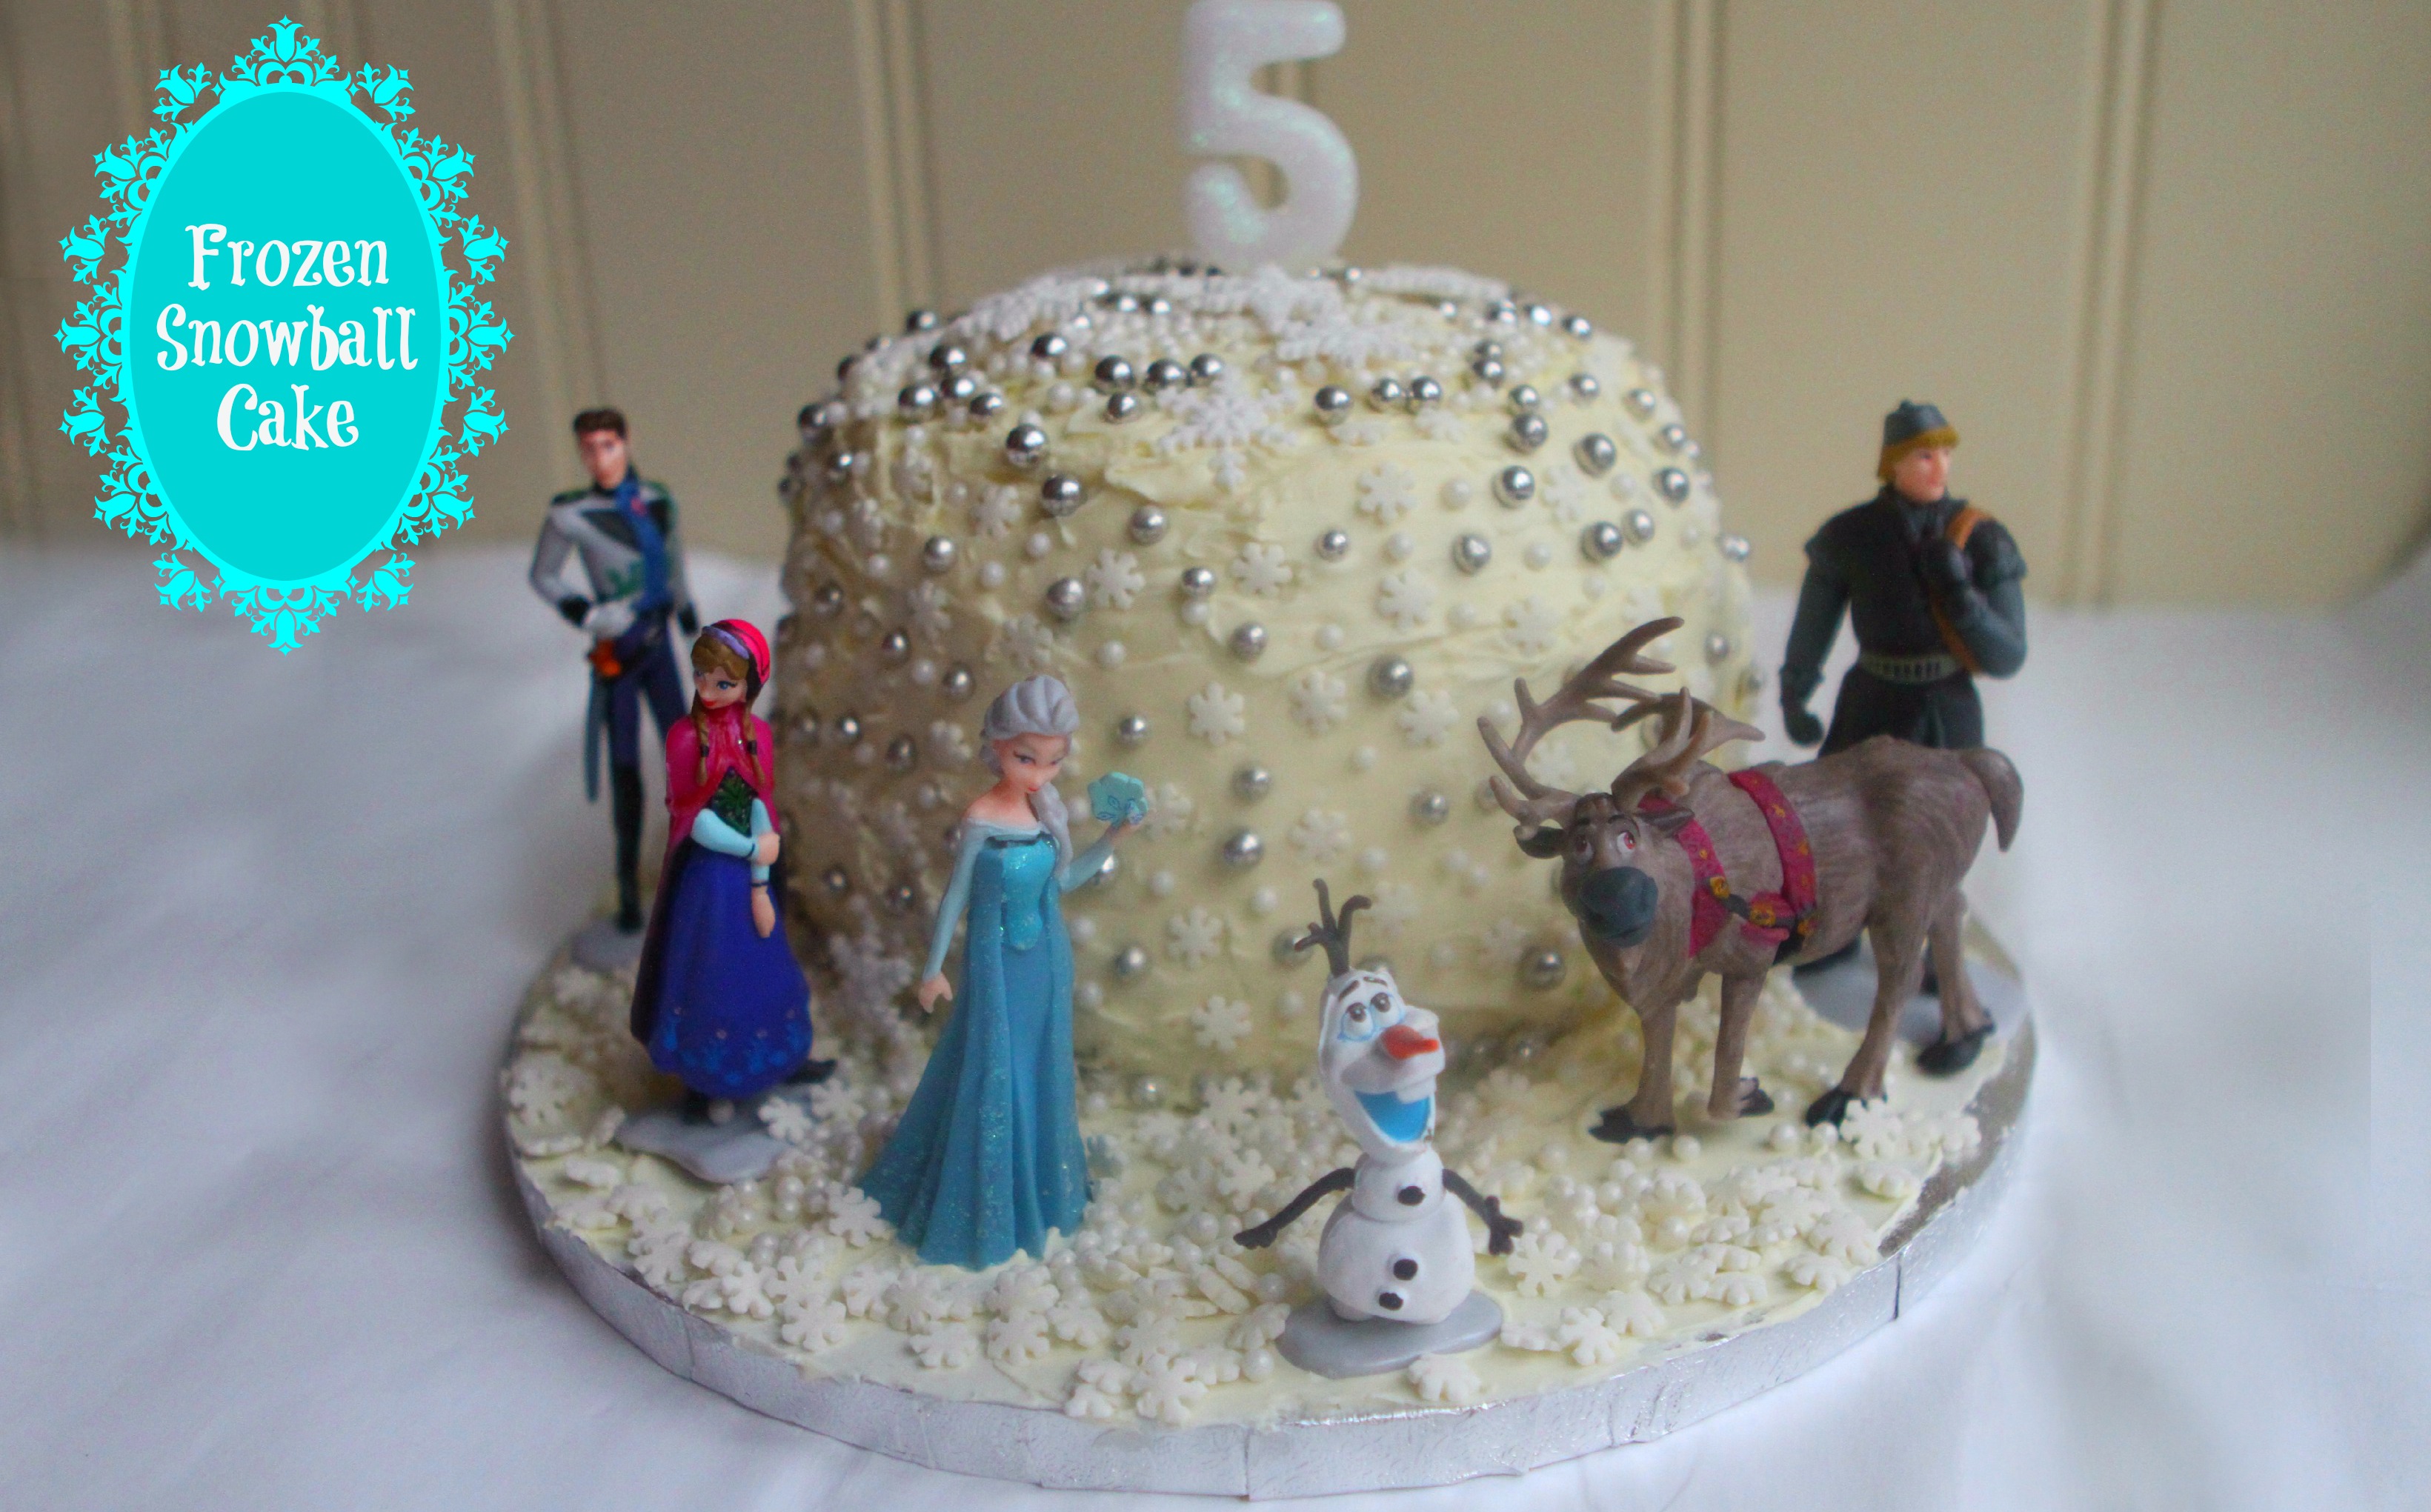
Jenny’s second cake was an unusual take on the many Frozen themed cakes we’ve seen this year – a simple blue coloured snowball cake decorated with sugar pearls and mini snowflakes. I love that it’s such a simple idea but still instantly recognisable as a Frozen themed cake.

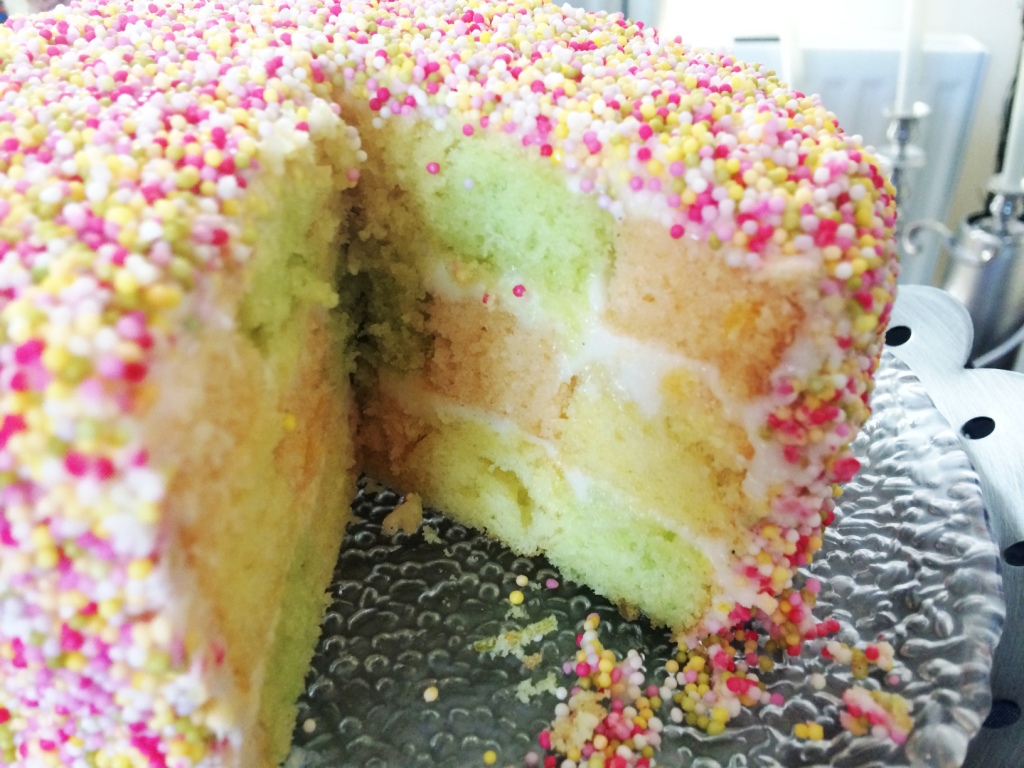
Jen at Bakearama linked up the brightly coloured Sprinkles and Checkerboard Cake that she made to celebrate the 3rd birthday of Derby’s Clandestine Cake Club – I love the idea of these clubs but sadly my local one always seems to meet on Thursdays which is the night I go to dance class. This cake sounds so refreshing with the citrus and raspberry flavours.

Finally we have a Honey and Date roll with a lime filling from Winnie at Winnie’s Blog. As always this looks stunning and is a very inventive flavour combination.

November’s Celebration Cakes and Bakes linky is now open – I’d love to see any Halloween of early Christmas bakes that you’ve made – or any birthday / celebration cakes!

If you have a cake or bake to link up please join in the linky below. The rules are simple:

You must have made the bake yourself – no buying from the local cake shop.

It must be a post about making the bake – it doesn’t have to be a full on recipe but it does need to be in the spirit of the thing.

It doesn’t need to be a new post it could be one from last year, but if it’s a seasonal celebration bake it should be appropriate – so no Easter cakes at Christmas, save them for springtime.

Posts must include the Celebration Cakes & Bakes badge (grab the code below)

Please comment on a few of the other entries – remember linkys only work if you spread the linky love!

That’s it everything else is optional.

If you follow me on twitter @jaisee_mummy and tweet me with the hashtag #CelebrationCakesAndBakes I will retweet any entries that I see.

CelebrationCakesAndBakes
<div align="center"><a href="http://jaisee.com/mummymakescakes/celebration-cakes-bakes/" title="CelebrationCakesAndBakes"><img src="http://jaisee.com/mummymakescakes/wp-content/uploads/2013/09/ccb_badge-e1379580719446.jpg" alt="CelebrationCakesAndBakes" style="border:none;" /></a></div>


Share Button

Traditional Chocolate Tea Cakes and Angel Delight

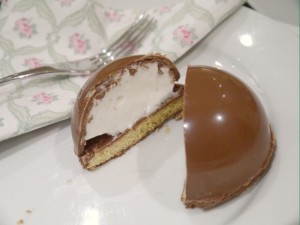
teacakes3I love chocolate teacakes – the marshmallow is that sticky gooey texture that is somehow so much nicer than the denser individual marshmallows. When they made them on the Great British Bake Off last year I instantly wanted to try making them and bought a silicone mould which has since been sitting sadly in the back of my baking cupboard waiting for an outing. I came across this mould the other day while having a sort out and decided to finally have a go at making them.

A couple of weeks ago I was sent some samples of the latest flavour of that classic dessert Angel Delight so I thought I would have a go at combining this with the marshmallow as a bit of a twist on the old recipe. The new flavour is bubblegum and really does taste like those vivid blue drinks we used to have in the 80’s and 90’s. I also wanted to make some traditional teacakes so I split my marshmallow half and half. Of course you could just make your Angel Delight up the nostalgic way with milk – there’s even instuctions on the packet to make it into a smoothie, but if you’re feeling a bit more adventurous why not give this recipe a try?

The bubblegum flavoured marshmallow didn’t set as well as the traditional marshmallow – probably because of the oil in the angel delight, but after a couple of hours to set it held it’s shape relatively well. Below you can see both types of teacake cut open to compare, although the colour doesn’t show particularly well the angel delight marshmallow has that classic pink colour to it.

angel delight tea cake traditional tea cake 3

Recipe:

This recipe consists of 3 separate processes, making the biscuit bases, making the marshmallow and tempering the chocolate. As well as the ingredients you will need: A silicone pastry brush, a silicone teacake (or at a pinch cupcake) mould, a circular biscuit cutter slightly smaller than the diameter of your teacake mould, a disposable sandwich bag.

To make the biscuit bases (makes 10 -12):

teacake bisc collage50g Castor sugar

50g Unsalted butter

2 egg yolks (keep the whites for the marshmallow later)

20g Wholemeal flour

80g Plain four (if you don’t have any wholemeal flour just use 100g plain flour)

half teaspoon Baking powder

Pinch of Salt

1 tablespoon Whole Milk

Preheated oven at 180c

  • Cream the butter and sugar
  • Add the egg yolks and milk then mix until combined
  • I a separate bowl combine the dry ingredients then stir into the egg mixture until a smooth dough forms
  • Dust your work surface and rolling pin with plain flour and roll out your dough.
  • Cut circular biscuits slightly smaller than the diameter of your teacake mould and place them on a greased baking tray. *Wash your biscuit cutter now*
  • Bake at 180c for about 12 minutes or until the edges begin to turn golden.
  • Remove the biscuits from the oven and use your washed biscuit cutter to trim any excess edges from the biscuits rising.
  • Place the biscuits on a wire rack to cool.

For the marshmallow (enough for 6 teacakes because I only had 1 6 teacake mould- double if you want to use all 12 bisciuts):Marshmallow Collage

3 large egg whites

150g castor sugar

1and a quarter tablespoons of glucose syrup (sometimes called glycerine this is available at pharmacies, alternatively you could use golden syrup)

Pinch of salt

1tsp vanilla essence

(optional 1/4 sachet of angel delight)

  • Place all the ingredients in a bowl over a pan of hot water and whisk to combine.
  • Keep the bowl over the hot water and whisk continually for at least 5 minutes until the mixture has thickened and doubled in volume.
    • At this stage I separated 1/3 of my mixture and whisked in 1/4 of an Angel delight sachet in a separate bowl.
  • Allow the marshmallow to cool while you temper your chocolate

To make the chocolate shell (for 6 teacakes):

300g Good quality Belgian milk chocolate (or dark if you prefer)Teacakes Collage

  • Break up your chocolate into small pieces
  • Set aside 100g of the chocolate
  • Place 200g of the chocolate in a large microwavable bowl and melt in 20 second bursts, stirring between each burst.
  • Add the other 100g of chocolate to the melted chocolate and stir continuously until the melted chocolate is cold when touched to your lip. (At least 5 minutes).
    This is the seeding method of tempering and avoids all the heating, cooling and re-heating of other methods.
  • Drizzle a small line of chocolate onto a plate / work-surface – if it sets hard and shiny within a couple of minutes your chocolate is tempered correctly.
  • Use a silicone pastry brush to brush a thin layer of chocolate into each teacake mould. Allow this layer to set then repeat with a second layer. (You may need a 3rd layer depending on the thickness of your layers).
  • Place the mould to one side to allow the shells to set (I put mine in the fridge although technically you shouldn’t as it can cause the chocolate to “bloom” or loose it’s shine).
  • Dip as many biscuits as you have teacake shells into the chocolate to coat them then replace them onto greaseproof paper / a wire rack to set.
  • Keep some melted chocolate t0 seal the teacakes – place this inside a sandwich bag.

Combining:

  • Spoon the cooled marshmallow into the set teacake shells.
  • Place the chocolate coated biscuits on top of the marshmallow filled shells.
  • Use the remaining tempered chocolate in the disposable sandwich bag to seal around the edges of the biscuits by cutting off the very tip of the bottom corner of the bag and using it like a piping bag.
  • Leave the teacakes to set for a couple of hours (the chocolate will set quite quickly but the marshmallow takes longer).
  • Carefully turn out your teacakes – the thinner the chocolate shell the more careful you have to be!

teacakes4

This post is an entry for #AngelDelightMoments Linky Challenge


Casa CostelloLink up your recipe of the week


Share Button

Happy Halloween

Did you have fun on Friday for Halloween? My kids were both finally old enough to understand it a little this year and were very excited – they decided they wanted to have a party so we had a little tea party for the 4 of us – they helped to make the food and chose designs for their pumpkins.

Earlier in the week we went to a local farm shop where we chose pumpkins to carve out. They have lots of different shapes, sizes and colours and we ended up with 3 standard pumkins and a couple of smaller ones. We looked at designs and each chose a design which I then drew on and cut out. My son chose a Boo from Luigi’s Mansion (a Mario brothers computer game), my daughter chose a spooky face and I chose a witch with a bubbling cauldron.

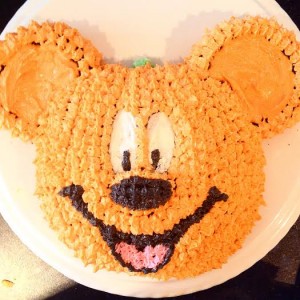
Halloween CollageWe carved our pumpkins on the Thursday then had Friday to make our “party” food. I used a mould to make a red velvet Halloween Mickey Mouse cake and decorated it with stars of frosting. Before turning the cake out of the mould I leveled off the bottom of the cake with a bread knife and kept the offcuts to make cake pops.

pumpkin cake Collage

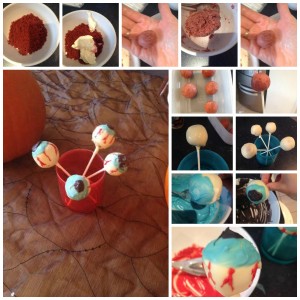
Cakepop CollageTo make the cake pops (which I’ve never tried before) I blended the offcuts of cake to make crumbs then combined them with some left over frosting. I used the mixture to make balls and set them in the fridge for 30 minutes. I then placed the balls onto lollipop sticks and dipped them into tempered white chocolate. I used candy melts to add blue iris’s, black pupils and red veins to my cake pop eyeballs.

We did also have some savoury food for our Halloween, we decided to go for creepy pizzas made to look like monsters and a mummy. These are very easy to do you just need margarita pizzas, a circle cutter for the ham eyes, peas and sweetcorn (or you can make your own bases and top with passata and grated mozzarella cheese).

Pizza Collage

Everyone loved the Halloween tea party and my kids had great fun handing out sweeties to trick or treaters. What did you get up to for Halloween?

Share Button

Sheridan Store Opening

Sheridan Collage 2Today I was invited to attend the opening of the new Sheridan Luxury Bedding and Lifestyle outlet store at Cheshire Oaks. Sheridan is an Australian company which specialises in luxury bed linen but is expanding into a stunning new baby linen collection as well as launching a new interior fragrance collection in time for Christmas.

The new store opened this morning and to celebrate there was breakfast, goody bags for the first customers and a fabulous balloon modeller who made a Thomas the tank engine for my son and a cheeky monkey for my daughter.

Sheridan bedding collage 3While I was at the launch I was also given some beautiful bed linen to review – a flat sheet and pillow cases made of 100% Mulberry Silk from the deluxe range. The colour is a beautiful gold and the texture is wonderfully smooth. As you can see below the set blends beautifully with my bedroom and will certainly get lots of use in the summer when we take the duvet off. I’m even tempted to nip back and see if they have the duvet covers in the store to buy.

I also received some lovely towels which the balloon animals particularly took to – the are soft, fuffy and 100% cotton. The “Fog” colour is contemporary and the quality is plain to see.

As well as the outlet store at Cheshire Oaks another outlet store has also just opened at the York designer outlet. Well worth a visit if you’re re-imagining your bedroom and want a little bit of luxury.

Sheridan3 Collage


Share Button
This entry was posted in Reviews.

Room on the Broom Autumn Chocolate Cake

room on the broom chocolate cakeWith nights closing in and leaves changing colour Summer is definitely over. The shops are filling up with Halloween (and even Christmas) goodies and I’m having to think about trick or treat costumes and  pumpkins. This week my son’s school had an Autumn themed “bake off” as a fund raiser. To me Autumn and Halloween mix perfectly with a Room on the Broom themed chocolate cake. I entered the adult category and let my son make cupcakes by himself for the children’s. My son was very happy because it was the first time he had been allowed to decorate and make cakes all by himself (the control freak in me usually helps out). A friend’s daughter won the children’s category with a hedgehog cake and I won a bottle of wine for the adult category.

I made a Rich Chocolate Cake (recipe here) filled with Vanilla frosting and covered with ready to roll chocolate flavoured fondant. I used a mixture of sugar paste, fondant, tempered white chocolate and cinder toffee to make the decorations.

Mushrooms:

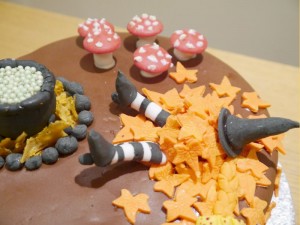
The mushrooms were made using modeling chocolate for the stems and red chocolate buttons for the tops, attached together and to the cake with tempered white chocolate which I also used to add the spots on top.

Witch:

The witch’s hat and legs were made from sugar paste. The hat is a simple circle attached to a cone of sugar paste with edible glue. To make the legs I rolled strips of black sugar paste into white sugar paste then rolled the resulting stripy sugar paste around a floral wire. I used black sugar paste to make the shoes. I also made a long ginger plait and spotty bow a’ la Room on the Broom.

You may also like: Room on the broom cupcakes.

You may also like: Room on the broom cupcakes.

Leaves:

I coloured ready to roll fondant red and yellow then blended the two together to create an autumn leaf effect. I used leaf plunger cutters to create the leaves then covered a ball of chocolate fondant to create the pile of leaves the witch has fallen into.

Cauldron:

To make the cauldron I used a cake pop mould to make two hemispheres of tempered white chocolate then slightly melted them to join them together. I also melted away the top of the sphere to create a flat surface for the cauldron “bubbles” to sit on. I covered the ball with black sugar paste and created a rim around the top. I also used sugar paste to make legs which I attached with edible glue. I then melted the top of the white chocolate again and pressed  in green sugar pearls and sprinkles to create a bubble effect.

Fire:

The stones around the fire are made of sugar paste attached with edible glue. The flames are made of cinder toffee (recipe here) . I made a batch of cinder toffee as normal then used the left over mixture cooling in the pan to pull out flame shapes which I pushed into the fondant. If you try this please make sure the mixture has cooled enough that you won’t burn your fingers.

So there it is, a cake that showcases sugar work, tempered chocolate and fondant modeling.I’m entering this cake into Jenny Paulin’s Great Blogger’s bake off showstopper competition. Below you can see the details on the top and also the cakes my 5 year old made by himself.

room on the broom chocolate cake detailsIMG_6516.JPG


Casa CostelloGreatBloggersBakeOff


Share Button

Good morning

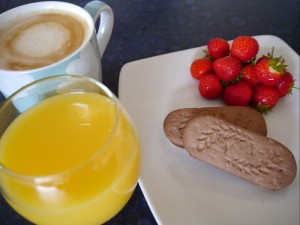
belvitaWe all say “Good Morning” but what actually makes a morning good? For our family mornings changed a lot in September when our son started school and our daughter started pre-school 3 days a week. Until September we could take our time and not rush – if we arrived somewhere a little late it didn’t really matter – but now we do need to be on time. We need to be in the playground ready to line up when bell rings and everyone needs to have eaten a proper breakfast for the day. For my kids this means cereal but I often find myself snacking and surviving on coffee. Belvita were kind enough to send us some breakfast biscuits recently and I have to admit they are very handy for a quick breakfast as I’m getting kiddies out of the door. They’re also good as a snack to give the kids if we’re out for the day.

Belvita have asked us to share #morningwin stories and I think mine has to be the fact that since September I’ve actually managed to go to the gym 4 times a week – 3 of those on days when I don’t have the kids. This might not sound like much but since my daughter was born my gym membership has pretty much been used for swimming with the kids and a nice lunch. To actually go in the gym or to yoga is a huge #morningwin for me.

This post is an entry for #MorningWin Linky Challenge sponsored by belVita Breakfast. Learn more at http://bit.ly/belVitaUK

Share Button

October’s celebration cakes and bakes with August’s round up

mickey mouse clubhouseThis last month a has been great but busy, my son turned 5 and started school all in the same week and my daughter started preschool. We’ve had a big party, got used to the new routine and had two charity cake sales to bake for. For his 5th birthday my son wanted a Mickey Mouse Clubhouse theme so we had the big cake for his party and cupcakes for his actual birthday.

August had some lovely cakes linked up, and I hope that everyone will forgive a month’s absence and contribute and autumn or Halloween cakes this month!

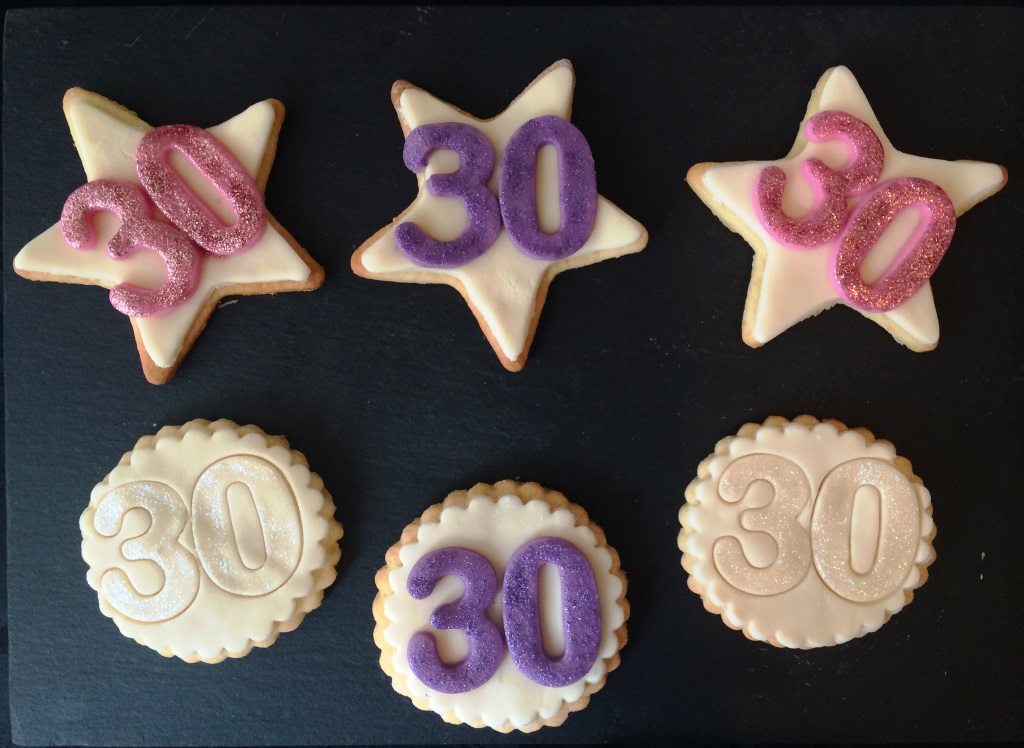
August’s first bake was a batch of 30th birthday biscuits from Jen at Bakearama they are lovely and sparkly and perfect for any girly girl – I’m liking them for my own birthday next year!

Next was a Summer berry cake by Ros at The more than occasional baker. All that fruit topped with icing sugar is making my mouth water.

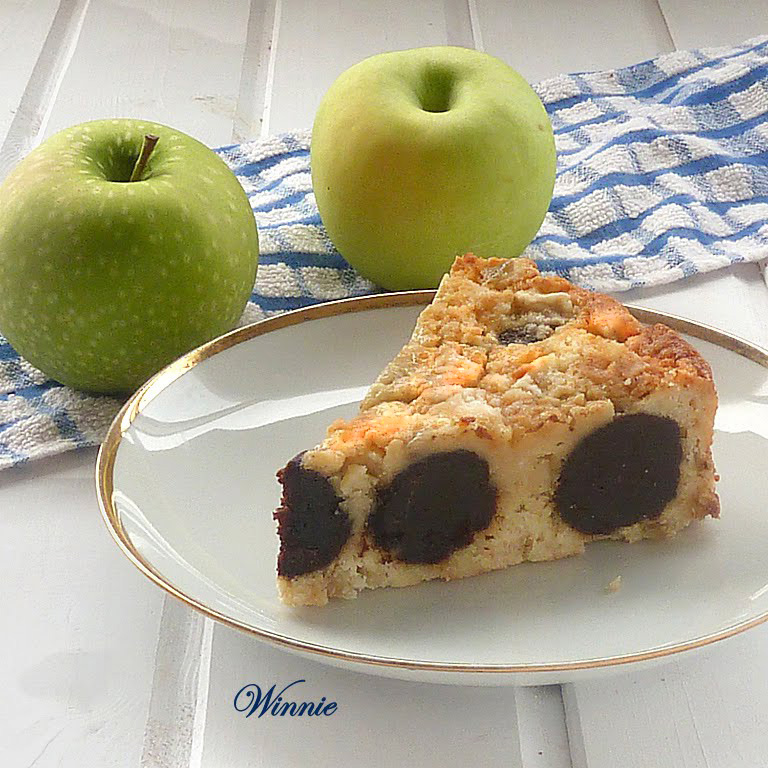
Winnie from Something sweet again joined in with a beautiful looking apple cake filled with chocolate polka dots.

Ros from The more than occaisional baker also linked up a stunning Cherry and coconut bundt cake and I’m loving the tin she used. I have a couple of bundt tins but may have to look for something similar.

Charlene from Food glorious food added a flavour packed Caribbean explosion cake filled with spices.

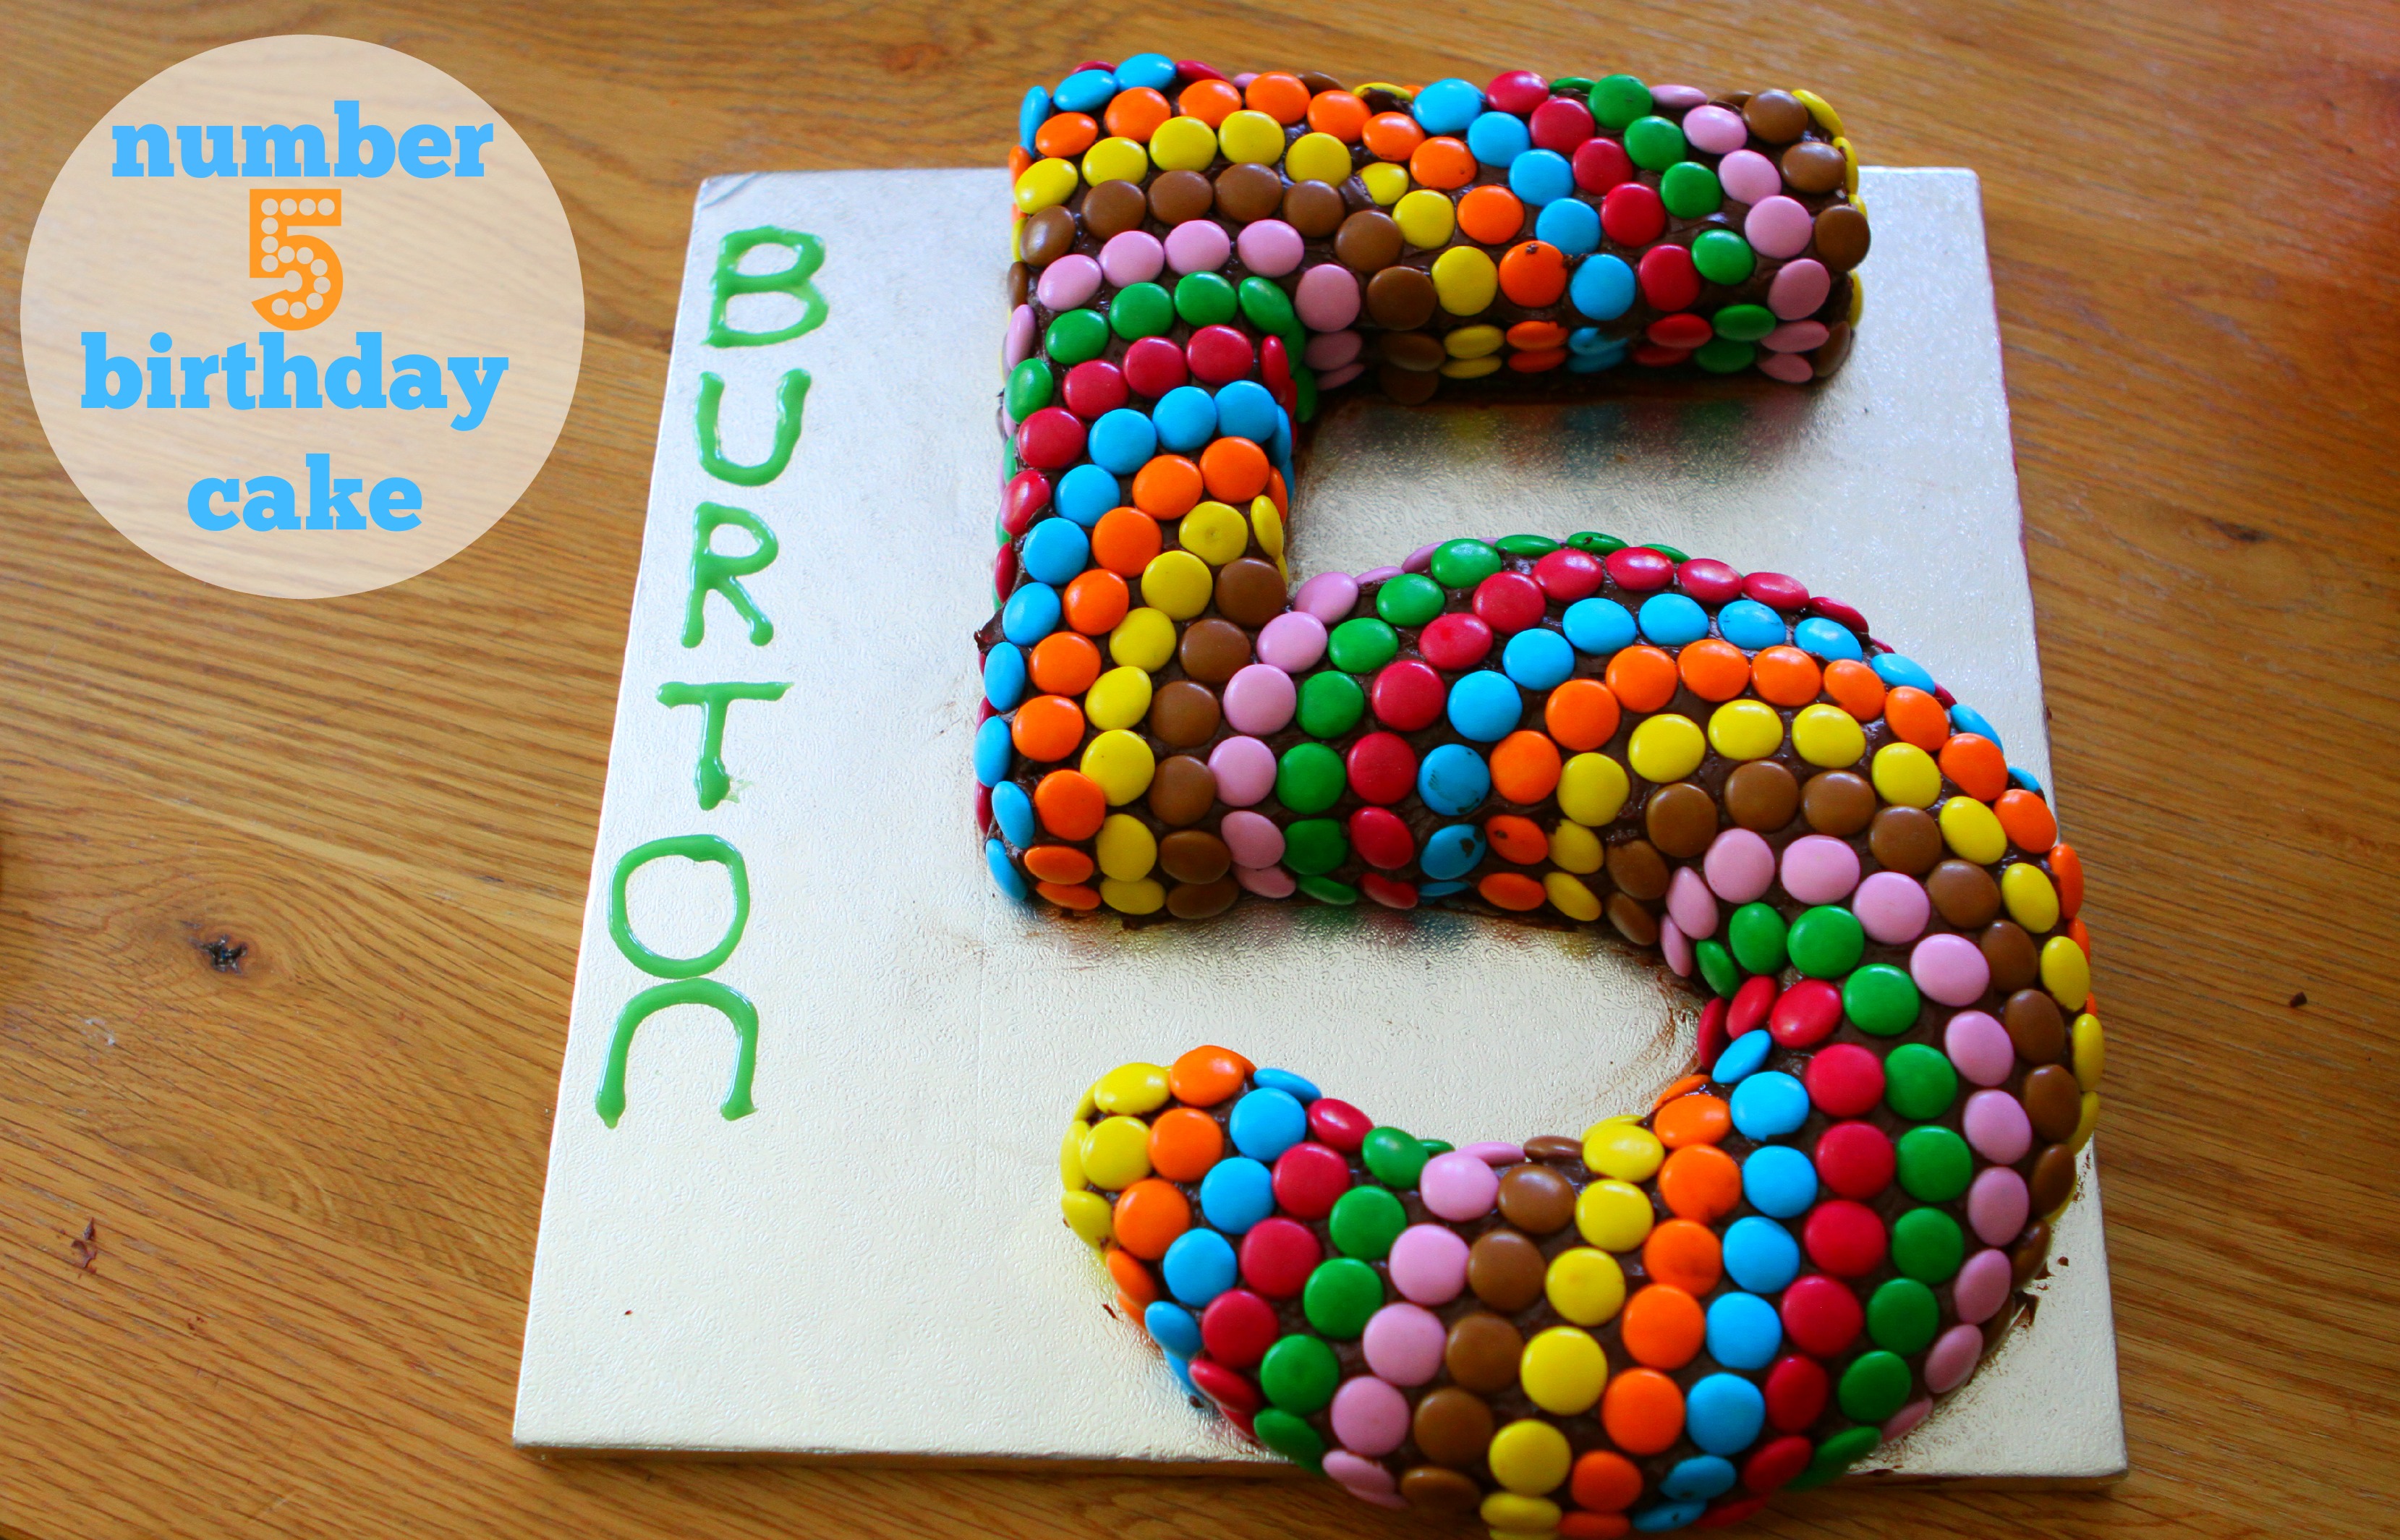
Finally Jenny from Mummy mishaps added a beautiful candy covered Number 5 cake made for her son’s birthday – if you read the post she actually made two cakes and both look fab.

If you have a cake or bake to link up please join in the linky below. The rules are simple:

You must have made the bake yourself – no buying from the local cake shop.

It must be a post about making the bake – it doesn’t have to be a full on recipe but it does need to be in the spirit of the thing.

It doesn’t need to be a new post it could be one from last year, but if it’s a seasonal celebration bake it should be appropriate – so no Easter cakes at Christmas, save them for springtime.

Posts must include the Celebration Cakes & Bakes badge (grab the code below)

Please comment on a few of the other entries – remember linkys only work if you spread the linky love!

That’s it everything else is optional.

If you follow me on twitter @jaisee_mummy and tweet me with the hashtag #CelebrationCakesAndBakes I will retweet any entries that I see.

CelebrationCakesAndBakes
<div align="center"><a href="http://jaisee.com/mummymakescakes/celebration-cakes-bakes/" title="CelebrationCakesAndBakes"><img src="http://jaisee.com/mummymakescakes/wp-content/uploads/2013/09/ccb_badge-e1379580719446.jpg" alt="CelebrationCakesAndBakes" style="border:none;" /></a></div>


Share Button