School day tea times

My son started reception this September and my daughter started 3 days a week at preschool so life has been a little bit different these last few weeks. I finally have a bit of time to myself, but I also have two small tired children to feed every day before they fall unconscious! Our tea time menus vary a lot depending on if we are eating as a family or feeding the kiddywinks first. Our family meals tend to be home made pizza, roast dinners, spaghetti bolognese and baked potatoes etc. If I’m just cooking for the kids we make scrambled eggs on toast, sausages or that old favourite of fish fingers. In fact given the choice my son will ask for fish fingers for tea any time we aren’t all eating together. We use a lot of fresh vegetables in our cooking and my kids love shelling peas from pea pods but for days when everyone’s tired we also keep a lot of frozen veg in. It’s so convenient and means that on days when I’m looking for something easy my kids always get their vegetables with their tea. Green beans are a favourite, as are peas and sweetcorn. For roast dinners we also add roast carrots to the mix.

Tea time Collage with text
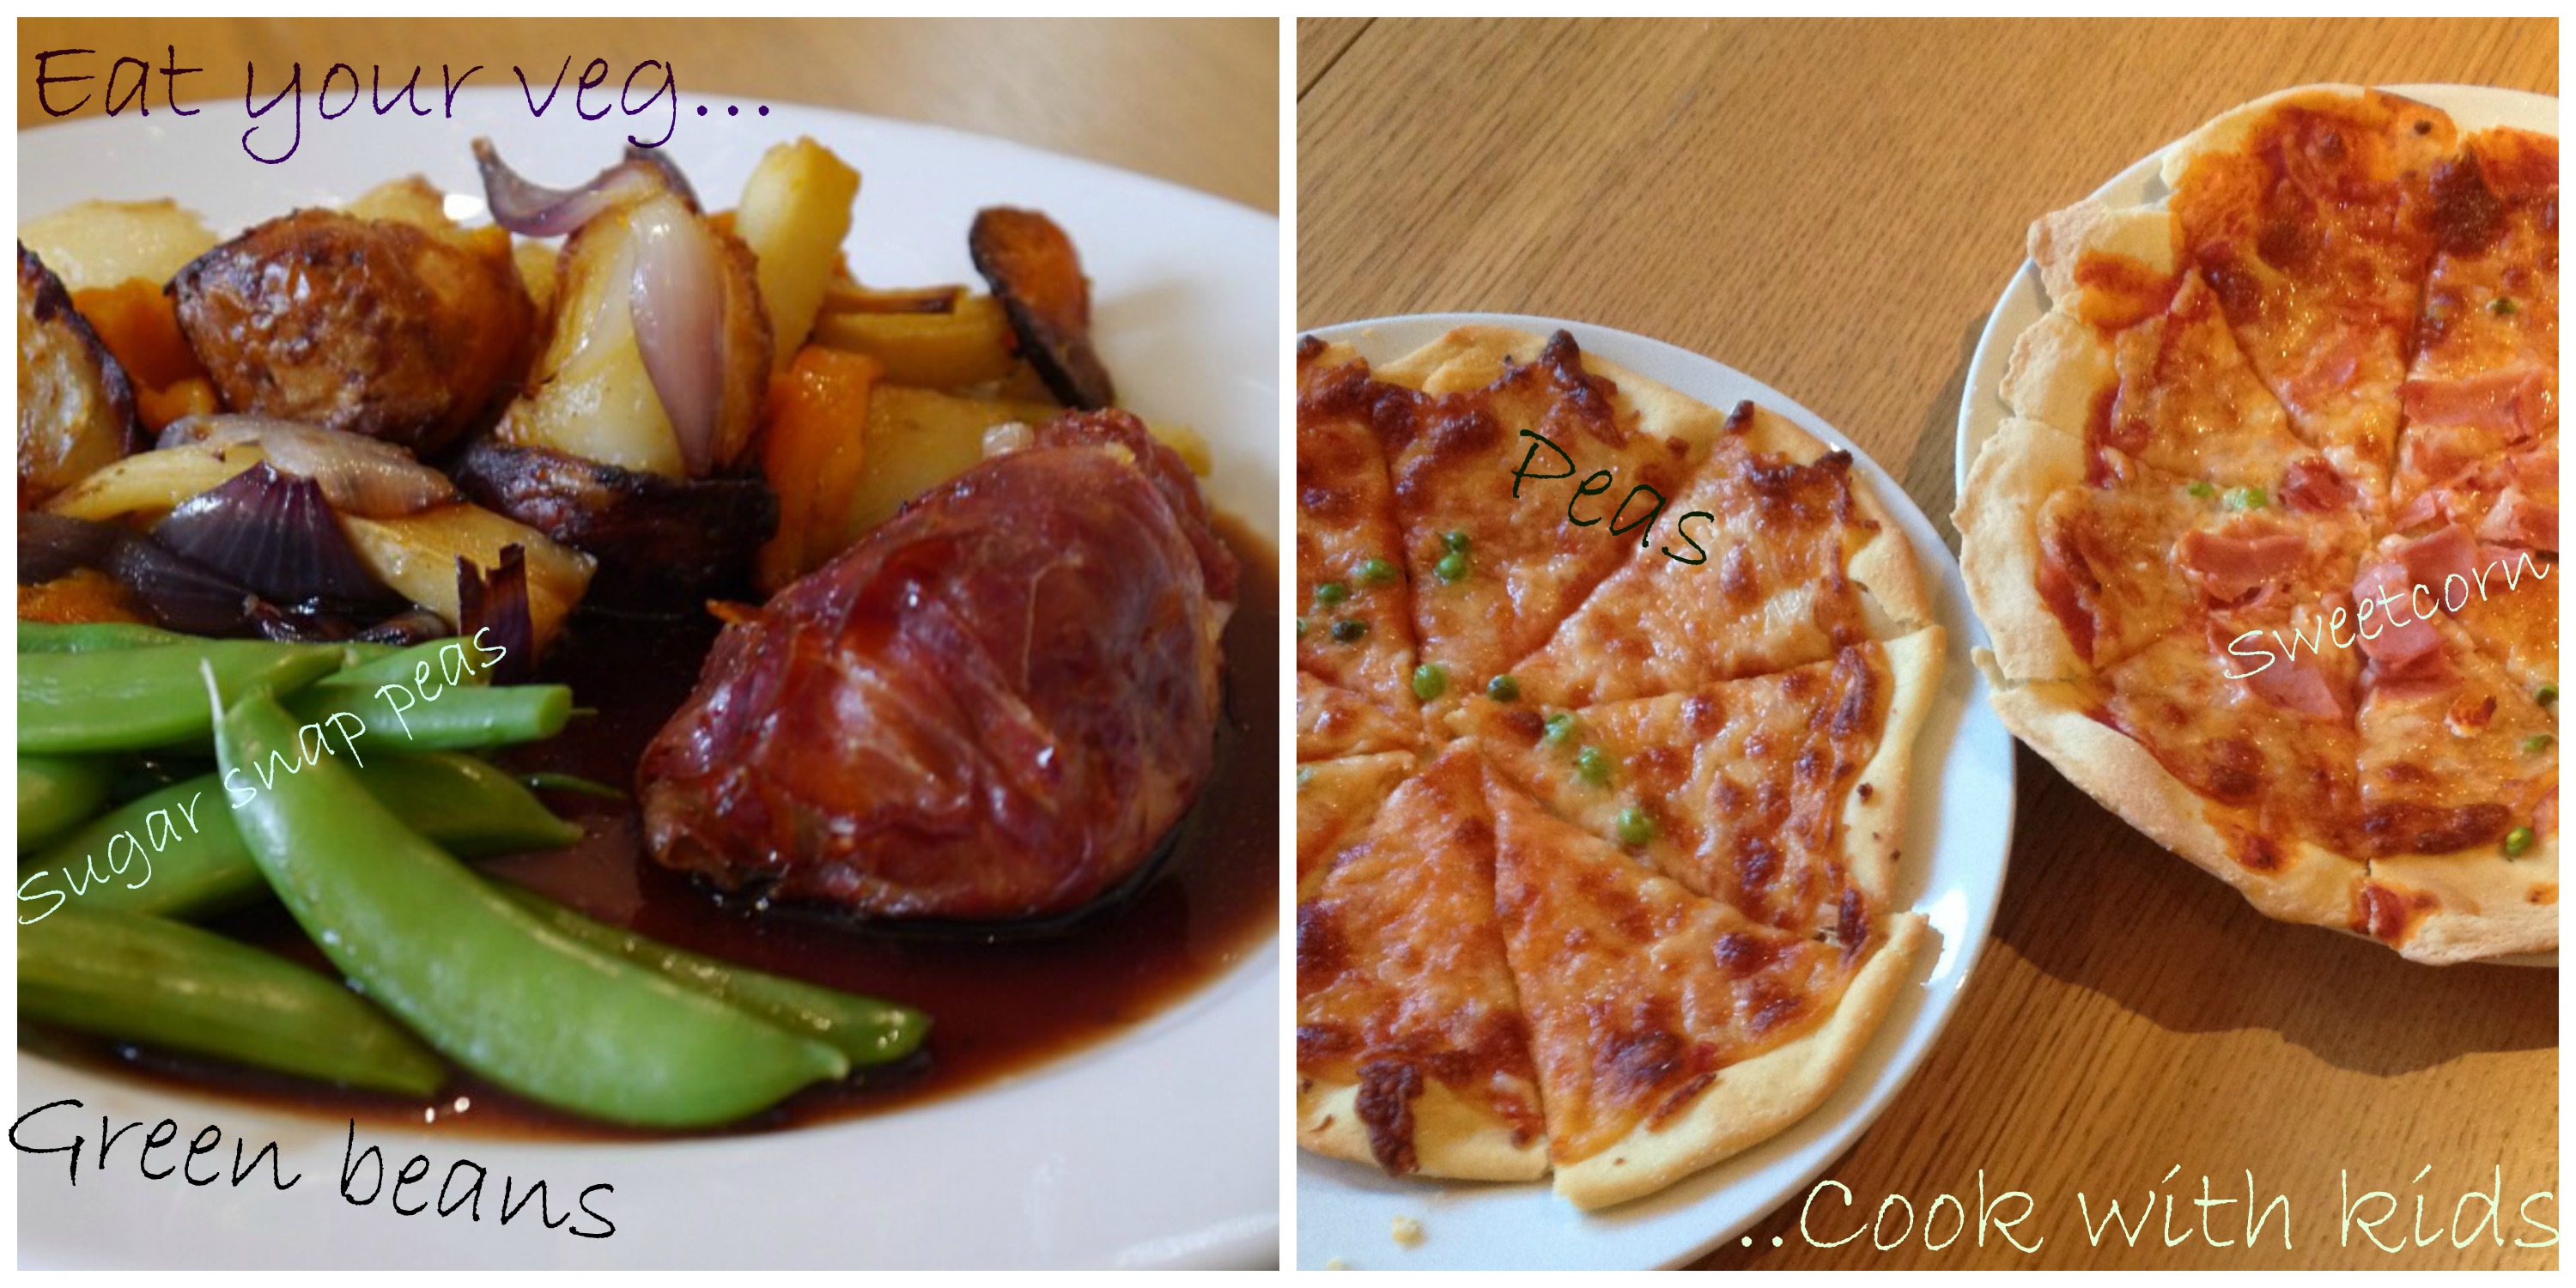
The pizzas above were made by my kids, I roll out the dough and then they add their own pasata, grated mozzarella and toppings – in this case ham, peas and sweetcorn. Other choices have been chicken, pineapple, peppers etc. It’s a fun way to get them into cooking and they are much more likely to eat something they’ve birds eyebeen involved in making. Recently Birds Eye sent me some vouchers to try out their products and we chose lots of frozen vegetables as well as the ever present fishfingers. As part of their #Afterschoolchefs challenge they are asking bloggers to write about their tea time routines and how they get their kids clearing thier plates. This post is an entry for #Afterschoolchefs Challenge, sponsored by Birds Eye. Learn more on the Birds Eye Facebook Page

Birds Eye do a great range of frozen food and some of the vegetables even have a new resealable zip on the bag meaning that I’m not having to scramble around for food clips to seal the bag.

Of course kids get tired and sometimes there’s nothing you can do to get them to finish their tea. Occasionally you have to accept defeat and just put them to bed. Especially when this happens…

asleep3

Share Button

Thomas and friends: Tale of the brave

Thomas&Friends_TOTB_artMy son is a bit of a Thomas the tank engine fan. In fact “a bit” doesn’t really cover it. He turned 5 in September and still shows no sign of growing out of his trains. We have a massive wooden track as well as a growing collecton of take n’ play sets. It isn’t just the toys though, he’s also a huge fan of the movies. He will happily watch them again and again on repeat until I have the music stuck in my head for days. The latest Thomas and friends movie is called Tale of the brave and features all our usual friends as well as new characters Gator  a visiting engine from the high mountains and Marion a steam shovel who works in the clay pits with Donald and Douglas. We were invited to a special screening of the film at Thomas land Drayton Manor and had a fabulous day. We also received the DVD to take home with us and it has been VERY well used since.

If you have a Thomas fan I can certainly recommend this DVD – it has dinosaurs, engines and lessons about confronting our fears. Both my son and my 3 year old daughter love the film and my son is now asking for the Clay pits take ‘n play set to add to his collection.

Gator_hero poseF

Tale of the brave is available to buy now, as are the toys linked to it.

Thomas&Friends _TOTB DVD artwork

Share Button

Chocolate orange cupcakes for grown ups with decorating ideas for all levels

cake line Collage

What’s your favourite cupcake? This week I’ve been deciding what I should bake for a great competition run by the people at Betta Living. They are looking for exciting cupcake recipes in the run up to National Cupcake Week 15th – 21st September. Surprisingly perhaps my favourite cupcakes aren’t vanilla, although you’d be forgiven for thinking they were considering how often I use my vanilla cupcake recipe. My favourite cupcakes to make are chocolate orange cupcakes, in fact the only reason I don’t make them more often is that I eat far to many of them when they’re in the house! Instead of frosting I use a white chocolate ganache on top and decorate with a variety of chocolate and fondant decorations. Last year I made Cointreau truffles to go on top of the cupcakes, this year I’m using the same cointreau and dark chocolate ganache I used in the truffles but I’m putting it actually inside the cakes, which is what makes them just for grown ups. Below you’ll find the recipe for my cupcakes and the ganache but first here are also some ideas for decorating the cupcakes – whether you’re a complete novice or more experienced there’s an idea to love; because autumn is on it’s way I’ve done a couple of seasonal designs, as well as the yummy dark chocolate decorations.

9 decorating ideas with something for all levels:

cupcake collage numbered

1. Sprinkled home made (or bought) chocolate chips

2. Tempered dark chocolate hearts

3. Tempered dark chocolate leaf

4. Fondant autumn leaves

5. Tempered chocolate writing

6. White and dark chocolate ganache stars

7.Fondant pumpkin

8. Fondant flower cascade with sugar pearls

9. Embossed fondant.


For the cupcakes:

250g castor sugar

cupcake batter Collage250g unsalted butter (softened)

4 eggs beaten

4 tsp orange extract

200g self-raising flour

50g good quality cocoa powder (not drinking chocolate)

1/4 (quarter) tsp baking powder

zest of 2 oranges

25 – 50ml whole milk

Preheat the oven to 180c

Makes 15 larger cupcakes or 24 small cupcakes

  • In a free standing mixer cream the butter and sugar
  • Add the orange extract to the egg and slowly add to the butter cream while still mixing. If needed add a spoonful or two of the flour to help it combine.
  • In a separate bowl mix together the cocoa powder and flour then add to the egg mix and mix until smooth.
  • Stir in the orange zest
  • Add the milk until the mixture drops easily from a spoon – you may not need all of it.
  • Place in cupcake cases and bake at 180c for either 15 minutes for small cupcakes or 18 minutes for larger cupcakes.

For the dark chocolate decorations and cointreau ganache filling

chocolate decorations collage 3200g Extra Dark Chocolate

50ml room temperature double cream

Cointreau to taste (for me about 1 shot glass full)

  • Melt 2/3 of the dark chocolate in the microwave using 10 second bursts, stirring each time. The idea is to keep the chocolate as cool as possible while getting it to melt.
  • Once the chocolate has melted place in a large bowl, break the remaining 1/3 of dark chocolate into small pieces and add to the melted chocolate. Stir continuously until the solid chocolate has melted and the chocolate feels cool when touched to your lip. This is the seeding method of tempering chocolate.
  • Place the chocolate in a piping or sandwich bag and cut off the corner, pipe some shapes onto foil or grease proof paper to use later for decoration. You could do anything from drops of chocolate to chocolate writing.
  • Place the remaining tempered chocolate back into the large bowl and stirring the room temperature cream. Mix until smooth then add the cointreau, testing to check you are happy with the flavour as you go. (It’s a hard life!)
  • Place the ganache in a piping bag with a filling nozzle and inject the filling into the cooled cupcakes.

For the white chocolate ganache:

50ml room temperature double cream

200g  White Chocolate

  • Melt the white chocolate in the microwave using 10 second bursts, stirring each time. The idea is to keep the chocolate as cool as possible while getting it to melt. Once the chocolate begins to melt simply continue to stir until all the remaining lumps are melted by the already melted chocolate.
  • Stir in the room temperature cream and keep stirring until the ganache thickens – it the ganache seems too stiff add a little more cream.
  • Leave to cool, stirring regularly until the ganache is thick enough to be piped.

This post is my entry to the Betta Living “Betta bake a cupcake” #bettabakeoff competition to celebrate National Cupcake Week which runs from 15-27 September. The lovely people at  Betta Living are giving away £750 in gift vouchers for the most creative cupcake recipe with one runner-up also receiving £250 in vouchers. So if you have your own blog why not get baking? You can find full details here.

group 3

Share Button

Lemon meringue pie

lemon meringue pieThis week I’m back joining in with the great bloggers bake off after missing a week to make all the mickey mouse themed birthday party food for my son’s 5th birthday. I decided to make lemon meringue pie because A- my husband loves it B- I’ve never made it before C- I don’t really eat it so it’s good for my diet and D- I was sad to miss out on the Baked Alaskas so wanted to do something with meringue.

lemon meringue pie collage
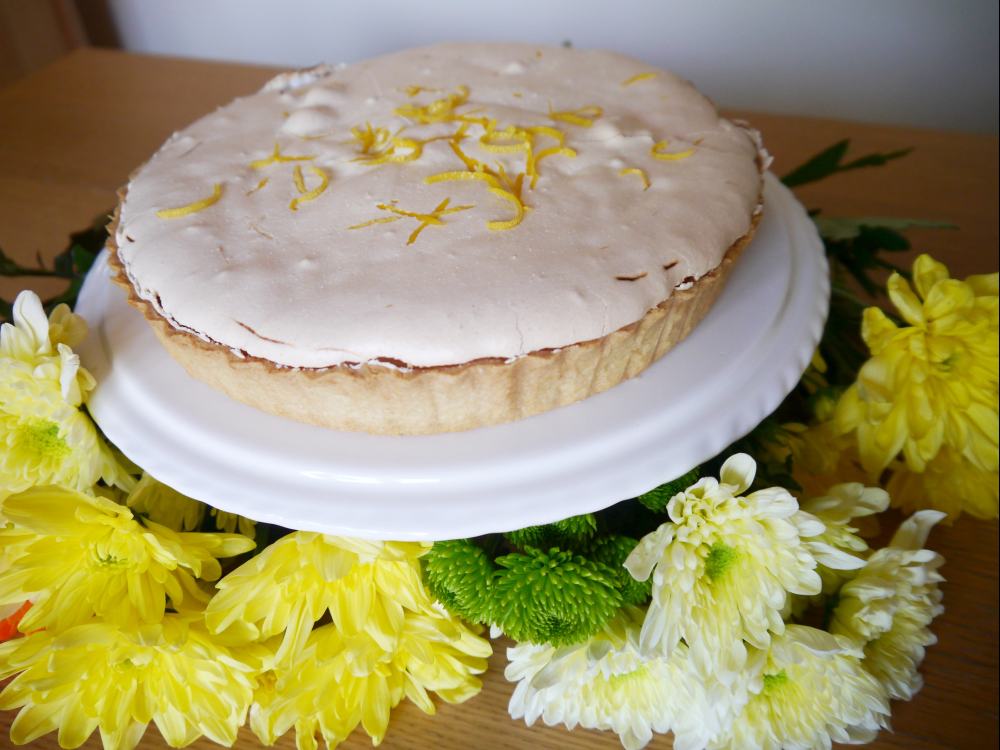
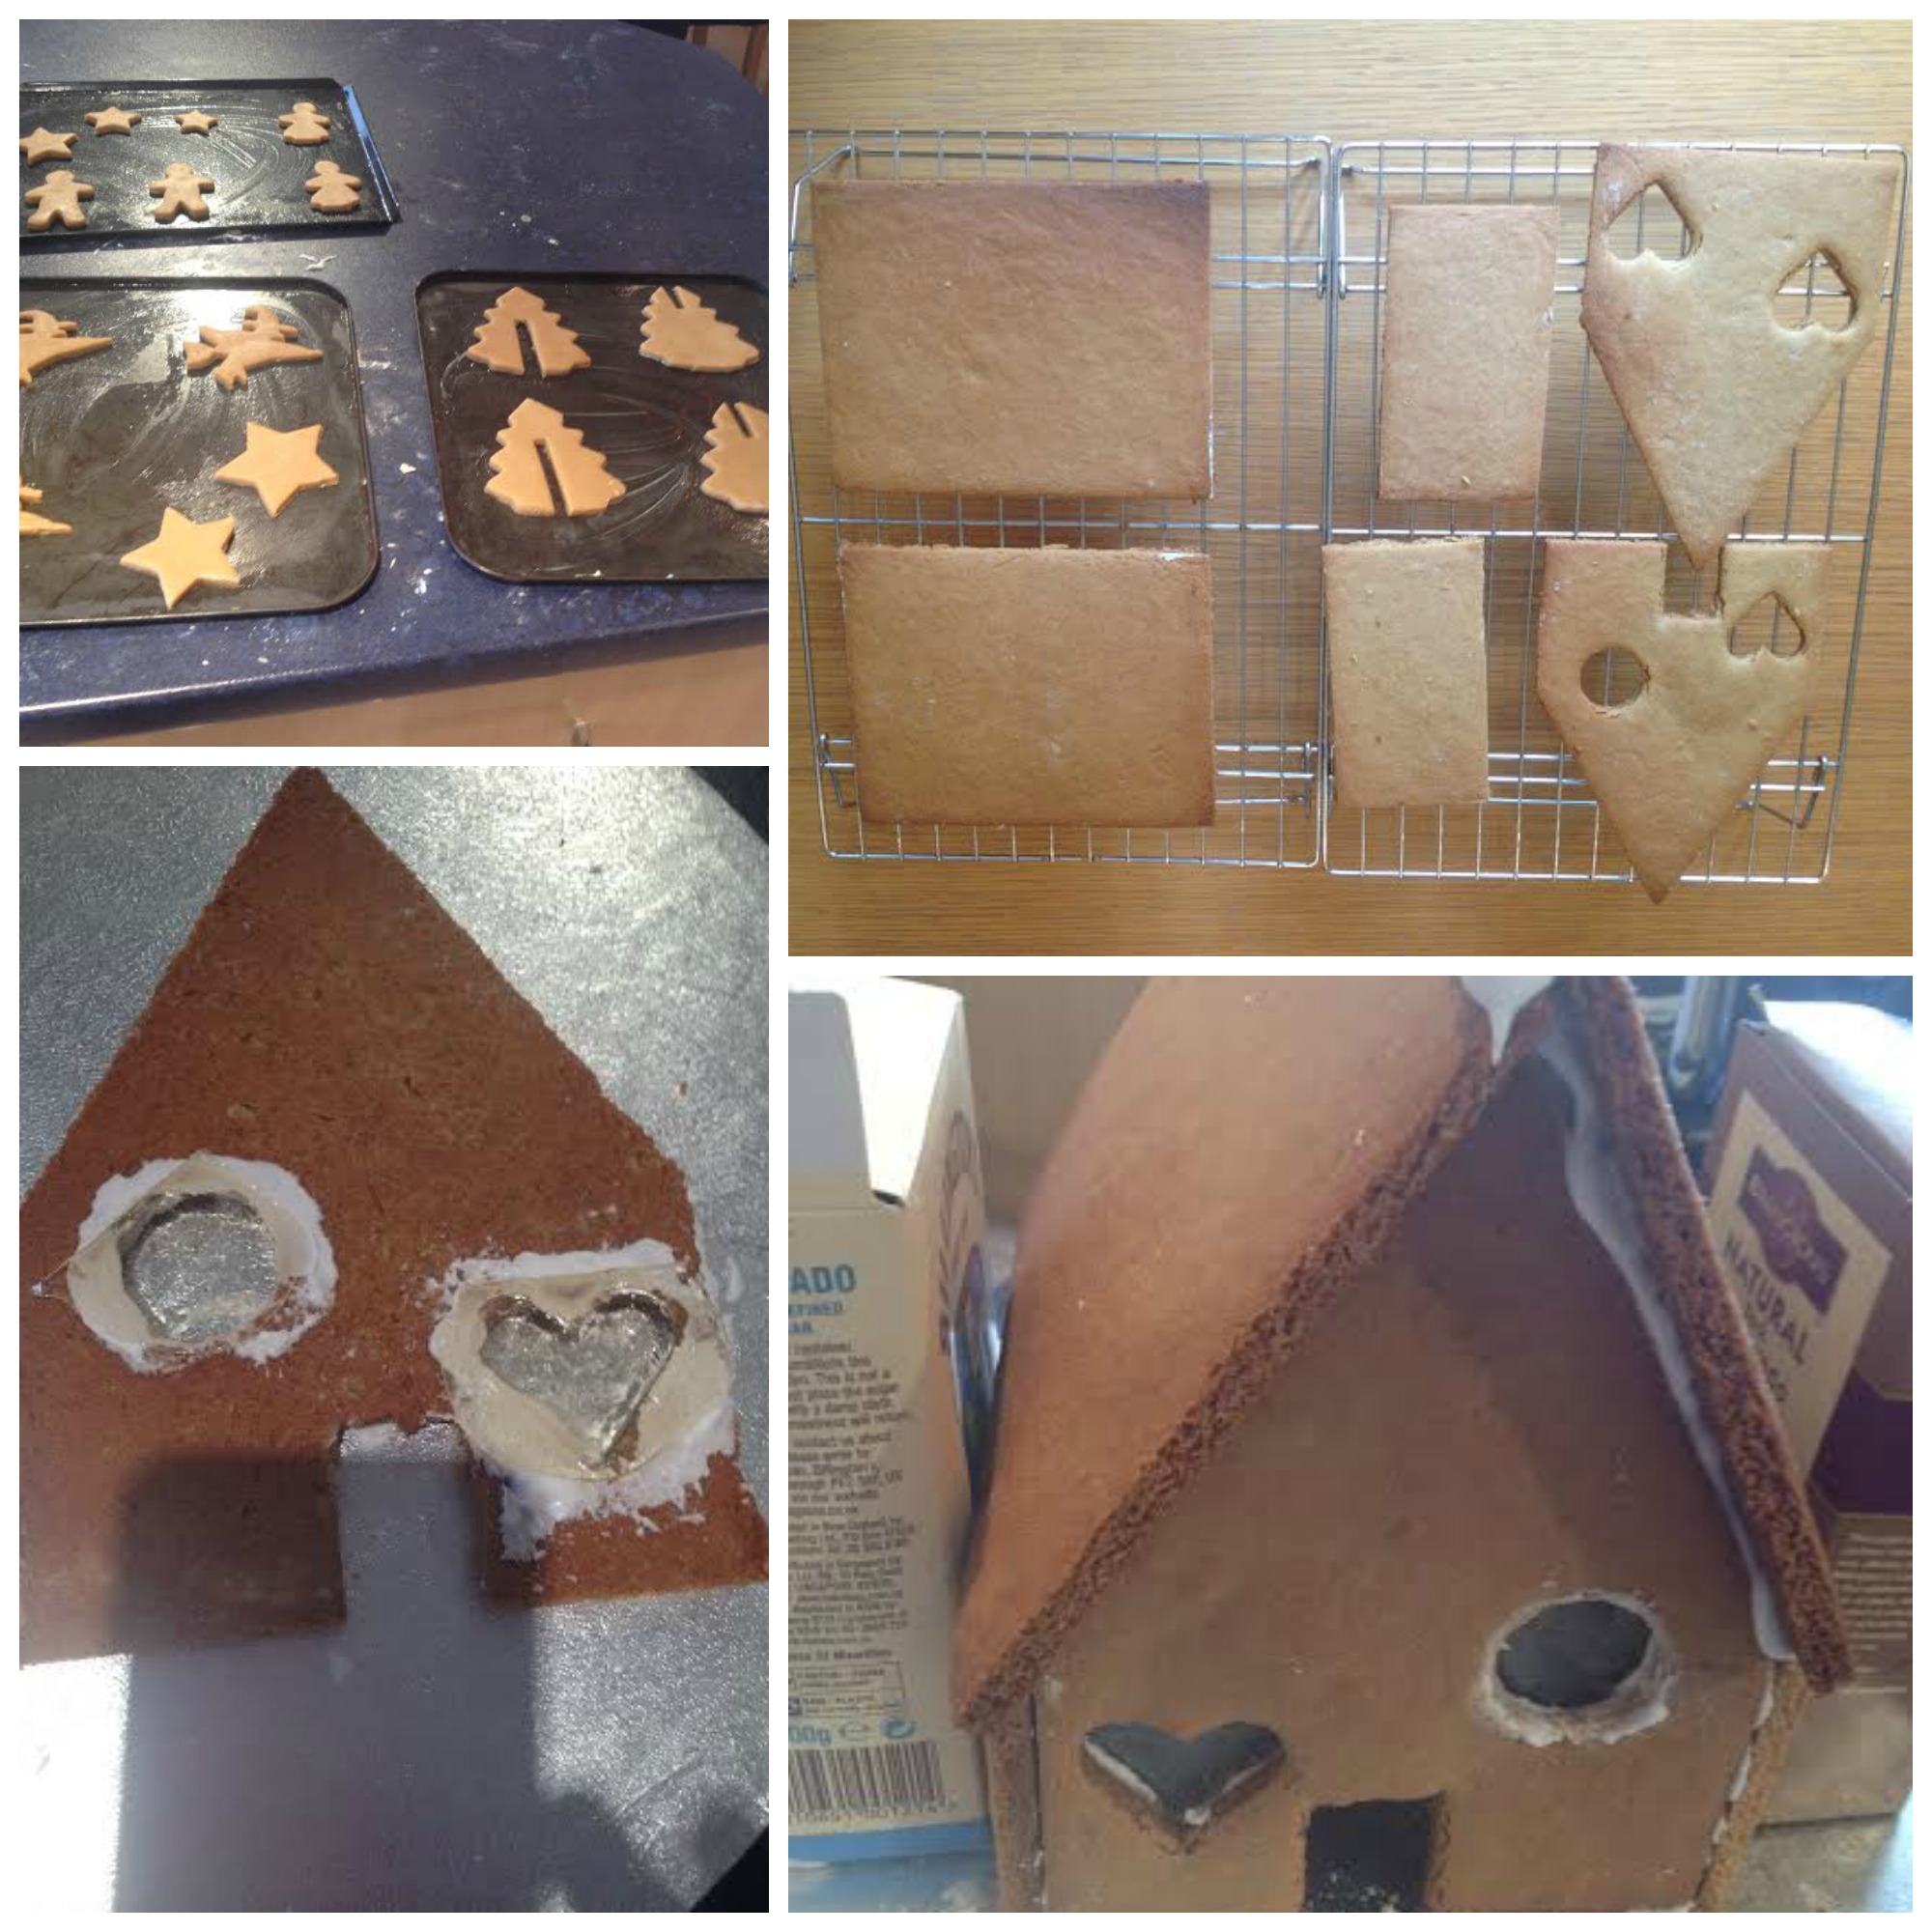
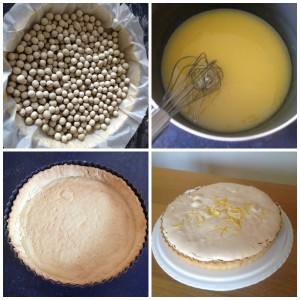
I used the same sweet pastry I used last year for my summer fruit meringue pies but changed the meringue recipe a little. I was rushing a little so lost the beautiful peaks in the meringue but overall the pie came out well. I blind baked the case as it was larger than my small summer fruit pies and adapted a Mary Berry recipe for the filling.

We’ve just eaten it for dessert with our tea and it looked pretty good when we cut into it!

This recipe is for  9 inch pie made in a loose bottomed tin.

For the pastry:

125g Plain flour

15g Castor sugar

75g Unsalted butter

1 large egg yolk (keep the egg white for the meringue)

1 tablespoon of cold water

preheated 180c oven


  • If you have a blender (which I don’t), just put all the ingredients in and mix.
  • Otherwise place the flour and sugar and in a bowl and mix through before rubbing the butter in to create a breadcrumb effect.
  • Next beat the egg yolk and mix through with your hands or a wooden spoon.
  • Add the water and combine the dough into a ball.
  • Knead briefly to ensure the egg yolk has distributed evenly throughout the pastry (no yellow bits).
  • Butter your pie tin – with fluted edges I find the best way to stop pastry sticking is to get right in there with your fingers and make sure every bit of the fluting is buttered.
  • Roll out the pastry on a floured non-stick surface (I used my fondant mat but greaseproof paper works too) and then flip the pastry onto the pie tin before carefully peeling off the non stick surface.
  • Carefully lift and press the pastry into place making sure there are no holes.
  • Use a knife to remove excess pastry from the top drawing it outwards so that it pulls the pastry into the walls of the tin rather than away from them.
  • Line with grease proof paper over the pastry then fill with baking beans
  • Blind bake the pastry in a 180 oven for 15 minutes then remove the baking beans and grease proof paper and bake for a further 5 minutes to brown.

For the lemon filling

This is a very tart filling, if you prefer it sweeter reduce the lemon juice to 3 lemons and add a little extra water instead

Juice and zest from 4 unwaxed lemons100ml water100g castor sugar1 level tablespoon of cornflour4 large egg yolks (beaten)

  • Place the sugar, lemon juice, lemon zest and  water into a pan and bring to the boil.
  • Reduce the heat and whisk in the cornflour until there are no lumps.
  • Continue to stir until the mixture thickens.
  • Remove the pan from the heat and leave to cool slightly to stop the eggs scrambling when they are added.
  • Beat the egg yolks and add to the cooled sugar mixture stirring constantly to help mix in evenly and prevent the eggs scrambling. Take back to the heat and cook over a low heat stirring until the mixture has thickened (5 minutes or so). Remove from the heat and leave to one side to cool while you make the meringue.

For the meringue

5 egg whites (1 left over from making the pastry and 4 left over from making the filling).

250g castor sugar

2 teaspoons cornflour

Preheat the oven to 170c

  • Whisk the egg whites on a high speed until they form soft peaks
  • Add the sugar a spoonful at a time while continuing to mix at a slow speed
  • Add the cornflour to make the meringue soft inside
  • Pour the lemon filling into the blind baked pastry case
  • Pipe or spoon the meringue on top of the lemon filling
  • Bake in a 170c oven for 15 minutes until the meringue is crisp on top.


lemon meringue pie inside


GreatBloggersBakeOff


Share Button

Ciabatta bread

CiabattaAs a lover of Italian food, ciabatta is a bread I always enjoy, the chewy texture and the crusty outside are always a great start to a meal at our local restaurant. Strange then that I’ve never tried making it before, if you listen to the instructions on the Great British Bake Off this week it can be done in 3 hours, although if you follow the recipe in Paul Hollywood’s book Bread he adds an extra 6 hours of proving to the start to ferment the dough and increase the flavour. I followed Mr Hollywood’s recipe initially but found that the dough – which he says should resemble a batter was much too dry with the amounts listed so I added another 50ml to this. The recipe instructs you to mix up half the dough and leave to prove for 6 hours before mixing in the rest of the ingredients and beginning a more traditional prove. In all honesty I probably wouldn’t do the first stage again, I’m sure it added an extra dimension to the flavour and the bread did come out smelling exactly like ciabatta should but I really don’t have time in day to day life to prove for 6 hrs, then 2 hrs, then another hour.

We had our ciabatta for supper on Tuesday with olive oil and balsamic vinegar. I tasted lovely and had the irregular bubbles that Mr Hollywood said should be present so all in all a successful experiment.

GreatBloggersBakeOff


Share Button
This entry was posted in Bread.

Picnic loaf

This week was week 3 of the 2014 Great British Bake Off, they made rye bread rolls, struggled with ciabatta and made savoury filled loaves as show stoppers. Last year the technical challenge was an apricot couronne and as a variation I made  savoury couronne with spinach, parma ham and mozzarella which seems to fit with this year’s showstopper theme. Instead of twisting the dough into a couronne shape I simply wound it into a spiral, making a more solid loaf which, hen cut reveals to pinwheels of filling inside.

Picnic loaf 2Ingredients:

500g Strong white bread flour

1 sachet fast action yeast

2 tsp salt

125ml warm whole milk

125ml warm water

30g butter (softened)

Approx 8 slices of parma ham (or normal ham if you prefer)

1-2 Large handfuls of fresh spinach

100-150g buffalo mozzarella (the kind that comes packed in brine not the grated kind)

Method:

  • Place the flour in a large bowl or freestanding mixer bowl.
  • Add the yeast to one side of the bowl and the salt to the opposite side. Mix thoroughly.
  • Mix 125ml of whole milk and 125ml of water in a microwavable jug and heat for approx 40 seconds (try 20 seconds at a time to avoid over heating).
  • Gradually add the warm milk & water to the flour mixture and stir with the wooden spoon (or fingers) until all the flour is picked up. Depending on how moist or dry your flour is you might need slightly more / less water.
  • Once all the flour is picked up add the softened butter and knead for at least 10 minutes. I let my stand mixer do this for me with a dough hook but it can also be done by hand until the dough is smooth and elastic.
  • Place in a clean oiled bowl and cover with cling film. Leave to rise for at least an hour and a half until doubled in size.
  • Tip the risen dough onto a floured surface and knock back (knead out the air). Use a rolling pin to roll out the dough into a long thin rectangle. (It will try to spring back but persevere).
  • Lay out the Parma ham then add the spinach to cover the ham. (The spinach will release quite a bit of water when cooking so don’t add too much.)
  • Break the mozzarella into marble sized pieces and dot across the dough then add the fresh basil leaves.
  • Roll the dough into a long sausage shape then wind it into a spiral.
  • Place on a greased and floured baking tray and leave to rise for 45 minutes covered with a tea towel.
  • Preheat the oven to 180c.
  • Brush the top with beaten egg and bake for 25 minutes at 180c – the bottom of the lof should sound hollow when tapped.

Picnic loaf

GreatBloggersBakeOff


Share Button
This entry was posted in Bread.

Hansel and Gretel Gingerbread Cottage

Hansel and GretelWeek two of the Great British Bake Off was biscuit week, with showstoppers of free standing biscuit scenes. Before I even saw the show I knew I wanted to make a gingerbread house for the Great Bloggers Bake Off, it may not be as inventive as some of the bakers on the show but it is something my kids love. When making these before I’ve always used giant chocolate buttons for the roof tiles, this time I went a step further (imagining the look on Mary Berry’s face at the thought of bought chocolate buttons) and made tempered chocolate roof tiles in alternating milk and white chocolate. I also melted sugar to make the window panes. The chocolate coated beans were bought and I’m not sure if using a lollipop stick for the witch is strictly allowed but since I’m not really in the bake off tent I’m giving myself the benefit of the doubt!

To make the 3D trees I used a normal tree cutter then cut out sections from the middle to allow them to interlock. Hansel and Gretel are made wide enough to stand up using 2 biscuits attached back to back with royal icing. The witch has a lollipop stick pushed in immediately she comes out of the oven before the biscuit hardens, Her decoration is done using a technique called flooding where lines are piped around the shape and then the inner sections flooded with a slightly runnier icing. I used star biscuits to make the tree she is flying over and used a lolipop stick to put a hole in each as it came out of the oven, when decorated and stacked with royal icing to hold it together the tree forms a stand to hold the witch up. The weights given below make enough dough for this biscuit scene plus enough extra that if you break a piece you can make another, the dough can be frozen or you could make extra trees or animals once you have safely made your cottage. The royal icing is to join biscuits together, the water icing is for decoration. To make the window panes you will need a sugar thermometer.

Ingredients:

700g Plain flour

3 tsp bicarbonate of soda

3 tsp ground ginger

200g Butter

350g light muscavado sugar

8 tablespoons golden syrup (and a small dish of vegetable / corn oil to dip the spoon in)

2 eggs (beaten)

pre-heat the oven to 180c

To decorate:

Mini smarties

Water icing and gel colours (white, green, black)

100g castor sugar & 100ml water

Royal icing (1/2 of a 500g packet)

200g White chocolate

200g Milk chocolate


Method:

  • Sift the flour, bicarbonate of soda and ginger into a bowl.
  • Rub in the butter until the mixture resembles fine breadcrumbs.
  • Sieve in the sugar to remove any lumps then stir in.
  • Dip your tablespoon in the oil to stop the golden syrup sticking then add the golden syrup to the egg and beat to combine.
  • Gradually stir the syrup mixture into the dry ingredients.
  • Mix into a smooth dough.
  • Turn out the dough onto a floured surface and roll out.
  • Cut out your biscuits and place on buttered baking trays. The template I used for the house is from BBC Goof Food and can be found here (you will need to print out 2 copies in order to cut out all the pieces).
  • Use small heart or circle cutters to add windows and a knife to add a door.
  • Bake at 180c and trim the edges with a sharp knife imediately the pieces come out of the oven while they are still soft. Use the templates again to ensure the correct size but do be careful as the biscuits will be hot.
  • Cooking times may vary for different ovens but I  found the following times worked.
    Trees and figures =8 – 10 minutes (remember to puch the lollipop stick into the witch biscuit as soon as it comes out of the oven).
    Side of house = 14 minutes   *trim edges
    Gable ends of house = 16 minutes
    Roof of house = 18 minutes
  • Cool on wire racks before decorating.

Decoration:

  • Hansel and Gretel collageFirst make the window panes for the house –
    Place the castor sugar and water in a pan and heat to 150c using a sugar thermometer then pour window panes onto a foil covered baking tray (I needed 4)
  • Mix the royal icing then once the window panes have set attach them to the back of the gable ends using the royal icing.
  • While the window panes set in place temper the white and milk chocolate and pipe onto greaseproof paper to make the roof tiles.
  • Once the window panes have set in place assemble the cottage using the royal icing. Place the gable ends between the outer walls so that a ledge is created to rest the roof on while it sets. Only attach the roof once the walls have begun to set.
  • While the house sets decorate the trees, witch and children.
  • Attach the roof tiles in alternating layers with royal icing.
  • Add detail to the cottage with water icing.
  • Finally add mini smarties around the window and door frames.
GreatBloggersBakeOff
Share Button

August’s Celebration Cakes And Bakes with July’s Roundup

frozen cake 3
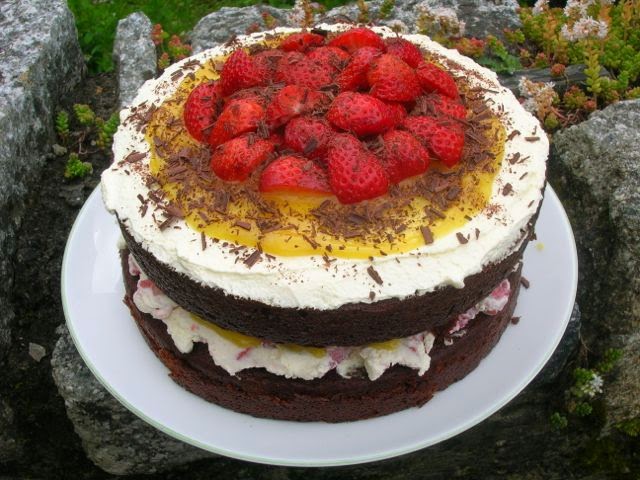
The summer holidays are here and they’re the last ones before my son starts school. He turns 5 in September and has asked for a Mickey Mouse Clubhouse cake and party. I’m busy scouring Pintrest for ideas as I don’t want him to feel he gets any less fuss than his sister had for her Frozen Party. My daughter’s 2 part Frozen themed cake made up the first two entries in July’s Celebration Cakes and Bakes. She had a vanilla Ice palace cake and a chocolate In Summer cake.

frozen cake 4

The next entry was a birthday cake that looks exactly like the cake from Minecraft made by Jo of Opposable thumbs. If you haven’t heard of it Minecraft is a sandbox game where you can build thing with different types of blocks. Older children / adults can fight off monsters, or for younger children you can have a peaceful existence with no scary things going bump in the night.

Next was a gorgeously rich looking chocolate birthday cake from the Chocolate log blog topped with lemon curd and strawberries.

Finally we have a stunning heart patterned swiss roll made by Winnie from Something Sweet. I think this would have been worthy of appering on The Great British Bake Off it looks so pretty.

If you have a bake you’re particularly proud of why not join in with the link below, the rules are simple:

You must have made the bake yourself – no buying from the local cake shop.

It must be a post about making the bake – it doesn’t have to be a full on recipe but it does need to be in the spirit of the thing.

It doesn’t need to be a new post it could be one from last year, but if it’s a seasonal celebration bake it should be appropriate – so no Easter cakes at Christmas, save them for springtime.

Posts must include the Celebration Cakes & Bakes badge (grab the code below)

Please comment on a few of the other entries – remember linkys only work if you spread the linky love!

That’s it everything else is optional.

If you follow me on twitter @jaisee_mummy and tweet me with the hashtag #CelebrationCakesAndBakes I will retweet any entries that I see.

Because this month I’m late posting the linky will run until August 31st.

CelebrationCakesAndBakes
<div align="center"><a href="http://jaisee.com/mummymakescakes/celebration-cakes-bakes/" title="CelebrationCakesAndBakes"><img src="http://jaisee.com/mummymakescakes/wp-content/uploads/2013/09/ccb_badge-e1379580719446.jpg" alt="CelebrationCakesAndBakes" style="border:none;" /></a></div>


Share Button

Chocolate and vanilla swiss roll

Chocolate and vanilla swiss roll
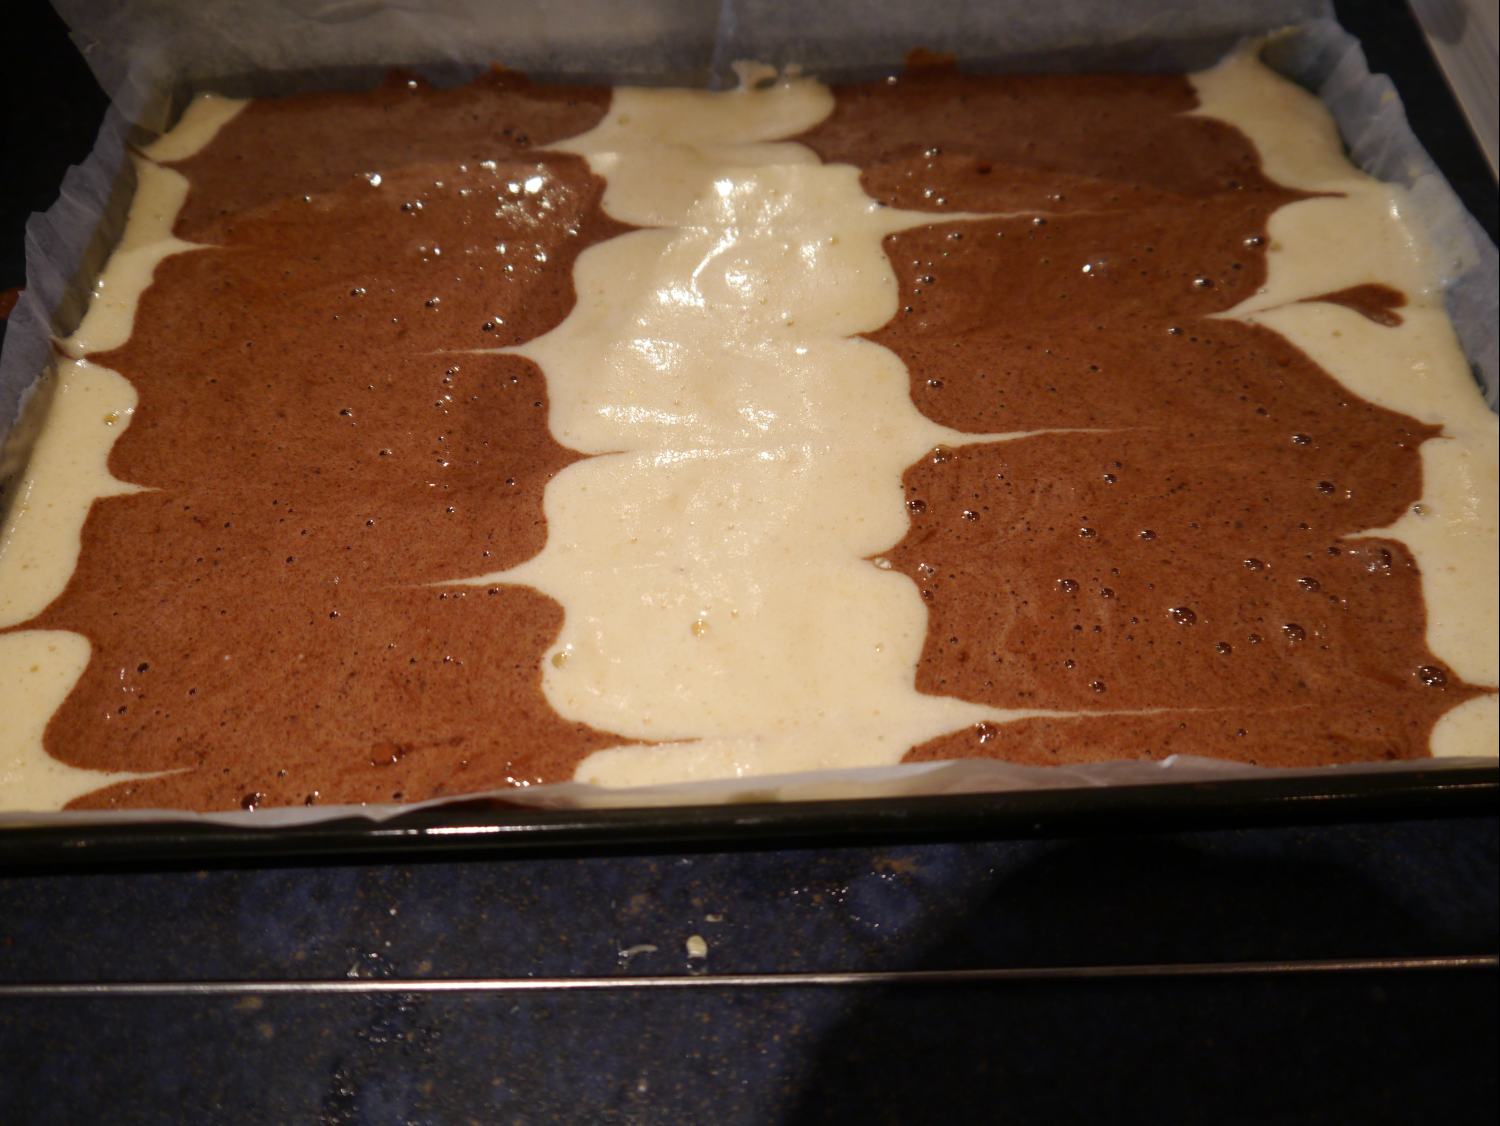
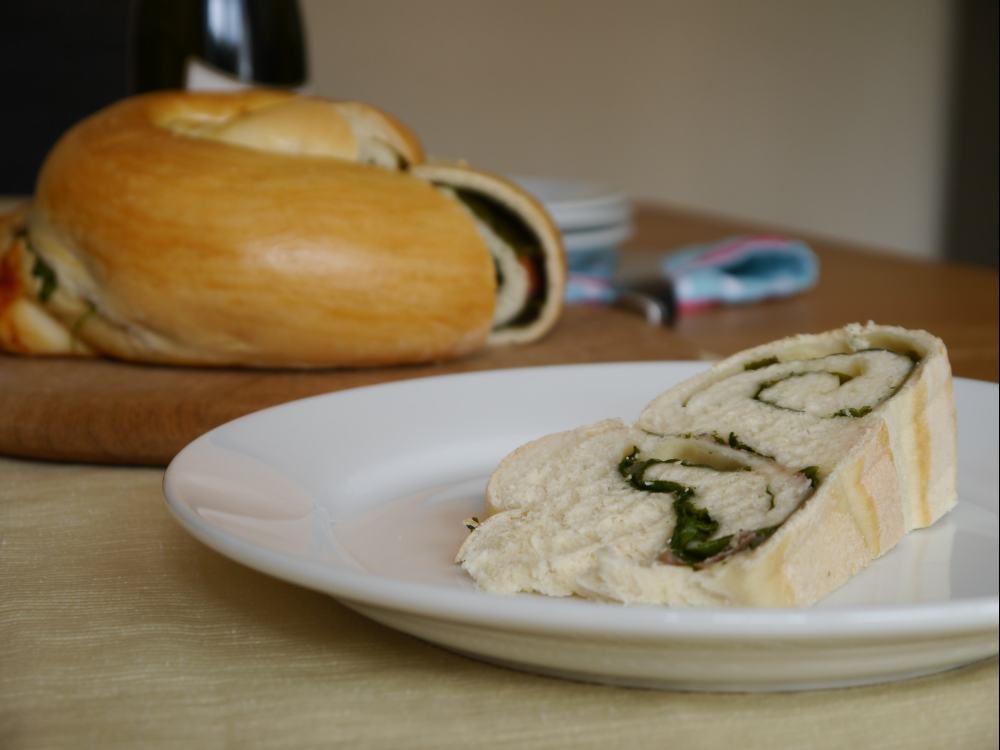
So the Great British Bake Off is back for another year and last night saw the bakers challenged with cakes. Swiss rolls, cherry cake and miniature British classics. In celebration of the bake off the Great Blogger’s Bake Off is also starting up again and my first recipe for it is this chocolate and vanilla version of a swiss roll adapted from a Mary Berry recipe in the book she signed for me last year. It’s partly inspired by those cadbury mini-rolls that have been around forever. I remember them from years ago and always liked them although I couldn’t tell you when I last had one. This is my attempt to make a giant one.

The sponge is striped chocolate and vanilla, and the filling is striped milk and white chocolate ganache. Finally the whole cake is covered in dark chocolate and white chocolate stars.

Ingredients

For the cake:

100g Castor sugar

4 Large eggs (beaten)

1 tsp Vanilla essence

100g Self raising flour

25g Cocoa powder

For the filling:

100g White chocolate

100g Milk Chocolate

50ml Double cream

200g Dark chocolate

White chocolate stars or similar to decorate

Method

  • Preheat your oven to 220c
  • In a free standing mixer whisk the sugar, eggs and vanilla essence using a balloon whisk attachment. Whisk until the mixture is stiff enough to leave soft peaks when the whisk lifts out.
  • Sift in the flour a little at a time, folding gently by hand to keep the air in the mixture.
  • Split the mixture in half and sift the cocoa powder into one half, folding as with the flour.
  • You should now have a vanilla mix and a chocolate mix.
  • Grease and line a baking tray with a raised edge with greaseproof paper, then grease the paper itself to stop it from sticking.
  • Place your two mixtures into jugs and pour stripes of the mixture into the tray.
  • Use a skewer to drag across the stripes and produce an attractive pattern as below.
    Chocolate and vanilla swiss roll batter 2
  • Bake in the preheated oven for 8 minutes. The sponge should be firm but only lightly coloured.
  • Once the cake is cooked score a line about 1cm from the end and roll up the sponge while it is hot. This will help it to roll later once it is cooled and filled.
  • While the cake is cooling melt the white and milk chocolate in separate bowls.
  • Add 25ml of double cream to the white and stir until the mixture thickens. Repeat this for the milk chocolate.
  • Pipe alternating lines of white and milk chocolate ganache onto the cooled cake then re-roll it and wrap firmly in several layers of cling film to help it settle into shape. The ganche will set and help hold the shape once the clingfilm is removed. Leave for at least an hour.
  • After at least an hour melt the dark chocolate and cut the clingfilm off the cake.
  • Pour the melted chocolate over the the cake and use a silicone pastry brush to help coat the cake with the chocolate.
  • Sprinkle the cake with the chocolate stars and leave to set – if the weather is particularly warm you may need to place the cake in the fridge. Only do this if really necessary as setting chocolate in a fridge can cause it to “bloom” and show whitish marks.
    GreatBloggersBakeOff
  • Thanks to Jenny Paulin for hosting the great bloggers bake off!


Link up your recipe of the week
Share Button

Rainbow cookies

rainbow cookies 4These soft chewy cookies are a firm favourite in our house, so much so that a batch of 60 small cookies is unlikely to last the week. I recently shared a random photo of a batch cooling on wire racks with Stork (@bakewithstork) on twitter as part of their #storkpassiton monthly draw. Last month the prize was a Kenwood stand mixer and amazingly I won it!! It arrived this week and is gorgeous so I thought I would share the recipe for my cookies. Why not have a go at making some then share a photo with them using the #storkpassiton hashtag and see if you’re lucky too.

Ingredients

225g Margarine

200g Light muscavado sugar

150g Castor sugar

2 Large eggs (beaten)

1 tsp Vanilla extract

400g Plain flour

1/2 tsp Salt

2 and a half tsp Bicarbonate of soda

100g Dark chocolate chips / chopped chocolate

100g Smarties or other candy coated chocolate beans either full size or mini.

Method

  • Preheat the oven to 170c.
  • Cream the margarine and sugar in a freetsanding mixer.
  • Add the vanilla extract to the beaten eggs then add little by little to the buttercream mixture.1
  • In a separate bowl mix together the flour, salt and bicarbonate of soda.
  • Gradually add the dry ingredients while mixing on a slow speed.
  • Stir in the chocolate chips and smarties.
  • Grease 2 – 4 baking trays (depending on how many shelves you have in your oven) and place small balls of the biscuit mixture on the trays – I tend to fit 9 to 12 balls per tray depending on the shape.
    Rainbow cookie collage
  • Bake for 8 – 10 minutes, the cookies will spread while they bake and should still be chewy once they have cooled.

rainbow cookies 5


Link up your recipe of the weekCasa Costello


Save

Save

Share Button