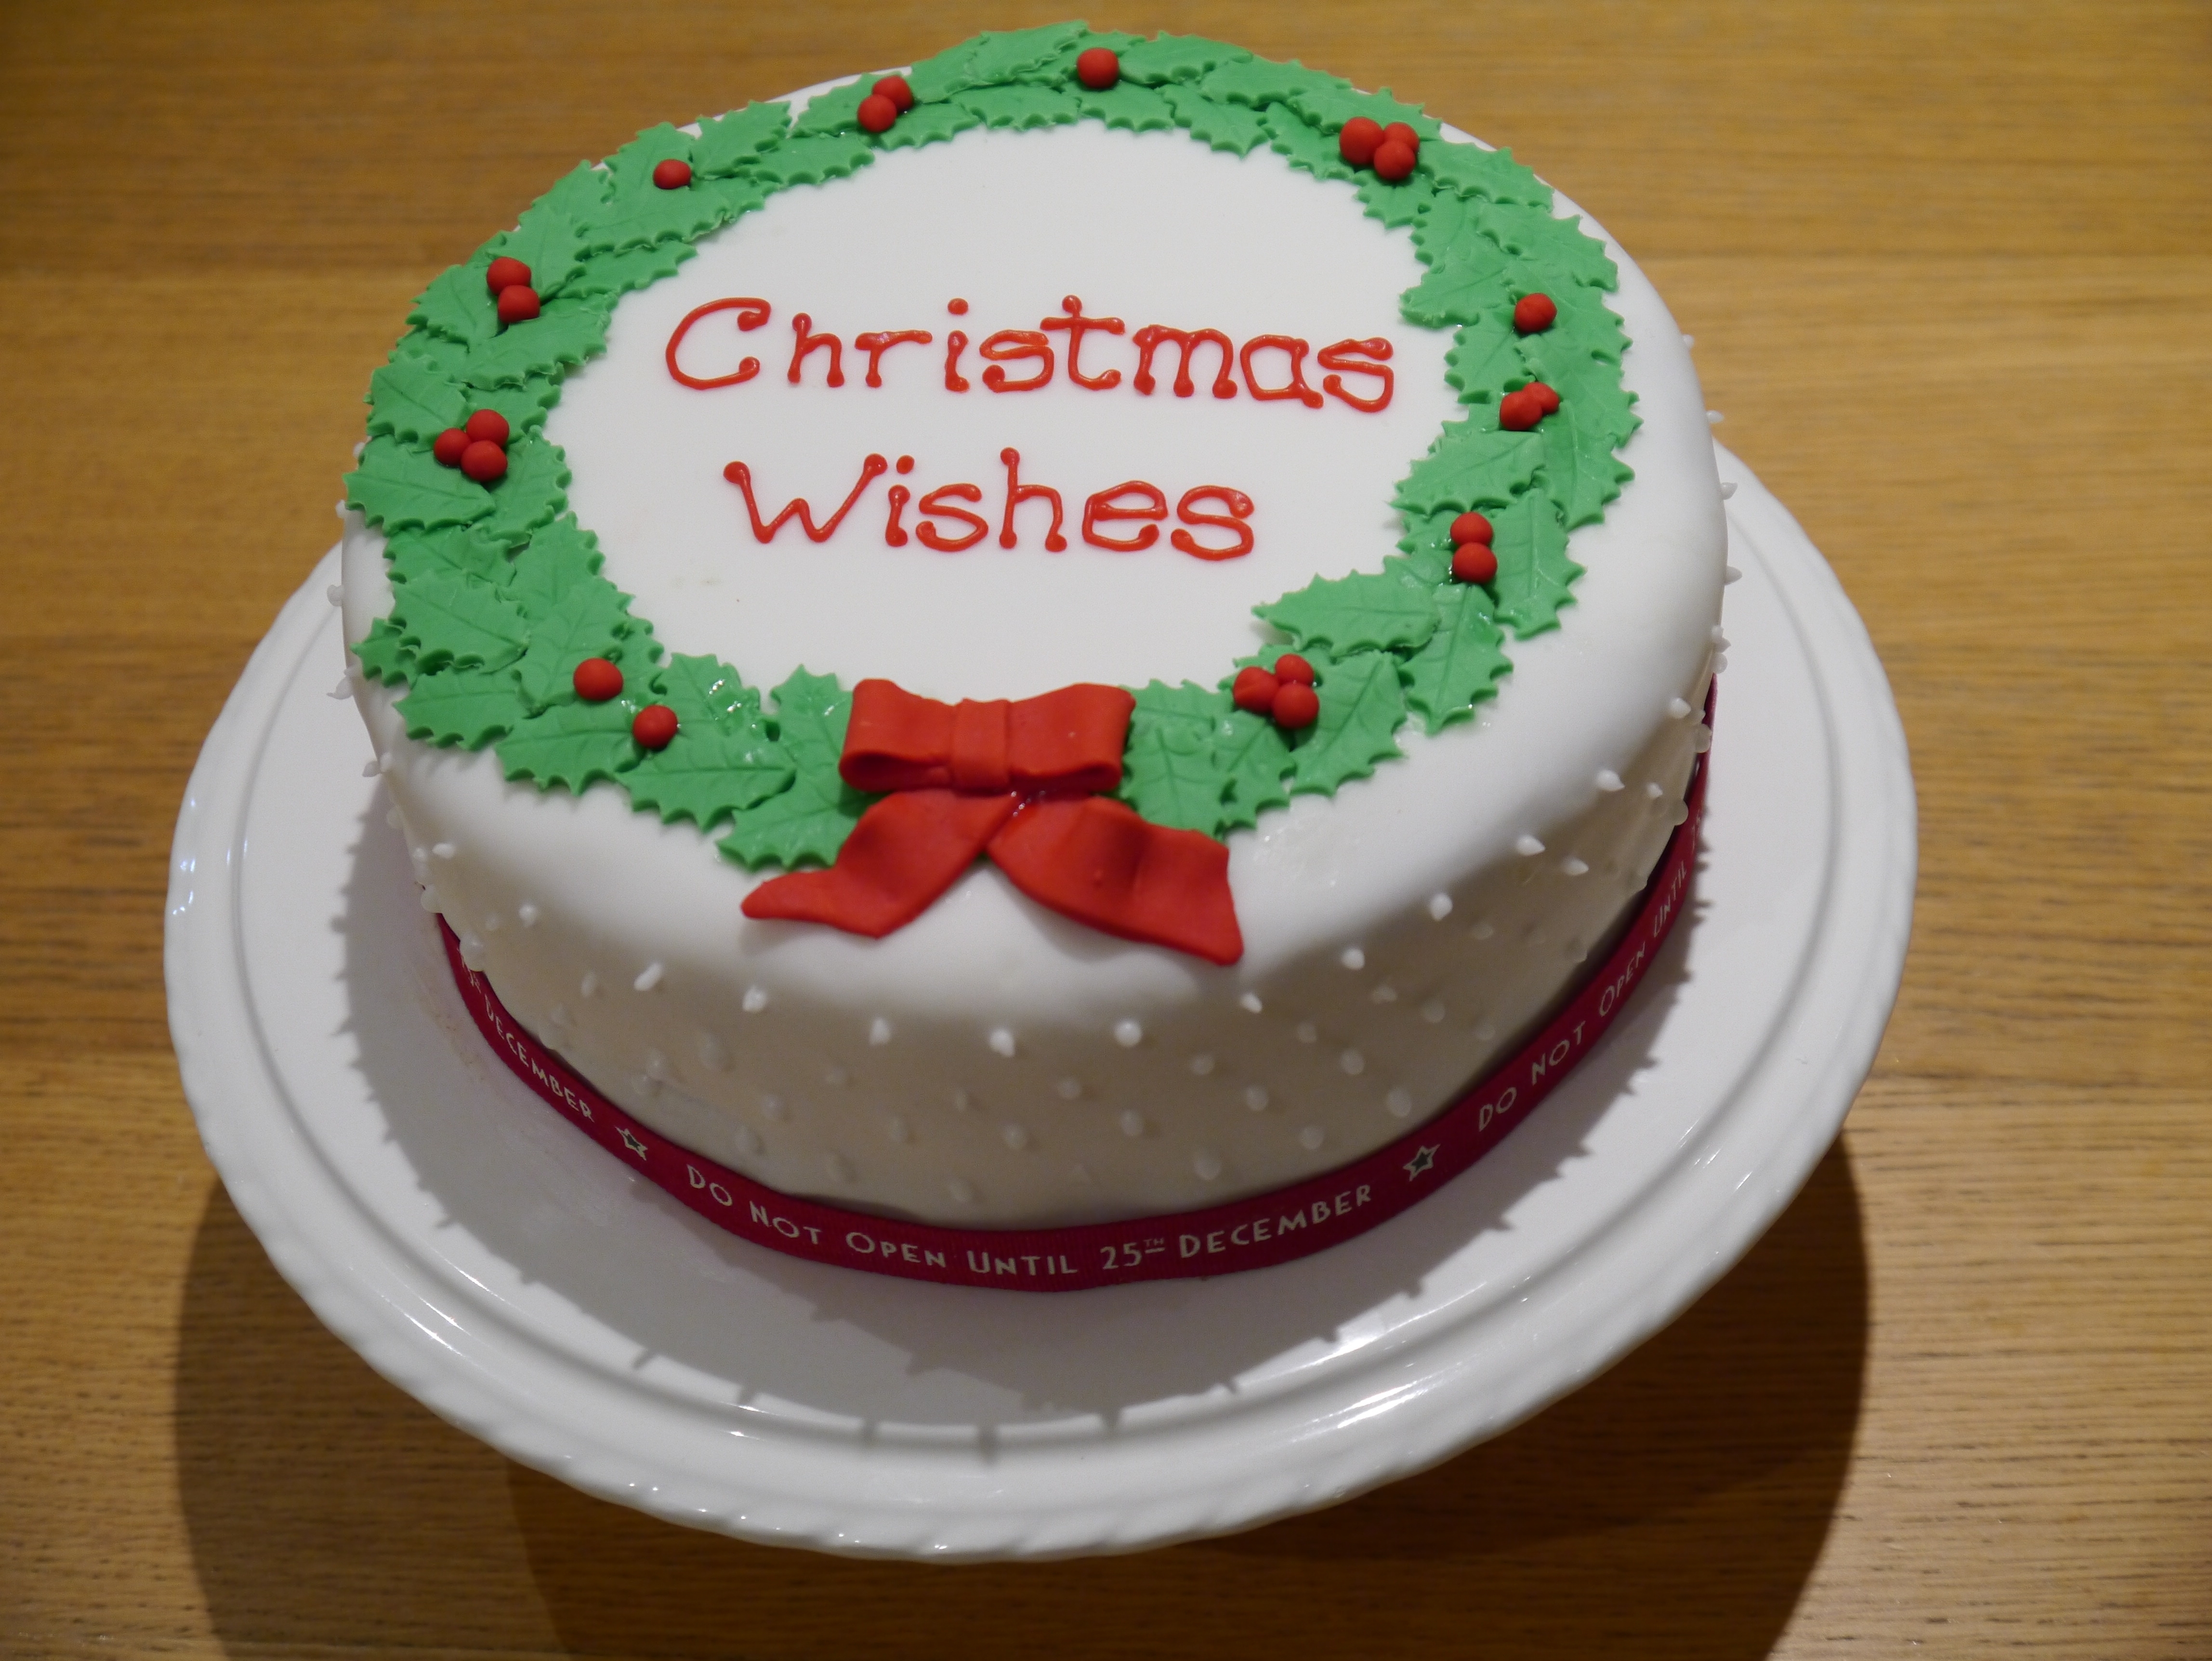
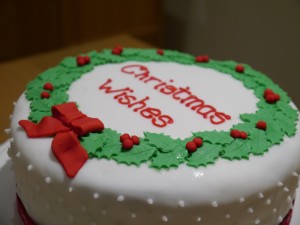
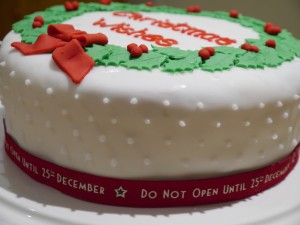
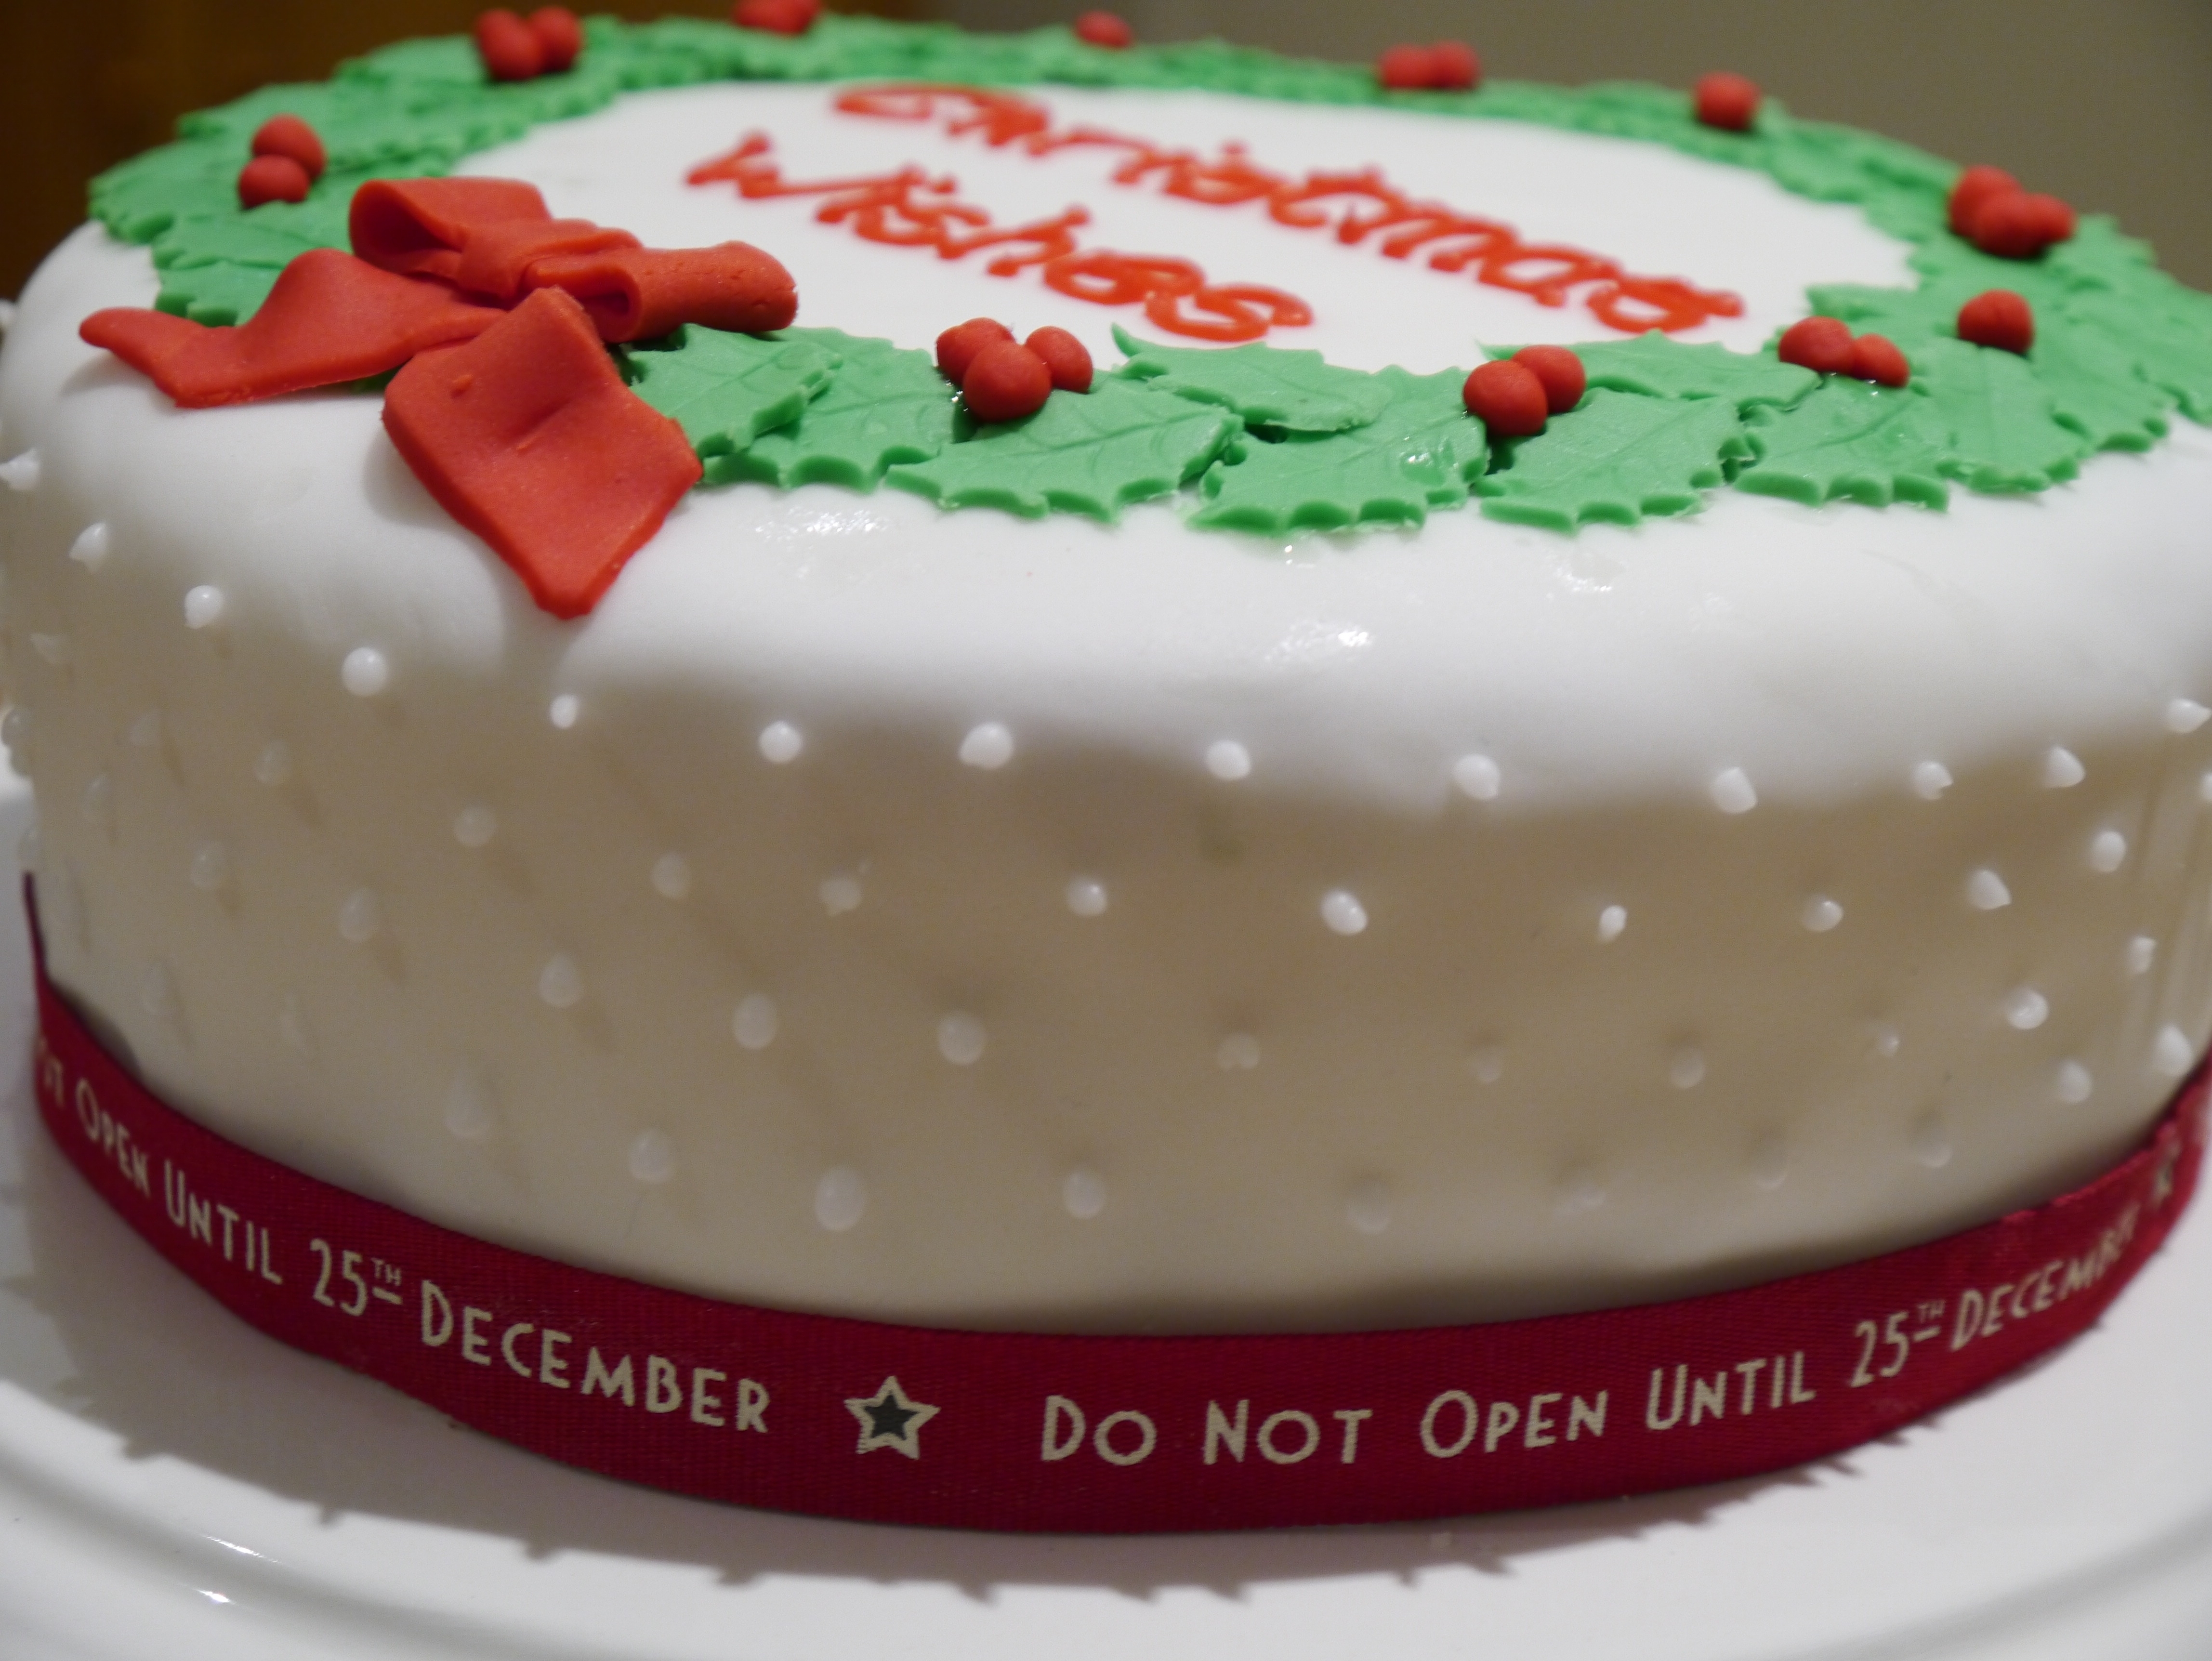
 Here is a simple and effective design for a Christmas cake, whether for a traditional fruit cake or, as in this case, a rich chocolate cake. The design is a holly wreath with hand rolled berries, a hand made red fondant bow and water icing dots around the edge in a diamond / diagonal pattern. The lettering in the middle is red water icing done with a writing nozzle. The only cutter I needed for this was a holly leaf (actually it was a cluster of holly leaves and I separated the leaves with a small knife. The chocolate cake is crumb coated and filled with vanilla frosting then covered in ready to roll white fondant.
For the chocolate cake
400g Plain flour
250g Golden castor sugar
100g Light muscavado sugar
50g Cocoa powder
2 tsp baking powder
1tsp bicarbonate of soda
half tsp salt
3 eggs (beaten)
150ml tub of sour cream
3 tsp vanilla extract
175g unsalted butter (melted)
125ml corn oil
300ml cold water
- Preheat the oven to 180c.
- Butter two 8in cake tins and line them with greaseproof paper (this is my least favourite part of baking but so worth it).
- Place all the dry ingredients in the mixing bowl of a stand mixer (sugars, flour, baking powder, bicarb, cocoa, salt) and mix (by hand) until they are well combined.
- Melt the butter in a microwave in 10 second bursts and stir to melt completely, avoid overheating it.
- In a large jug whisk the melted butter with the oil and then add the cold water, continue to whisk, then add to the dry ingredients in the free-standing mixer while mixing at a slow speed.
- Leave to mix until smooth and in a separate jug or bowl mix the beaten eggs, vanilla extract and sour cream.
- Add the cream mixture to the mixing bowl and continue to mix slowly until smooth.
- Split the mixture between the two tins and bake for about 55 minutes or until a cake tester comes out clean.
- Cool the cakes on wire racks before icing.
For the Vanilla frosting
160g unsalted butter
500g icing sugar
50ml whole milk
3 tsp vanilla essence
- Cream the butter and icing sugar in a free-standing mixer on a low speed it will look powdery first before becoming a smooth mixture.
- Mix the vanilla essence with the milk in a separate glass or jug (I use a re-purposed Tommy Tippee cup as it has handy volumes on the side).
- With the mixer on a low speed slowly add the vanilla milk.
- Beat the mixture on a high speed for at least 5 minutes
For the decoration
1 box of ready to roll white fondant icing (enough to cover an 8 inch cake plus extra to colour for the leaves and ribbon).
Non stick mat or greaseproof paper
Green and red food colouring paste
6 inch circle (a tin lid / cutter, loose cake tin base) to mark the top of the cake as a guide for the wreath.
Edible glue (or water)
White water icing thick enough to pipe
Red water icing thick enough to pipe (mde by adding red colouring paste to the wite water icing).
2 x Piping bags- or one and wash it in between the red and white icing.
2x writing nozzles – or one and wash it in between the red and white icing.
Ribbon for the bottom of the cake.
 Fill the cake with the vanilla buttercream then crumb coat the top and sides.
- Roll out the fondant on a non stick mat (or grease proof paper) until it is large enough to cover an 8 inch cake including the sides.
- Roll the mat or paper up with the fondant on and flip upside down and unroll onto the cake before carefully peeling off the non stick mat.
- Gently smooth the fondant around the top and sides and cut off the excess from the bottom with a pizza wheel or sharp knife. Discard any fondant that has cake crumbs on but keep the remainder to make the decorations.
- Colour some of the remaining fondant green by kneading through the gel colour then roll out the fondant and cut out holly leaves.
- Use the 6 inch circle (I use the top of my piping nozzle tin) to lightly mark a circle on top of the cake then attach the holly leaves around this circle using either edible glue or water. Be careful if using water as using too much can make the top of the cake sticky and too wet.

- To make the wreath pattern I made a v shape with two leaves on either side of the marked line all the way around the circle, then added extra leaves at points that the whit icing showed through.
- Colour the remaining fondant red by kneading through the gel colour then roll out the fondant and using a straight edge cut a long strip to make the ribbon.
- Cut your long strip of red fondant into 4 equal pieces.
- Take piece one, fold both ends into the middle to make the loops of the bow and use a spoon handle or similar to separate the top of the loops from the bottom a little to make the loops more bow-like.
- Take pieces two and three and cut off one end of each at an angle like the end of a ribbon – attach the other ends to the bottom of piece one to make the tails of the bow. Bend the tails slightly to give movement. Use edible glue or water to join the pieces together.
- Cut a small strip from piece four and use this to make the centre of the bow using edible glue or water to attach it.
- Place the bow on the wreath. This is now the bottom of the wreath.
- Use the remainder of piece four and any other left over red fondant to make holly berries. Attach them around the wreath in groups of 1, 2 or 3.
 Mix white water icing adding a teaspoon of water at a time until the icing will hold it’s shape when piped with a writing nozzle.
- Leaving space for your ribbon at the bottom pipe 4 rows of dots around the side of the cake.
- Pipe the top two rows together in a zig zag pattern.
- Pipe the third row between the dots of the second row and below the dots from the 1st row so that a diamond pattern begins to appear.
- Pipe the fourth row between the dots of the third row and below the dots of the second row to complete the diamond pattern.
- Either mix up a batch or red water icing that will hold it’s shape when piped with a writing nozzle or colour any remaining white water icing red and replace in a clean piping bag.
- use a straight edge to very faintly mark two lines for the letters to follow above the bow.
- Pipe Christmas Wishes in the middle of the cake
- Attach the ribbon around the bottom of the cake – if you use ins be sure to remove them before serving.

One comment