 Last week was a bit crazy, 2 blogging meet ups and a trip to the Creative Stitches and Hobbycraft show running at Event City on Friday. The show was full of fabulous supplies for crafty types and was running along side the Woman’s Weekly Live event which included a cupcake decorating session by one of their editors. Sue McMahon demonstrated some easy tips to make stunning cupcakes (perfect as this week is national cupcake week) as well as how to make an easy cupcake bouquet. The bouquet was beautiful and inspired me to think about how you could make an entirely edible bouquet of some sort.

 The Creative Stitches and Hobbycrafts show will be returning to Event City Manchester in Febuary just before Cake International which will run from the 7th to the 9th of March with some fabulous demonstators and guests.
Back to my edible bouquet and at first I thought about baking cupcakes in icecream cones and I will have a go at this sometime but since the Great British Bake Off this week will feature tuile biscuits which I’ve never made I decided to try and make a tuile bouquet to submit to this week’s Great Bloggers Bake Off hosted by The crazy kitchen and Mummy Mishaps.
Tuile bisuits are basicly egg whites, sugar, butter and flour. Wikipedia says that they’re traditionally flavoured with almonds but the recipe I used flavoured with vanilla which is great as far as I’m concerned. They’re supposed to be curved to resemble the roof tiles in Provence. To make the bouquet I made 2 bowls and several cones instead of curving them.
The recipe I used was from a site called Fine Cooking and you can find it here. I spent a bit of time figuring out what the amounts would be in grams as cup measurements make me nervous. The weights I used in the end are as follows:
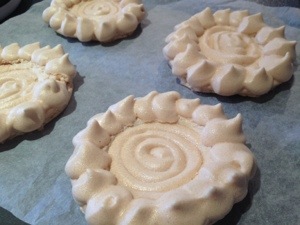
2 large egg whites (don’t whip them, I didn’t look at the recipe so we ended up with bonus meringues for lunch on Sunday)
113g of melted and cooled unsalted butter
96g of Castor Sugar
68g of Plain Flour
1 tsp of Vanilla extract
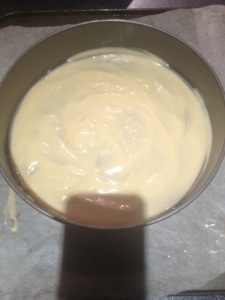
- I used a spatula to combine the egg whites and sugar before adding in the melted butter. (Make sure it has cooled as you really don’t want to start cooking the egg whites)
- Next I added the Vanilla essence and then finally stirred in the flour until I had a smooth batter.
- I rested the batter in the fridge for a couple of hours before attempting to make and shape the tuiles.
 I filled a piping bag with sugar and tied it off with a hairband to make a cone for moulding my tuiles. (Make sure it’s not going to melt the bag with the heat of the biscuits though!)
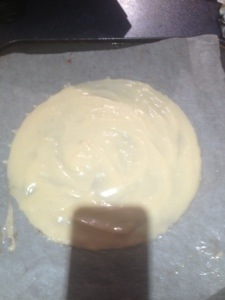
- When I was ready to bake the tuiles I preheated my oven to 180c and used well buttered greaseproof paper on a baking tray.
- I made the tuiles one at a time because I needed time to shape each one.
- First I made some small circular tuiles for the cones. I spread the batter as thinly as possible onto the buttered greaseproof paper and baked them for 6 minutes at 180c until they were golden a round the edges.
- I immediately lifted them off the paper with a palate knife and did my best to curve the (very hot) biscuit around the cone shape. It wasn’t easy but you can’t wait because otherwise the biscuits set. I’m sure just curving them over a spoon is much more sensible 🙂
- Next I made 2 large circular biscuits using a cake tin without the base as a mould. These took slightly longer (about 12 minutes but I checked every 2 minutes) I shaped them over a cereal bowl and a cup to make two bowl shapes.


I wanted to pipe roses into the cones so I made up some white chocolate ganache and also some dark chocolae orange ganache.
For the white chocolate ganache:
100g White chocolate
50ml double cream at room temp
- I melted my chocolate in a microwave using 15 second bursts and stirred continually once the chocolate started to melt, using the heat in the already melted chocolate to melt the remaining lumps.
- I then let the choclate cool as much as possible (while still being melted) before mixing in the cream and stirring to get a glossy finish.
- I continued to stir as the mixture cooled.
The mixture took a while to set enough to pipe and I would be temped to use a little less cream next time. I used shot glasses to support my cones while I piped.
For the chocolate orange ganache:
I used the same method as above but substituted dark chocolate of white. The mixture wasn’t as smooth as the white chocolate and I’m sure chocolate experts could tell you what I did wrong. I added a good splash of Cointreau to get the orange flavour so this won’t be going to my kids 🙂
Finally I used the dark chocolate ganache to sit one tuile bowl inside the other and to fill the remaining cones. I seem to have spent this recipe running out of things. Because of a few false starts with the tuiles I didn’t have as many cones as I wanted and because I’m not too familiar with piping ganache I used too much and began to run out of that also! The end result looked pretty but would have been better with more cones 🙂
Oh and these are the meringues we ended up with when I whipped the first egg whites like a numpty!


oh wow, well done, these look fab! Very brave to make Tuiles….
you are so brave to make tuikes and i love the bouquet effect you went for – really reactive. fab actually. thanks for joinng in x x
Oh my goodness – not only tuiles, but a tuile bouquet?! That’s impressive!
oh wow your such a busy women off to here there and everywhere you must have roller skates on your feet and not only that you made the most amazing bouquet clever ol you so pretty
Lovely! Your method sounds much less finger-burning than mine too. I had hopes to make a bouquet and couldn’t bring myself to do it after work. I wonder what the melted butter add – richness I suppose?
Wow, they are amazing! I had no idea how to make tuiles before I watched the programme and I didn’t realise that they were so fiddly. You’ve done a wonderful job!
Great job on such a tricky bake!
Woah there, they are impressive!
I’m impressed you can make a tuile, let alone a whole bouquet of them! Amazing!
Oh, wow! That’s really impressive. Never thought of a tuile bouquet before, it looks fantastic x
extremely impressive, I just managed to pop a few out and some in the bin!