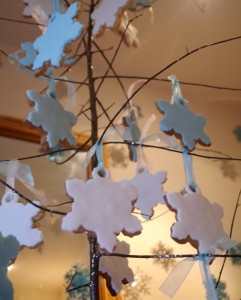
 My daughter’s birthday party was this Saturday and my Frozen obsessed munchkin had the day of her dreams. She’s been asking for an Anna birthday cake for months, which he got, along with an entire Frozen themed party. I have a snowflake cookie cutter which I use at Christmas time so I decided to try and make a snowflake covered tree inspired by the scene in Frozen where Anna and Kristoff meet Olaf for the first time.
You will need a snowflake cookie cutter, a wooden spoon handle or small circular plunger cutter, blue or white ribbon, ready to roll white fondant icing, blue gel food colour.
The cookies need a hole to thread the ribbon through, I used a sugar craft circle cutter but the handle of a wooden spoon would do just as well. To make the cookies I used my normal vanilla cookie recipe:
175g unsalted butter (softened)
200g caster sugar
2 large eggs (beaten)
1 and a half tsp vanilla extract
450g plain flour
1tsp baking powder
1tsp salt
- Cream the butter and sugar in a freestanding mixer or by hand
- Add the vanilla extract to the beaten egg then slowly add to the butter mixture while mixing
- In a separate bowl mix together the flour, salt & baking powder
- Add the dry ingredients to the mixing bowl and mix at a slow speed until combined
- Wrap your dough in cling-film and place in the fridge to cool for at least an hour (freeze half if you like)
- Roll out your dough and use a snowflake cutter to cut out the cookies
- Use the small circular plunger cutter / the handle of a spoon to make the holes for the ribbon.
- Bake at 180c for 8-12 minutes or until slightly golden then cool on wire racks

To decorate my biscuits I use ready to roll white fondant icing. I used some plain white and coloured some blue with a blue gel colour.
- To add colour to the ready to roll icing use a cocktail stick to add a very small amount of gel and knead as you would bread dough.
- I find the consistency of ready to roll icing a little too sticky to work with when it is straight out of the packet, so I add icing sugar to the work surface when kneading in the same manner as you would use flour when kneading bread. This makes the icing easier to handle.
- Roll out your icing and use the same snowflake cutter you used for the cookies to cut out. I found it easier to attach the icing and then cut out the hole for the ribbon once it was over the hole in the cookie.
- To attach the icing to the cookie Brush the back of your icing shape with a little water and place the cookie on top. Turn the cookie right way up and use the circular cutter to cut out a hole in the icing over the hole in the cookie.
- Leave to set
- Once the icing has set thread ribbon through the holes ready to tie onto your glittery tree.
The “tree” is a branch I cut from our garden and decorated with my daughter. I used a glazed plant pot with a hole in the bottom to support the tree and secured it with Air Drying Clay that you can get from an arts and crafts shop (I’ve been watching Mr Maker on cBeebies for too long!) We placed a pvc mat on the kitchen floor to catch and mess and spent a happy couple of hours painting the tree with PVA glue then sprinkling silver glitter on it. My daughter loved helping make the tree for her party and was so pleased when she saw it finished.
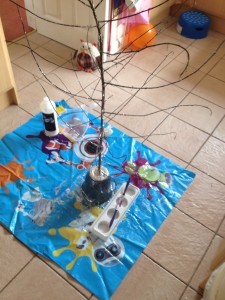 To make a glittery tree you need:
A mat / cut up binbag to catch the mess
Air drying clay
A plant pot with a drainage hole in the bottom
A branch from a tree that you have permission to take
PVA glue
Paint brush(es)
Glitter (preferably in a shaker)
- If the branch has leaves on it strip them off.
- Turn your plant pot upside down and place the end of the branch through the hole so that it reaches the floor.
- Use the air drying clay to secure the branch, making sure it goes straight up.
- paint the branch with pva glue.
- Sprinkle the gliter over the glue on the branches to make a sparkly frosty looking tree.
- Leave the glue to dry and the clay to set.
- Tie the snowflake cookies onto the branches.
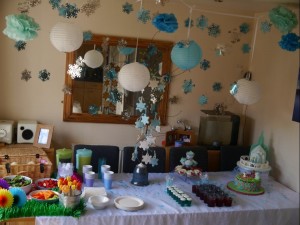

Wow they look fantastic! I bet the party was a huge success x #recipeoftheweek
Wow Jenny! These are incredible – You definitely win the award for Mother of the Week for this party. Thanks so much for linking up with #Bakeoftheweek x
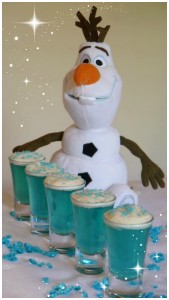
I have managed to avoid seeing Frozen so far – on the advice of so many people whose children are obsessed by it. I am however loving all the creative ideas it is inspiring. I thought the mini-garden I saw recently was going to be unbeatable but your Frozen-themed party is a gem! Love the tree and love the jelly shots! Your daughter is a lucky girl!
Thank you, I have a few other bits to write up for it including the cake. Hopefully they’ll be done by the end of the week.