Last week I made a rose tinted layer cake for my daughter’s birthday, she loved blowing out the candles and we have been working our way through it since Monday. Because her party wasn’t until the Saturday this (obviously) meant that she would need another cake for blowing out the candles at the party. I decided to aim for a tasteful and understated cake with a few flowers and butterflies on it. (This is the point where I start wishing sarcasm came across better in print ;))
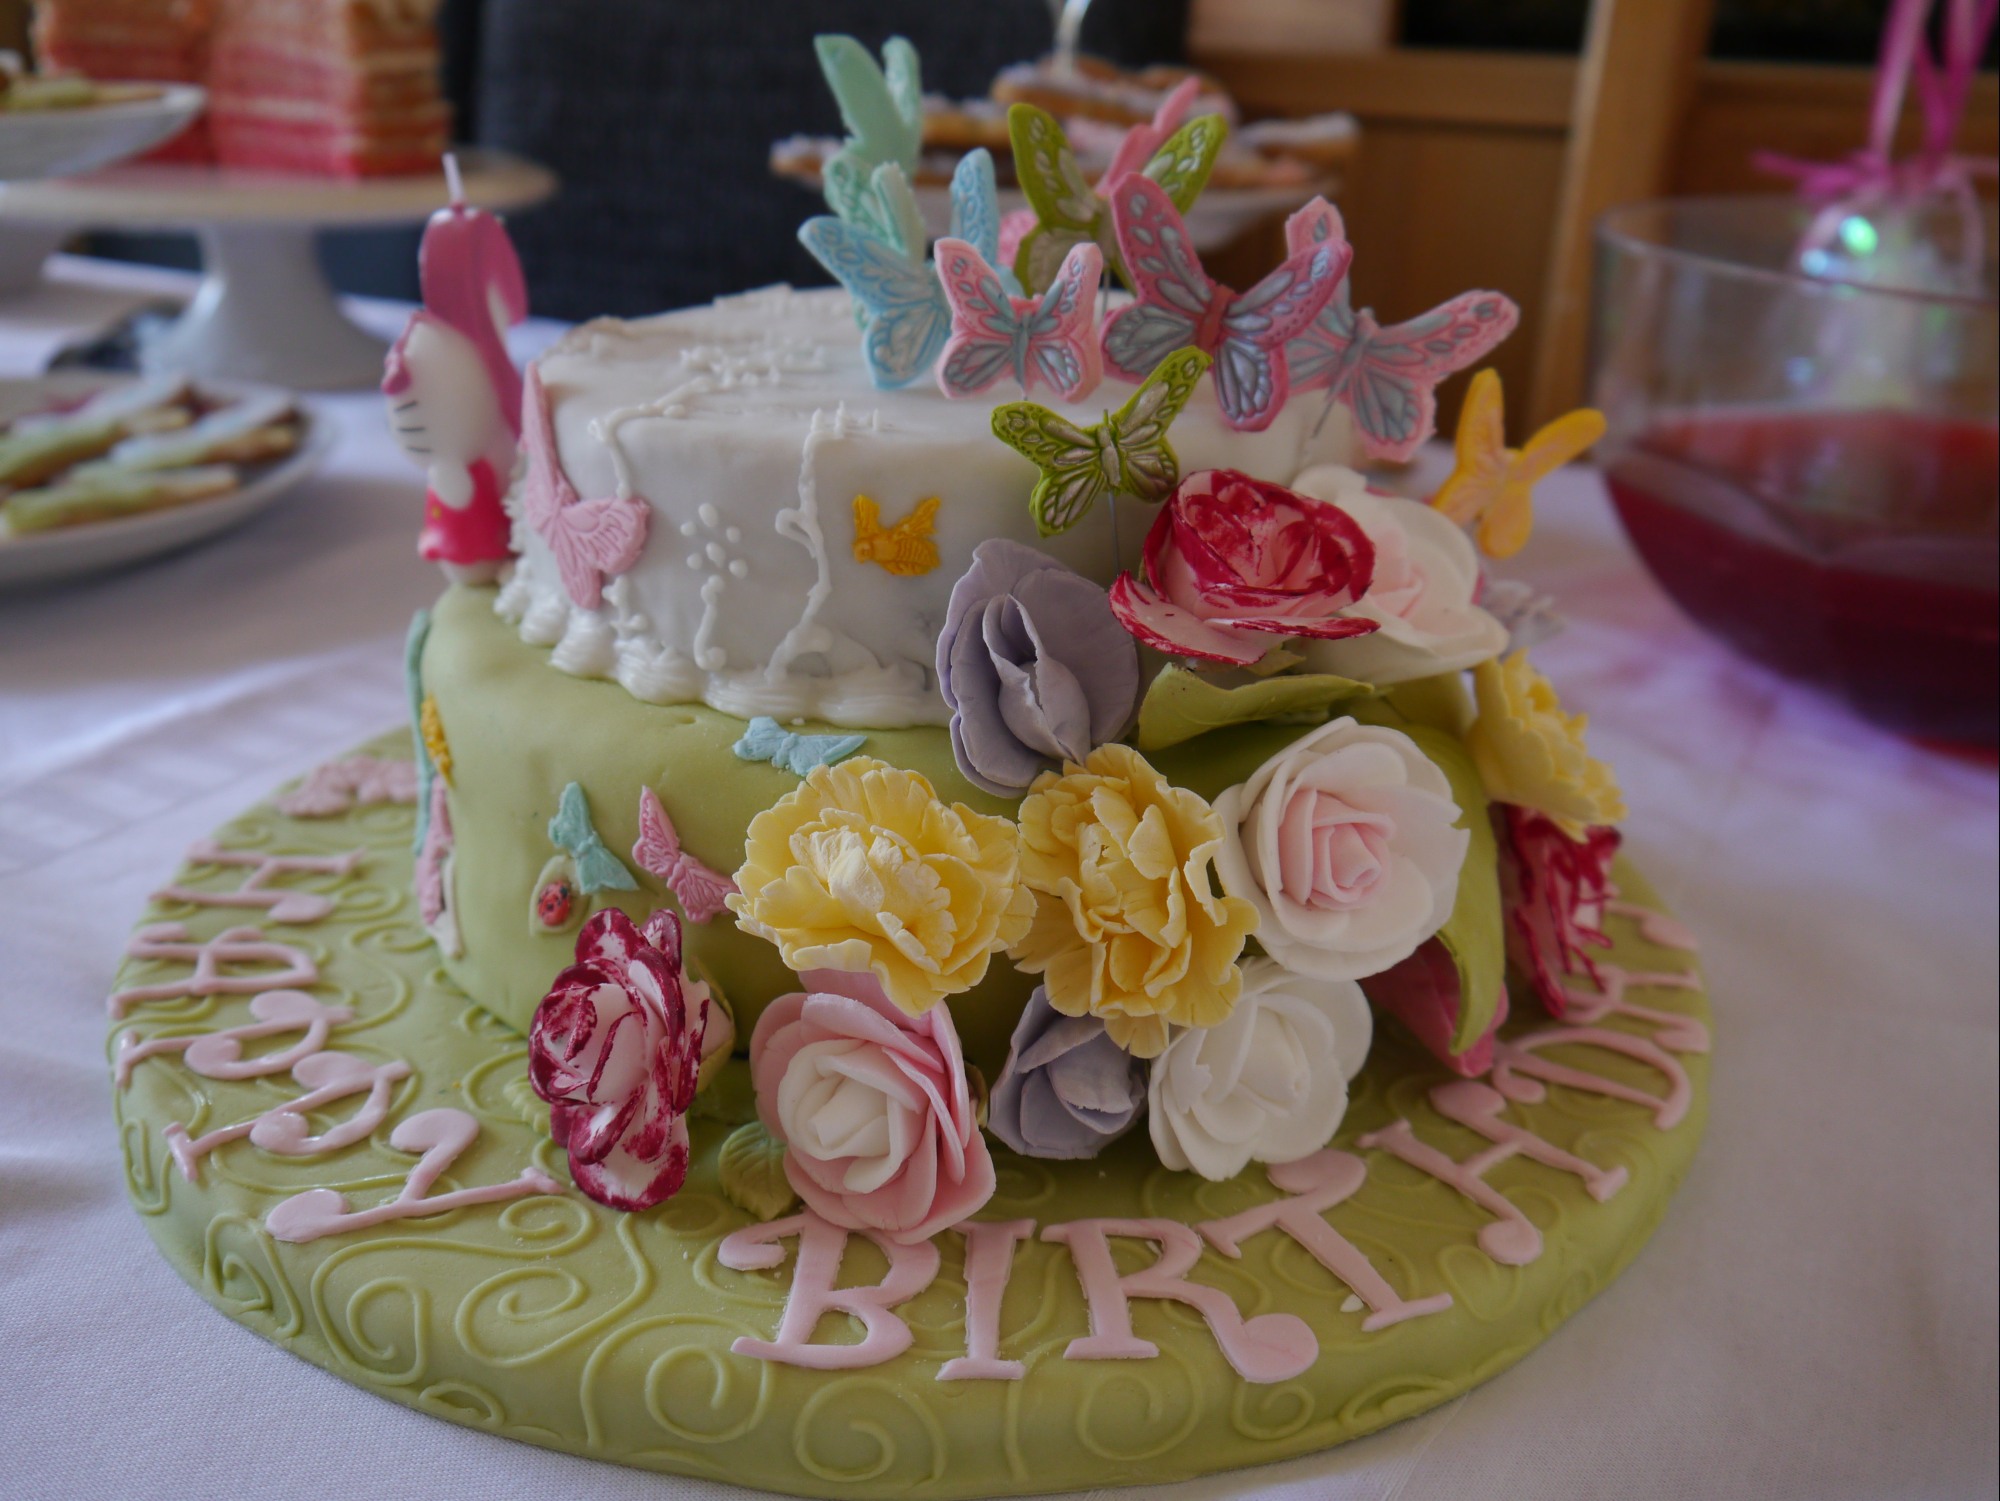
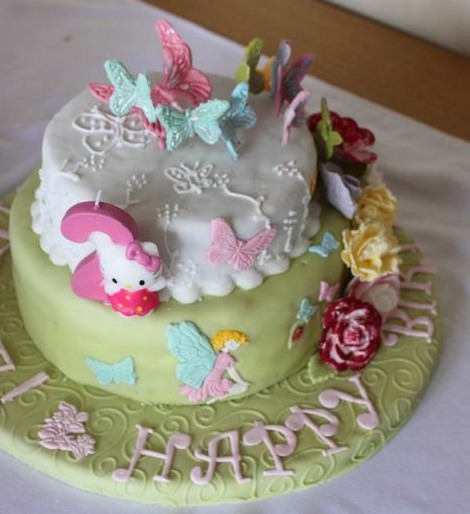
I made all the decoration myself, something I’m fairly proud of as I’d never made sugar paste flowers before. I think if I’d tried them a few years ago, when I first started teaching myself to decorate cakes it would have been a disaster; but over the years I’ve got better at handling sugarpaste and the end result is pretty good I think. The downside of this is that I got a little carried away, but then again you have to ask the question: “Can a two year old girl’s birthday cake ever have too many flowers and butterflies??”
The bottom layer of the cake was a dense chocolate cake to take the weight of the vanilla sponge of the top tier.
The chocolate cake recipe is adapted from Nigella Lawson:
400g Plain flour
250g Golden castor sugar
100g Light muscavado sugar
50g Cocoa powder
2 tsp baking powder
1tsp bicarbonate of soda
half tsp salt
3 eggs (beaten)
150ml tub of sour cream
3 tsp vanilla extract
175g unsalted butter (melted)
125ml corn oil
300ml cold water
- Preheat the oven to 180c.
- Butter two 8in cake tins and line them with greaseproof paper (this is my least favourite part of baking but so worth it).
- Place all the dry ingredients in the mixing bowl of a stand mixer (sugars, flour, baking powder, bicarb, cocoa, salt) and mix (by hand) until they are well combined.
- Melt the butter in a microwave in 10 second bursts and stir to melt completely, avoid overheating it.
- In a large jug whisk the melted butter with the oil and then add the cold water, continue to whisk, then add to the dry ingrdients in the free-standing mixer.
- Leave to mix until smooth and in a separate jug or bowl mix the beaten eggs, vanilla extract and sour cream.
- Add the cream mixture to the mixing bowl and continue to mix until smooth.
- Split the mixture between the two tins and bake for about 55 minutes or until a cake tester comes out clean.
- Cool the cakes on wire racks before icing.
The vanilla sponge recipe is as follows:
125g Castor sugar
125g Unsalted butter (softened)
125g Self raising flour
2 Eggs (beaten)
1 and a half tsp Vanilla extract3 tablespoons of whole milk
- Preheat the oven to 180c.
- Butter two 6in cake tins and line them with greaseproof paper.
- In a freestanding mixer cream the softened butter and sugar.
- Add the vanilla essence to the beaten eggs.
- Add the egg mixture to the butter and sugar while mixing on a low speed.
- slowly add the flour.
- Add milk until the mixture drops easily off a spoon.
- Split the mixture between the two 6 inch tins and bake for aprox 20 minutes or until a cake tester comes out clean.
To decorate the cake I used:
White roll out fondant icing
White floral sugar paste
Assorted gel colours
Carnation, sweetpea and rose cutters
Fairy patchwork cutters
Butterfly patchwork cutters
10 inch cake drum
6 inch cake board
wooden cake dowels cut to size
- I use buttercream to cover the cakes before adding the fondant, the recipe is here.
- Between the layers of the cake I use buttercream (and jam as an optional extra for those with a really really sweet tooth)
- Colour the fondant with gel colours using icing sugar to dust the work surface while kneading the colour through.
- Roll out on a non stick surface- there are specialised mats available, I used a textured one for the 10 inch cake drum and a smooth one for the cakes. If you don’t have a mat though grease proof paper works just as well.
-If the fondant is too sticky work a little extra icing sugar through it. - Roll out thinly and evenly then roll up the mat and lift over the cake (after spreading the buttercream over the cake evenly).
- Unroll the mat so it sits upside down on top of the cake
- Peel away the mat from the fondant then smooth the fondant over the cake.
- Cut away and excess fondant with a pizza wheel or knife.
- To put the two tiers together you need too add some reinforcement to the lower tier. Cut 4 cake dowels to the height of the bottom tier and push through it so that they sit under where the next tier will be. The next tier should be placed on a cake board (thinner than a cake drum) and sat on top of the dowels.
- Add whatever decoration you wish.
- To hide the join between the tiers either use piped royal icing or ribbon secured with pins.
I love making birthday cakes for my kids and seeing their faces when they see their cakes, but I have to say that I am always glad I only have to do it twice a year 🙂
I am adding this post on the teatime treats linkey for June run by What Kate Baked and Lavender and Lovage
I am also adding it (tenuously) to the calendar cakes linkey run by Dolly Bakes and Laura Loves Cakes, their theme for the month is things containing jam.


STUNNING! What an absolutely GORGEOUS cake and thanks so much for adding it to tea time treats too! Karen