 Welcome to the final part of my Lego Superheroes cake tutorial. In Part 1 and Part 2 I ran through how to level and cover a cake with fondant, and how to create superhero pictures using a pin (i’m like Macgyver). This post is about how I made the Lego bricks and Minifigures at the front of the board.
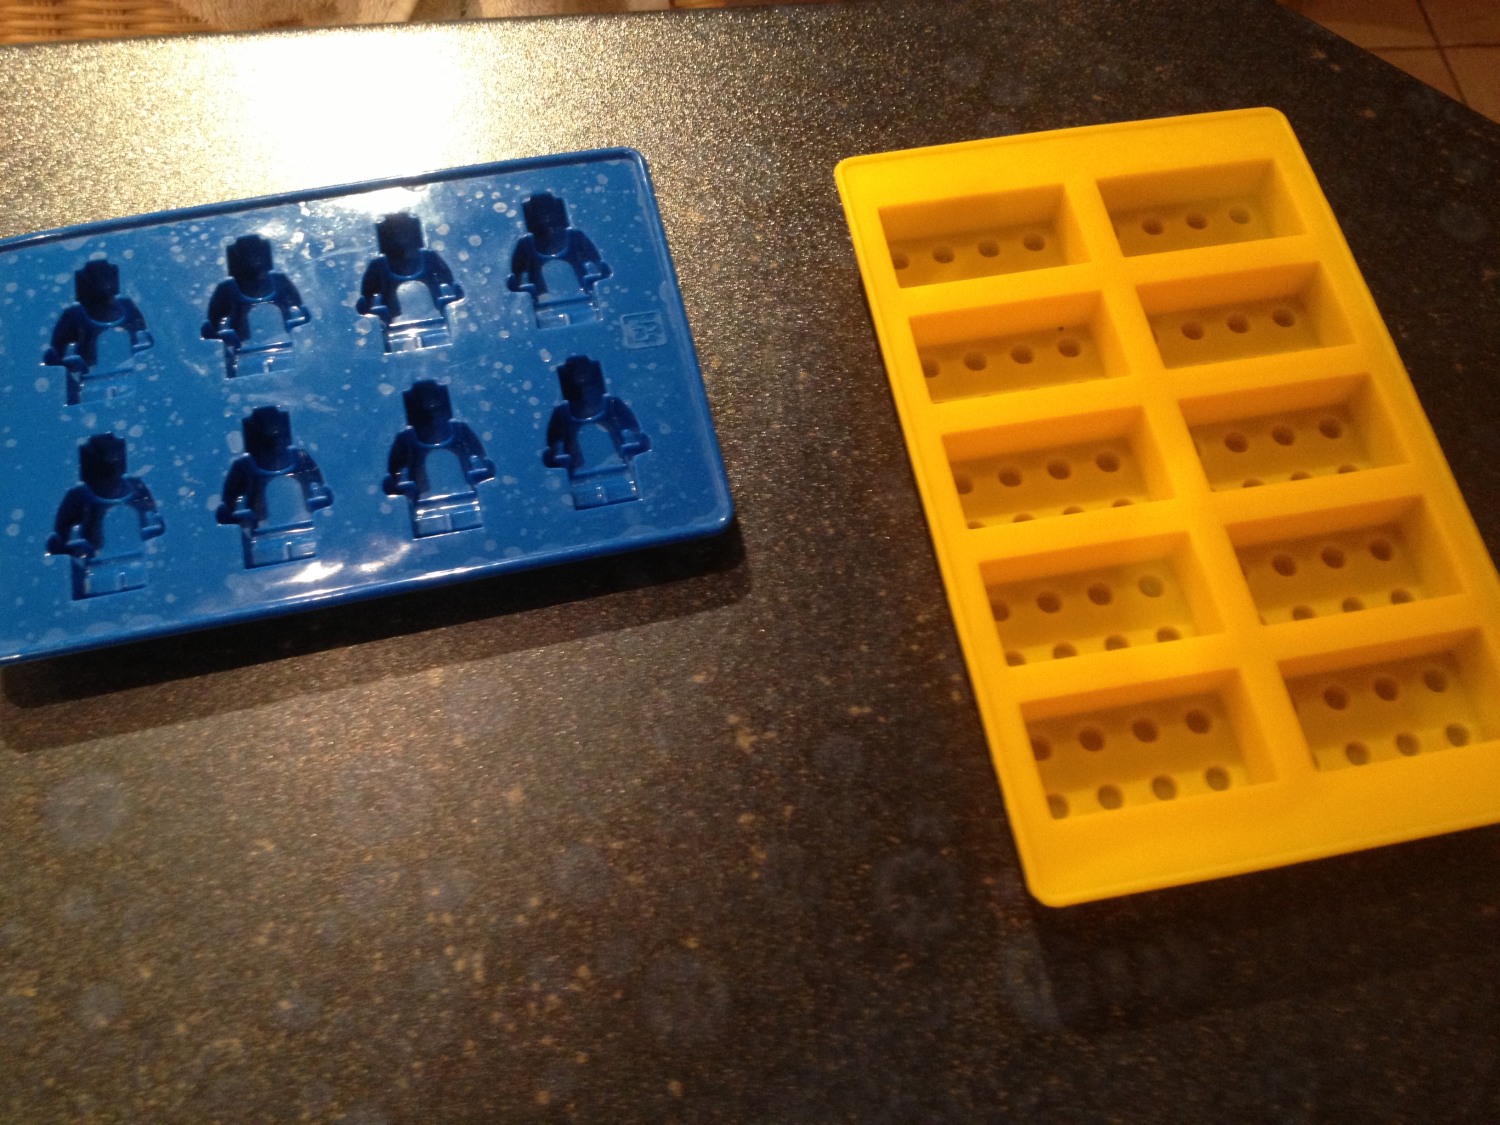 To make the bricks and figures I used moulds bought from The Gift Oasis via Amazon, I was very impressed with their customer service as they were out of stock when I ordered but rather than just waiting until the stock came in they contacted me to ask when I needed the items for, if I would like an alternative product or a refund? I chose to wait and the moulds arrived the next week.
Making the bricks
Initially I was going to use floral paste coloured yellow to make the bricks but after a couple of unsatisfactory attempts I was inspired by the Angel Eden Blog who used the same moulds as me to use my Wilton candy melts instead. I first used them at valentines and wrote about it in my first ever blog post, more recently I used them to make lollies for my daughter’s birthday. They are super easy to use and taste like most white chocolate. I melted the yellow candymelts in a microwavable bowl using 15 second bursts and stirring in between each one. Once most of the candymelts had melted I continued to stir and allowed the heat from the bowl to melt the rest I poured the candymelts into the mould and wiped away any overflow to give clean lines. I then popped the mould into the fridge to set – the instructions actually say not to set in a fridge but I’ve never had any problems and in the heat lately I didn’t really have much option. Once set I popped out lovely shiny lego bricks ready to use on the board.
Making the minifigures
 The minifigures are made from coloured flower paste. I made several figures in Blue, Red and skin coloured. I pushed the paste into the mould and then, because I needed to remove them from the mould but still be able to manipulate them afterwards, I froze them. I removed the frozen figures in one piece and allowed them to defrost before using a sharp knife to separate the arms and legs from the bodies in order to pose the figures. Once I was happy with the positions I used a fine paint brush, cocktail sticks and gel colours to add detail to the figures. For Captain America’s face I also dissected a skin tone figure to get the bottom half of a face and cut out the equivalent section of the blue figure. I then used edible glue to insert the skin toned bottom half of the face. I was very happy with them, ok they may not have been perfect but from a distance they looked ace and I think it was obvious which characters they were which was all I really wanted. As I did with the main cake I used pearlescant colour for Iron Man’s power source and eyes.
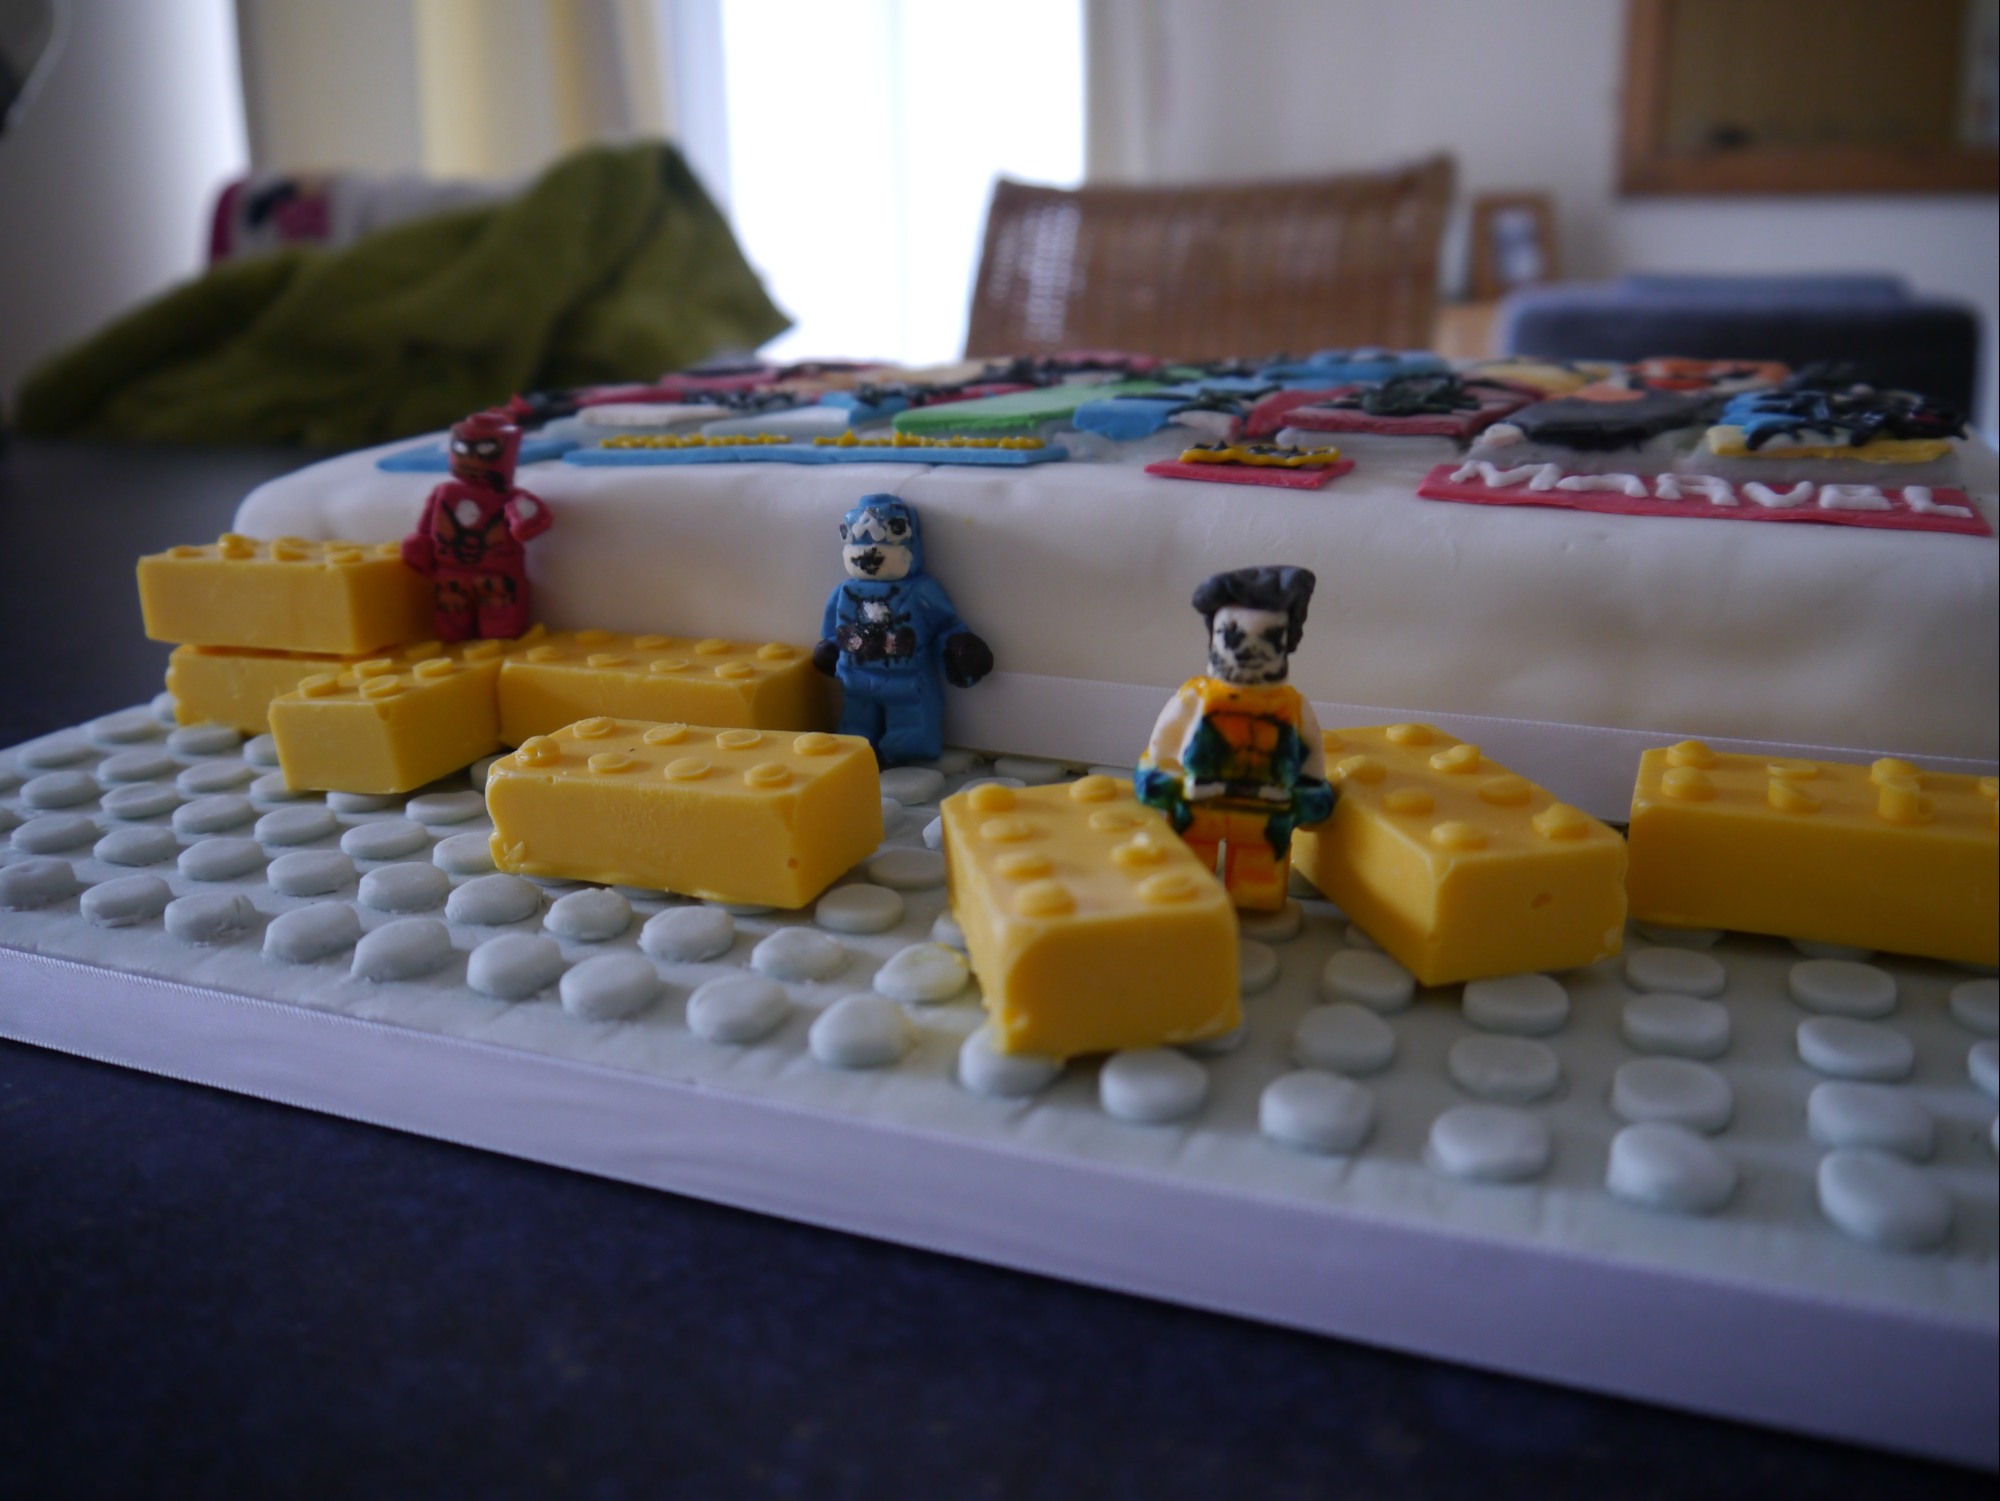
Attaching to the board
To attach my bricks and figures to the board I used a combination of two methods. I wanted to stack some of the bricks and also make sure they wouldn’t move around when transporting the cake so I decided the easiest way was to melt the bottom of the blocks and stick them to the board or to each other. I have a mini blowtorch which I use for crème brûlée
and it was perfect for the job. Once I had arranged the bricks on the board I decided where to place the figures. Captain America was simply stuck to the side of the cake with edible glue. For Iron man I used the blow torch to melt the top of the brick he would stand on and pushed his feet into it. Wolverine I stood between two bricks and melted them slickly where his hands touched them.
That’s it then, I hope you enjoyed my first try at a decorating tutorial. The cake was a big hit at the BBQ it was made for and as an amateur I was very happy with it.

The cake looks fantastic! I’m really glad my post helped out a bit
Abi 🙂
Hey! Thanks for mentioning our store and I’m just so glad we created an impression! It’s what keeps us going.