 Following on from my post Lego Superheroes Cake Part 1 where I showed how I levelled the cake and covered it with fondant icing I’m going to run through how I added the characters to the individual panels.
For this stage I used Floral paste which I had in the house from previous projects. I usually only buy white and colour as needed with gel colours, however I also had some black floral paste left over from an earlier project so I used that for all the black sections.
To save myself repeatedly making the same colours I started with all the red sections. I kneaded red gel colour (Wilton Red Red from the 8 colour selection if you’re really interested) through the white floral paste and added normal icing sugar as I find it too sticky to work with otherwise. I then rolled out the paste and laid the printed out template over the top as I did in part 1 to create the grey panels. 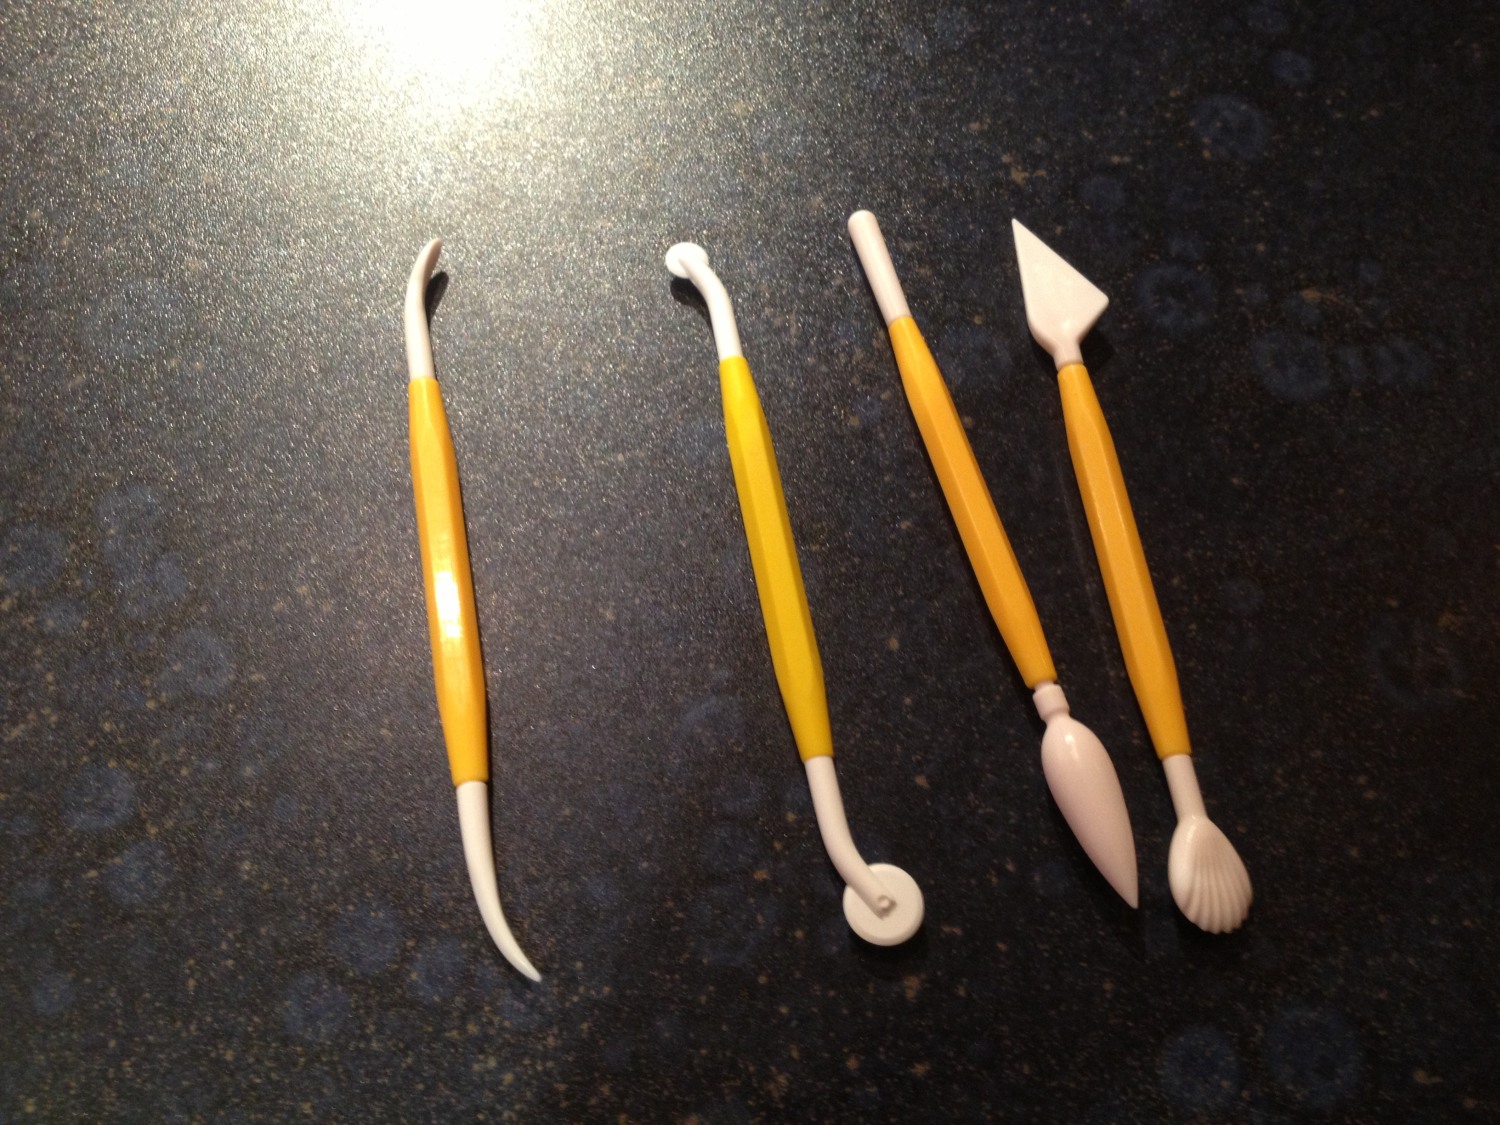 I used a clean pin to prick out the red sections of the first character “Deadpool” and then repeated this for Spiderman. I used a cake decorating tool like a mini pizza wheel to cut out the shapes. The tool is part of a set of about 12 tools. There are some good quality branded sets around but they get pretty pricey, I’m happy to admit mine is a cheap set from China, yes they come apart occasionally after being in the dishwasher but this is my hobby and while I can justify spending around £8 for the set I struggle to justify nearer £30.
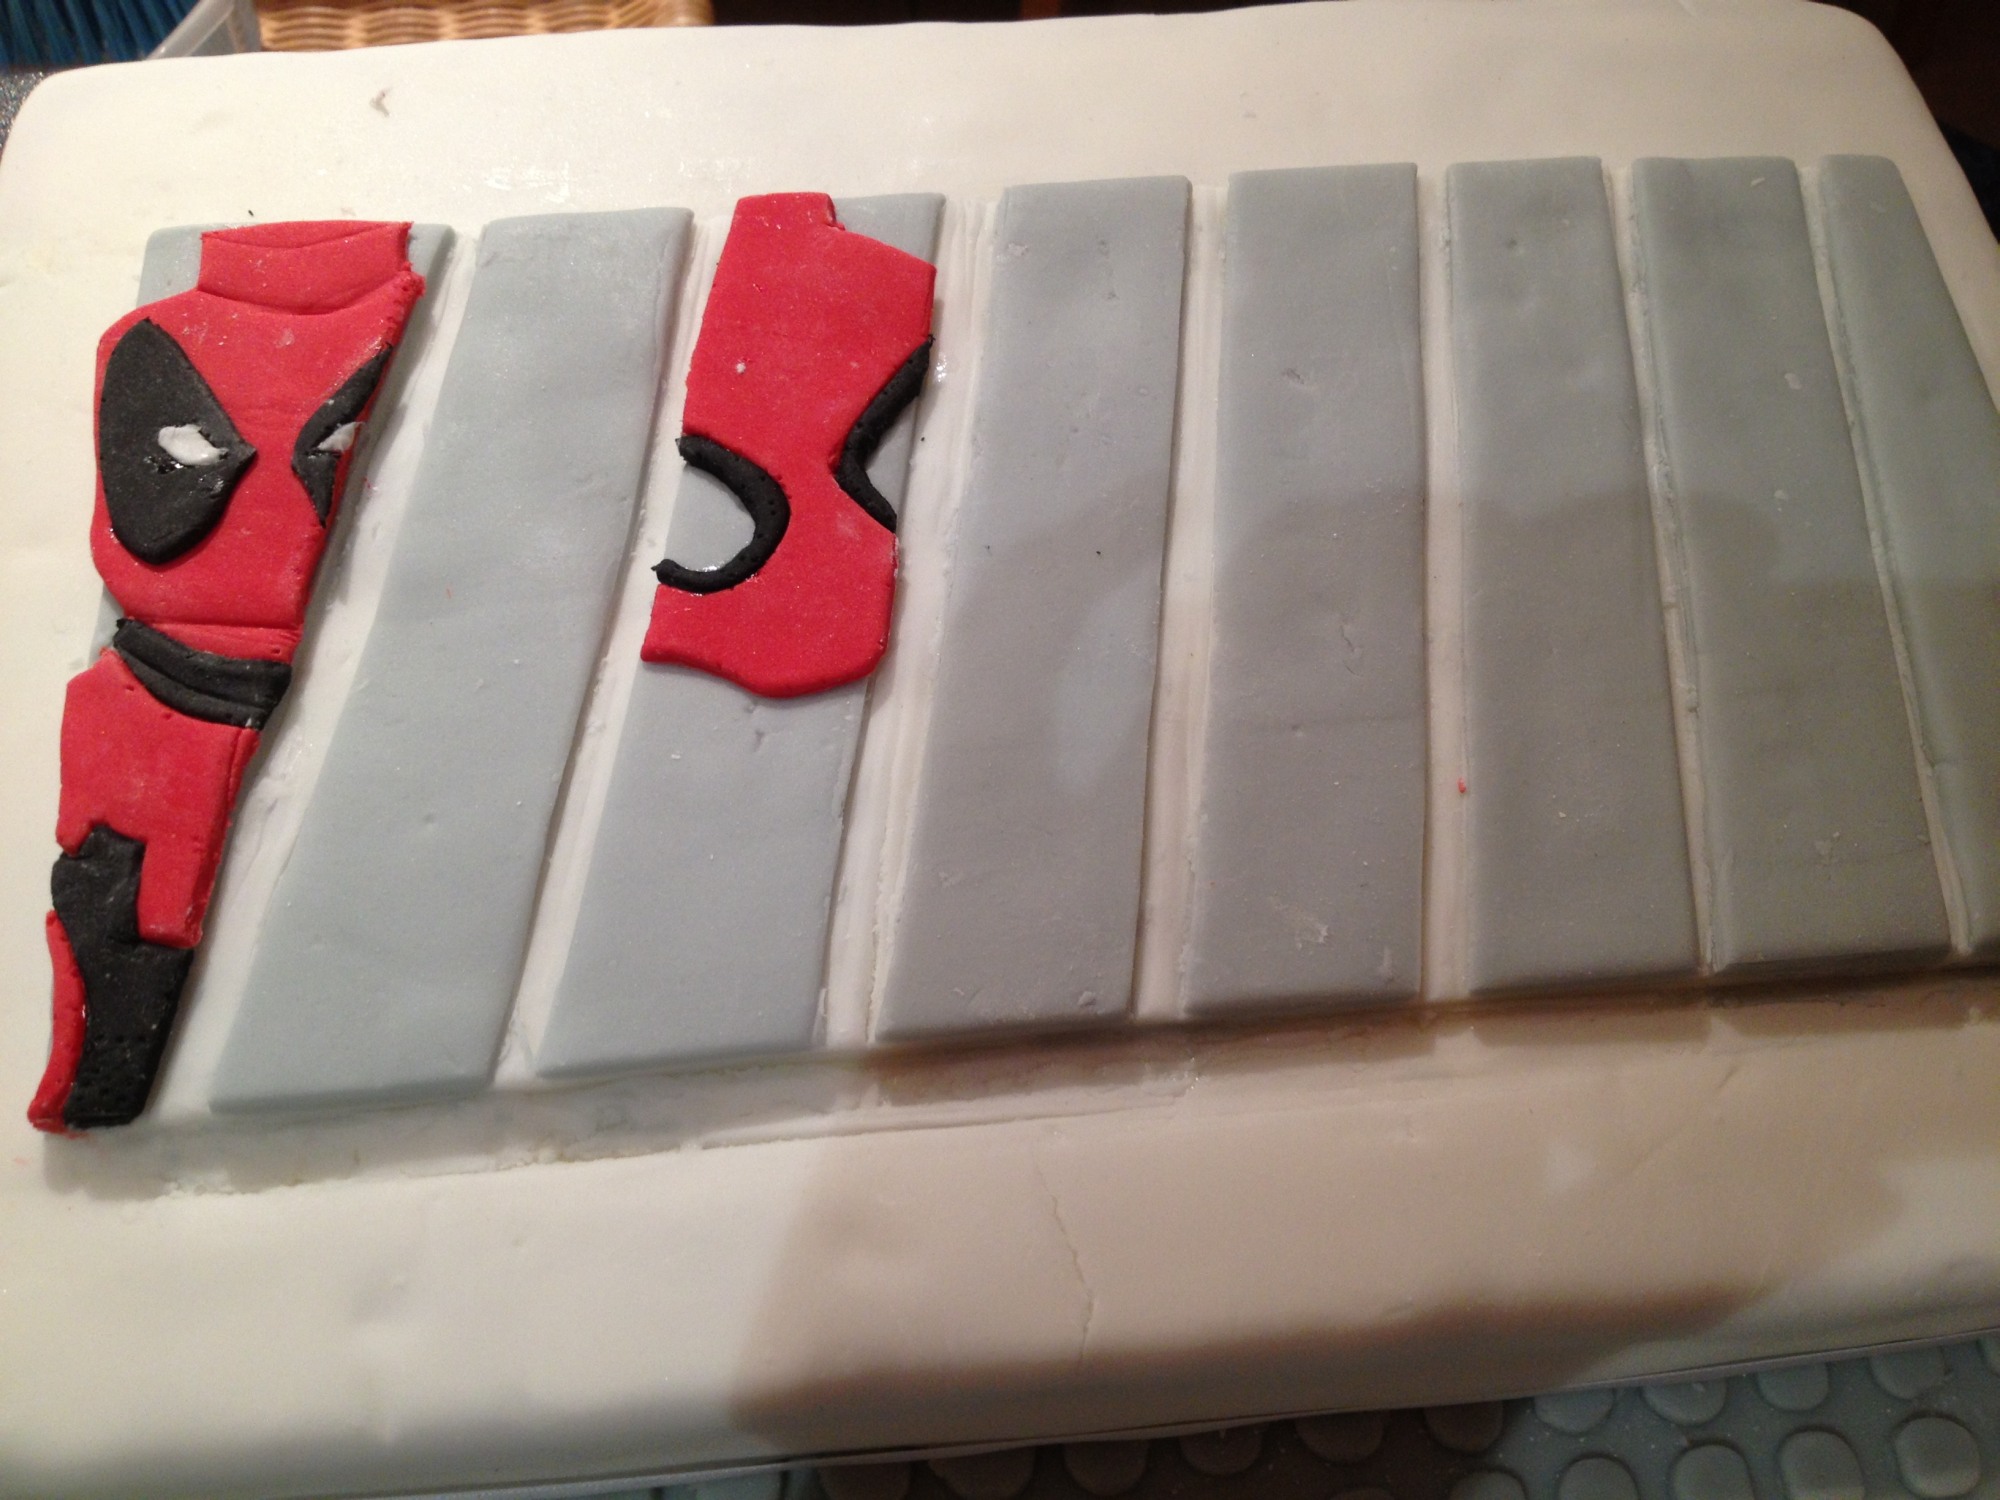 Once I had the basic red sections cut out I used edible glue to attach them to the grey panels. I then rolled out the black paste and again marked out those sections by laying my template over the top and using a clean pin to prick out the design. I added them to the red sections like a patchwork. (You might spot that Deadpool’s left eye is just added on top of the red, that’s because I forgot to prick out the section so just added that black piece on top, the white sections within it and the rest of his body is done as a patchwork and look much better, as do Spiderman’s head and eyes. I used the wheel tool to draw on lines like the studs on the characters heads.
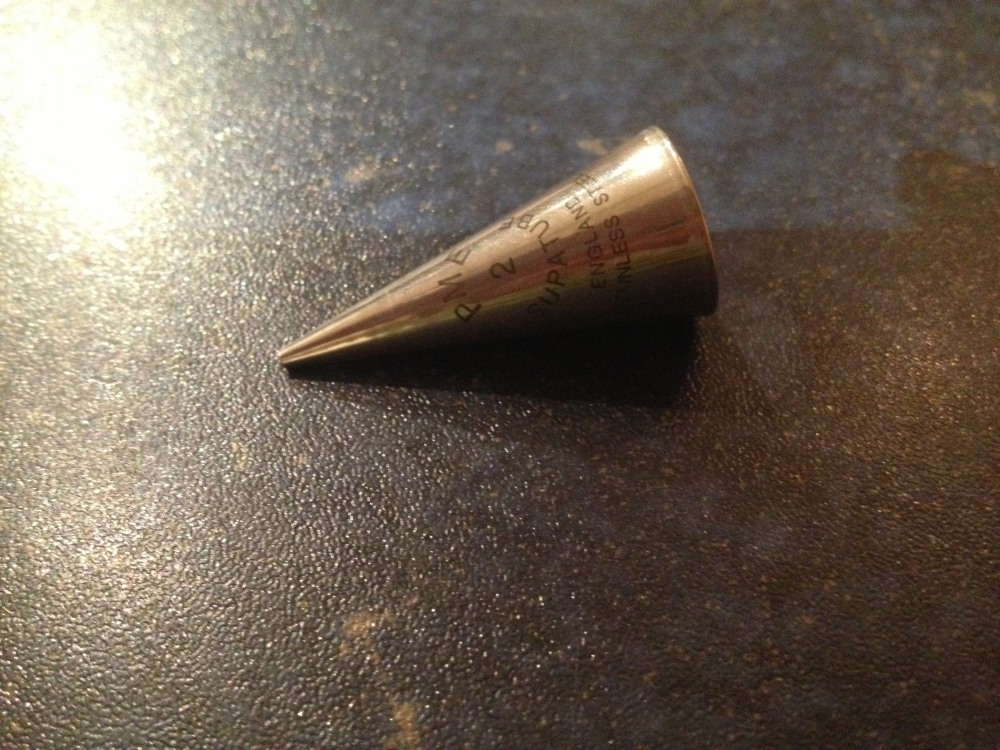
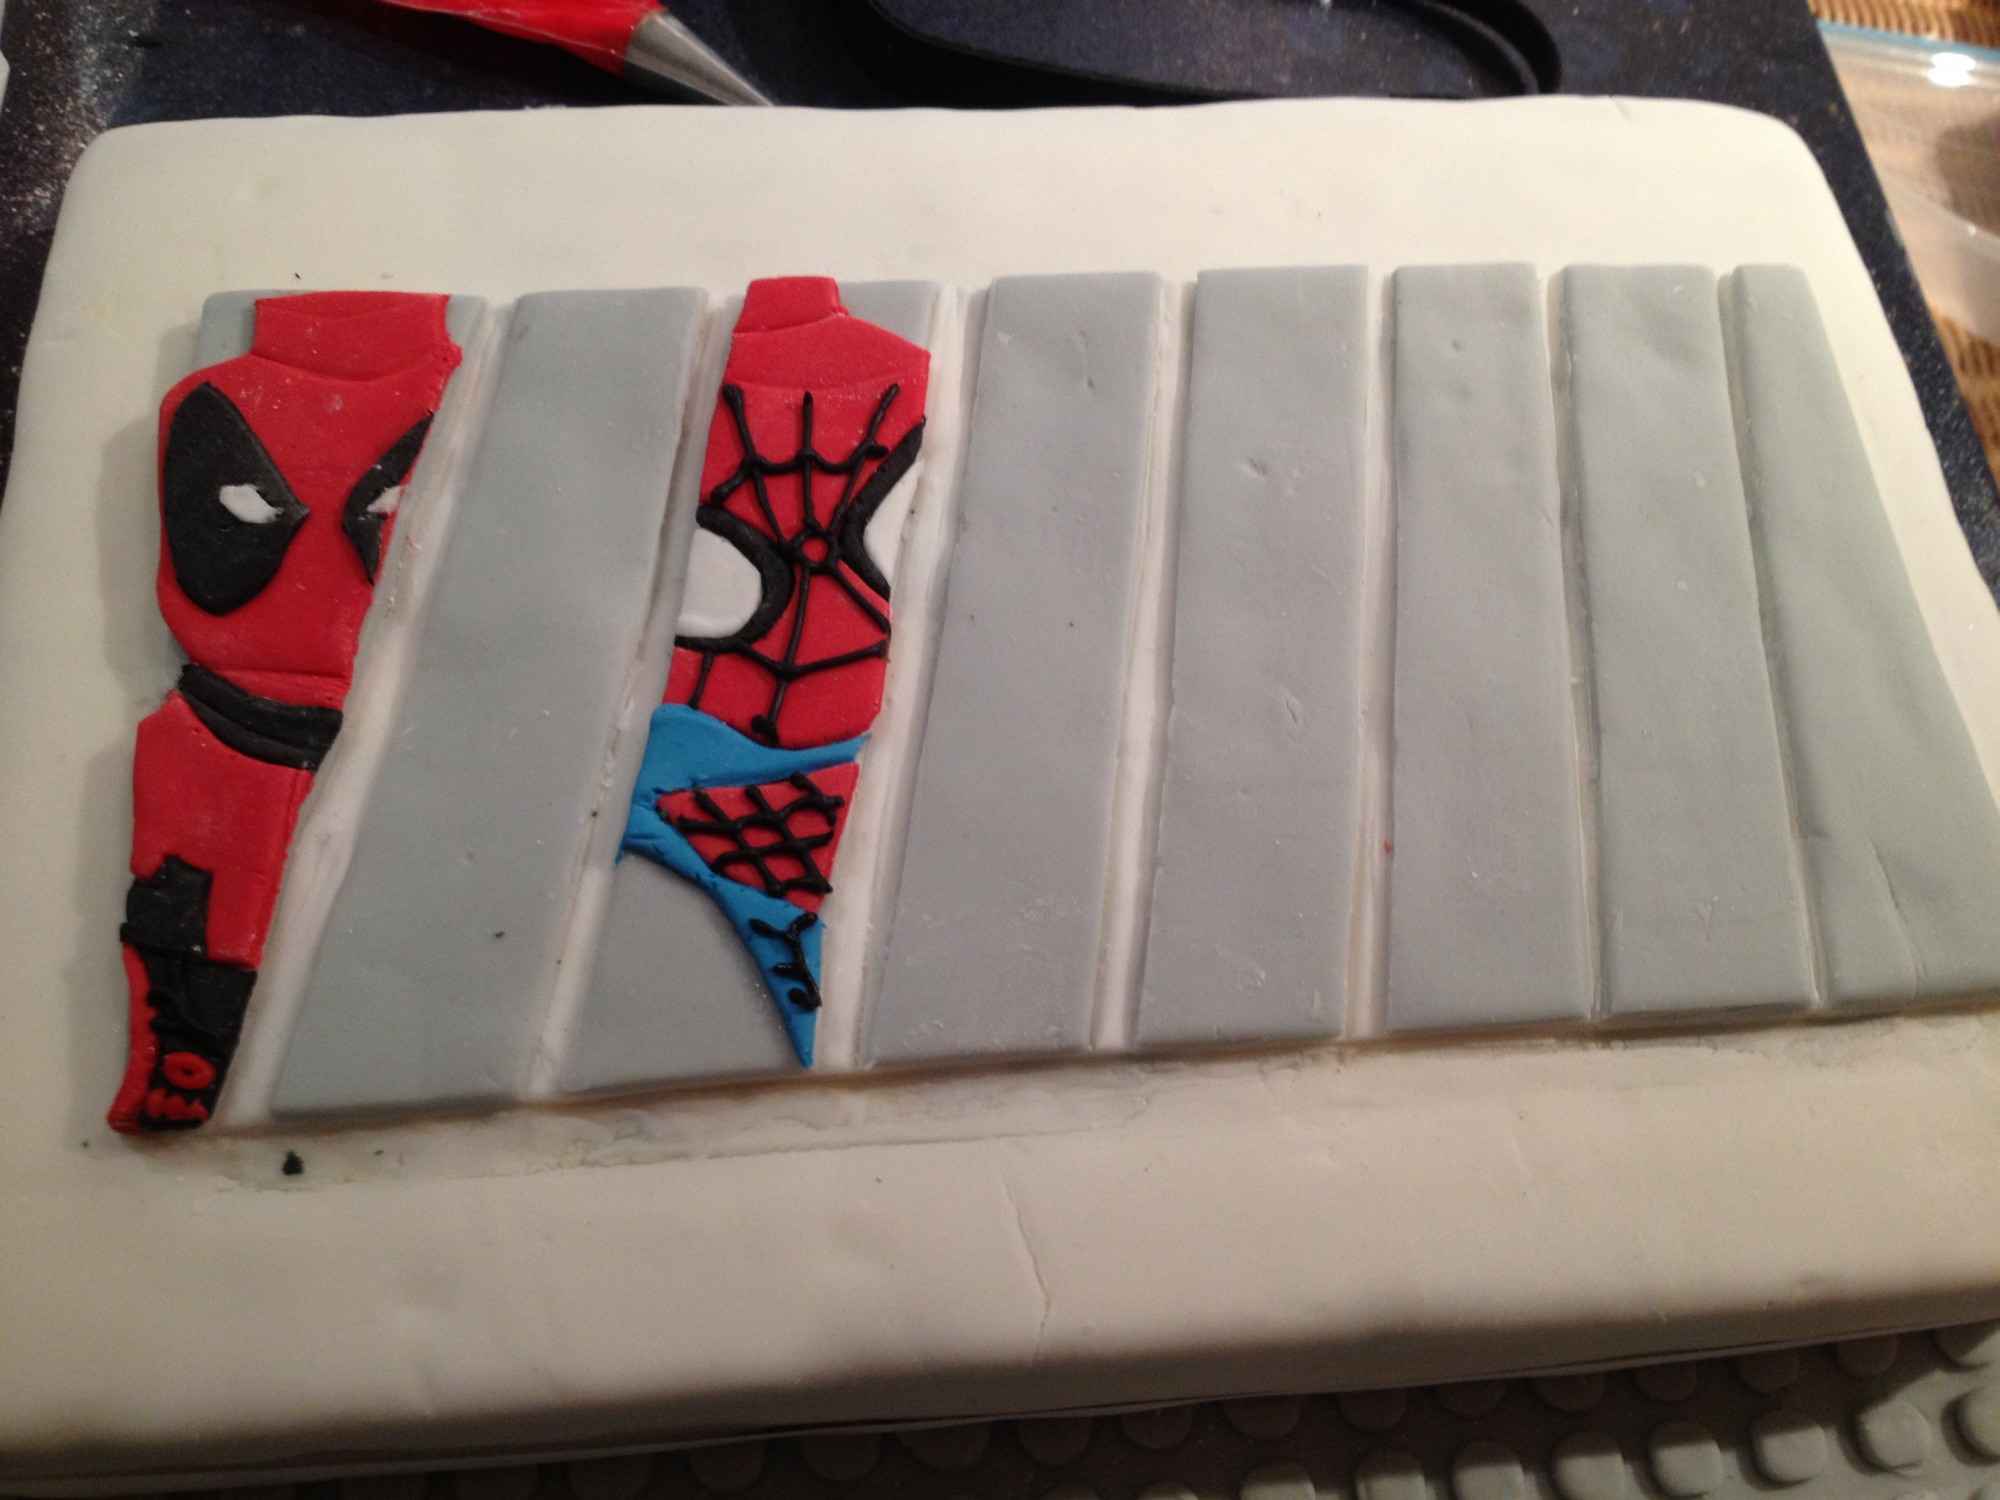 Next I kneaded blue through some more paste to use for Spiderman’s body and to keep for Captain America, I added Spiderman’s body in the same way before making up some basic icing sugar and water into a thick paste that retained it’s shape when piped through a PME number 2 nozzle I coloured it black with gel colour and added detail to Spiderman and Deadpool that was too fine to make easily with paste. I also mixed some red for extra detail on Deadpool.
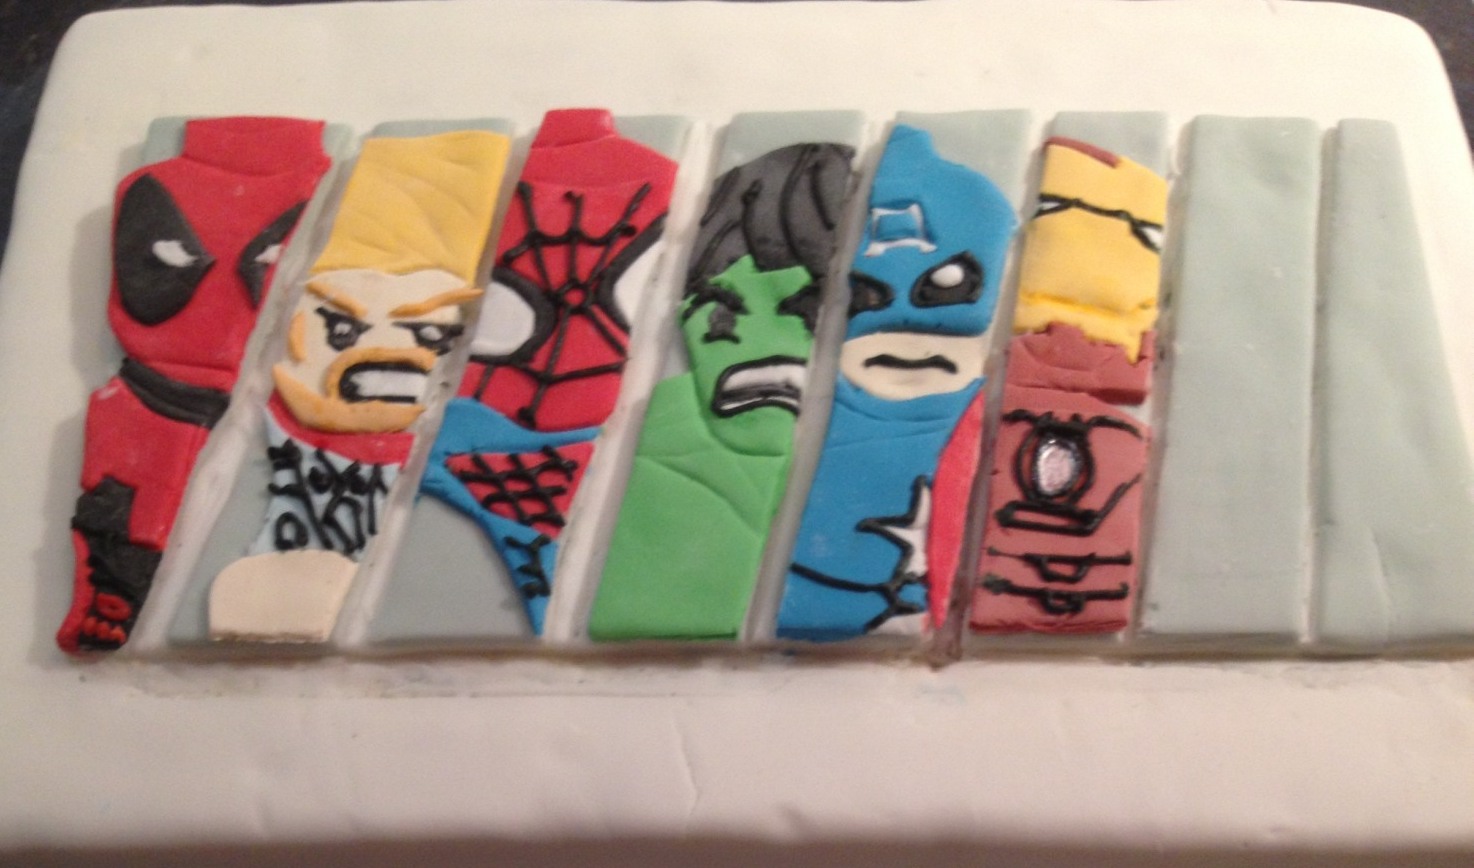 I continued working through the colours, the same blue I used for Spidey was used for Captain America, as was a little left over red to make his shield. I also made up some skin toned paste at this point, kneading Ivory colour through the white. I used a little for the Captain’s face. I put the rest aside wrapped in cling film.
I darkened the remaining red paste with a little black and blue gel colour to make the darker shade needed for Iron Man. Once that was cut out I made up some yellow for his helmet which I also used for Thor’s Hair.To colour Iron man’s power source and eyes I used a pearlescent white colour and painted it on with a paint brush.
The skin colour I made up for Captain America I used again for Thor, and then put aside again to use later on Wolverine and Black widow.
 For all the panels I used the patchwork style pricking shapes out with a pin and a template, I made sure I used the same template for all colours that had to fit together so that I knew the shape of the hole would match up with the shape of the piece fitting in to it. I continued to use Piped icing to add final details. For wolverine I used a cocktail stick dipped in black gel to make his stubble as it was so fine.
 All this was pretty time consuming and I spent Tuesday night, Wednesday and Friday working on the cake. Once all the characters were finally done I used Letter cut outs to make the lettering for Marvel and Tt (the company) cutting off the serif points with a knife so that the font looked right. Because the Lego logo was a more rounded font I made this with piped white icing then outlined it in yellow and black. I used the same yellow to pipe the “SUPER HEROES” text.

If you made it to the end of this post well done! It’s my first attempt at explaining the way I decorate cakes so probably needs a bit of work. Do click on the photos to see them in high resolution, the detail looks a bit blurry on the main web page.
In the final part of my tutorial I run through how I made the Lego bricks and figures that decorated the front of the board.

Amazing! My son was asking me for a cake like this with the superheros. I was racking my brain to figure how to do it!!! You make so much more simplar then what I was thinking. I make his cakes every year and it is expected..lol.. very time consuming but very rewarding afterwards! thanks so much for taking the time to make a how to tutorial! I will be using it this weekend!
Thanks
Alyssa
USA, Florida
Glad it’s of help to you 🙂 I enjoyed making it. Good luck.